
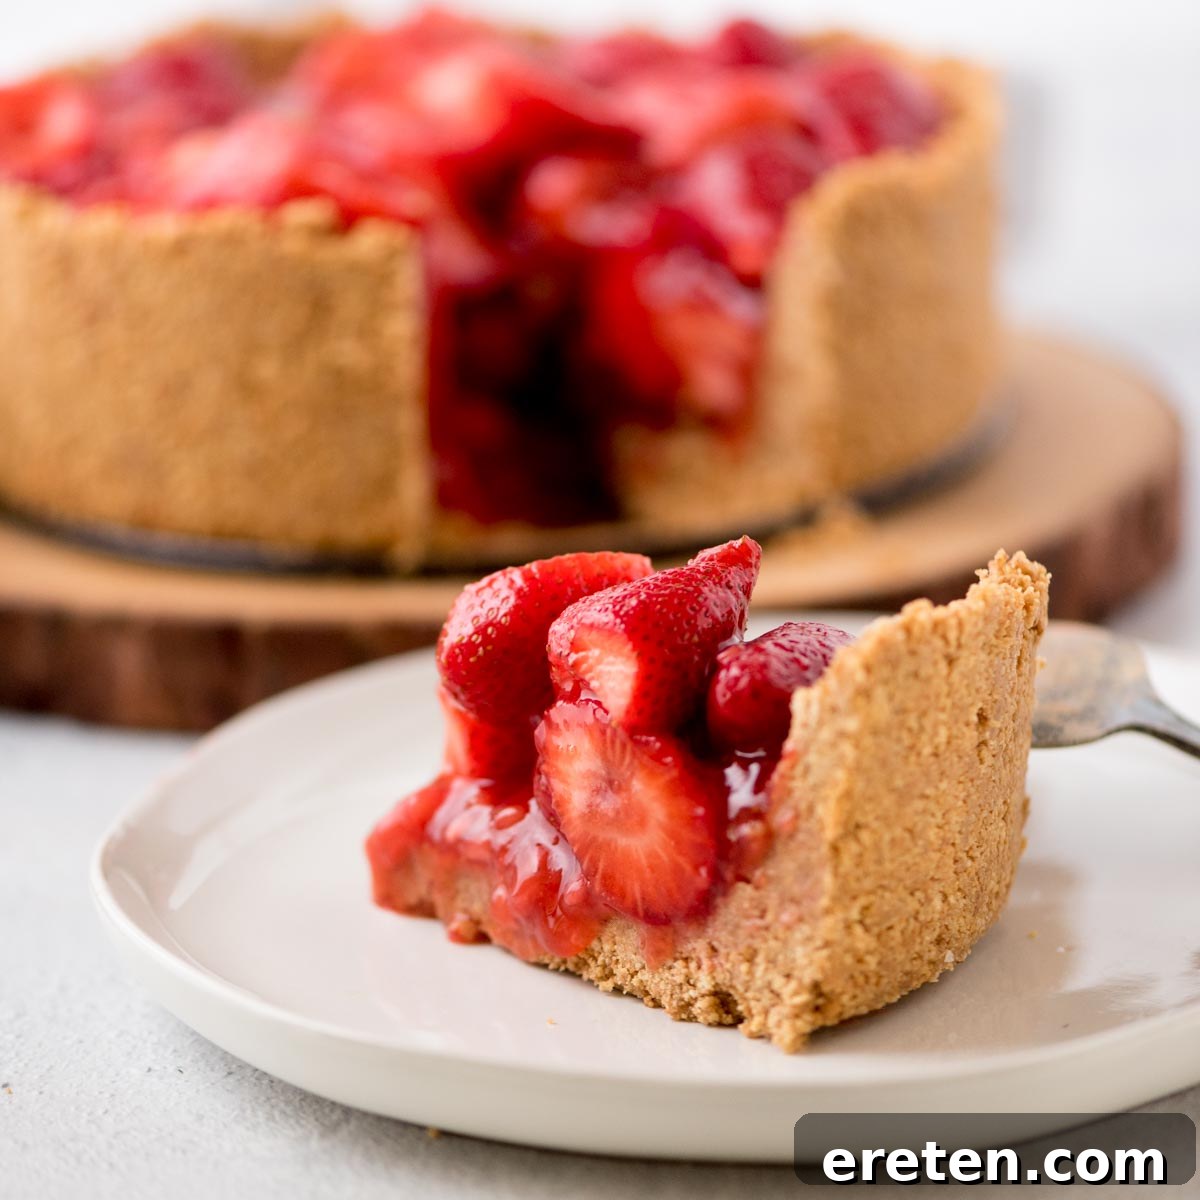
Ultimate No-Bake Strawberry Pie: Fresh, Creamy & Jello-Free Perfection
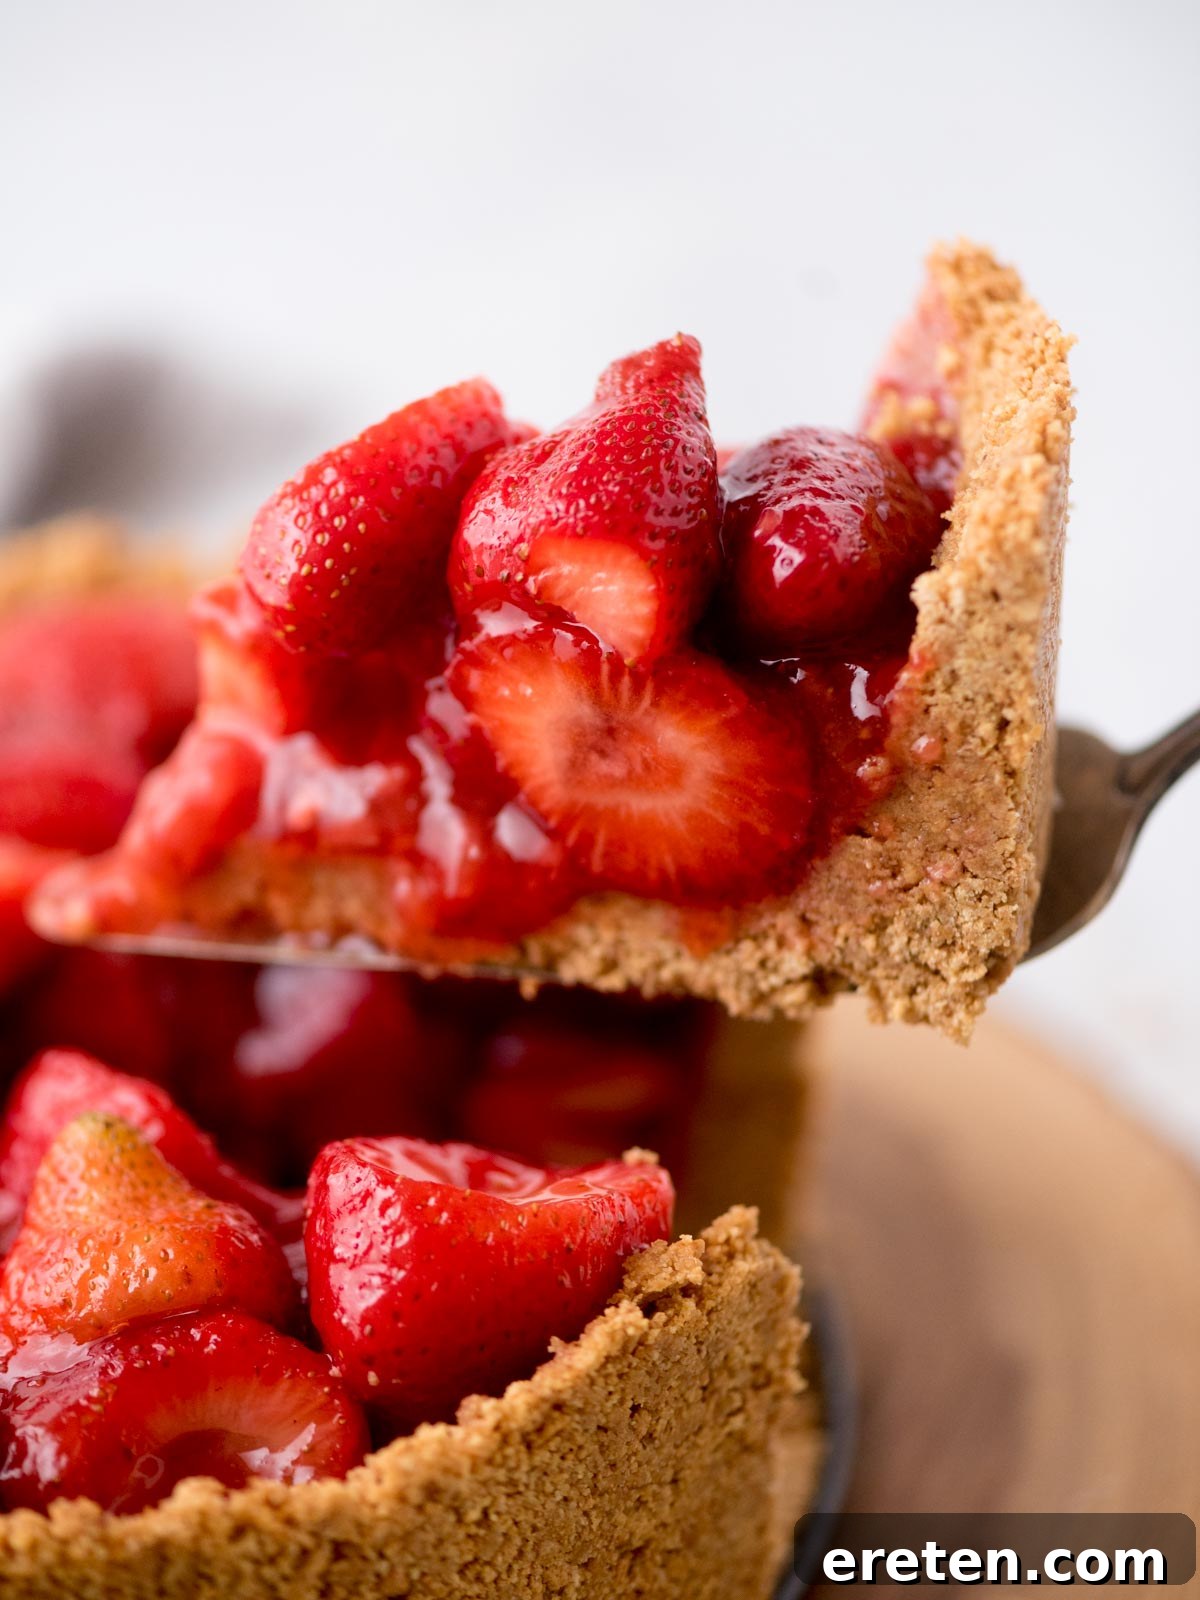
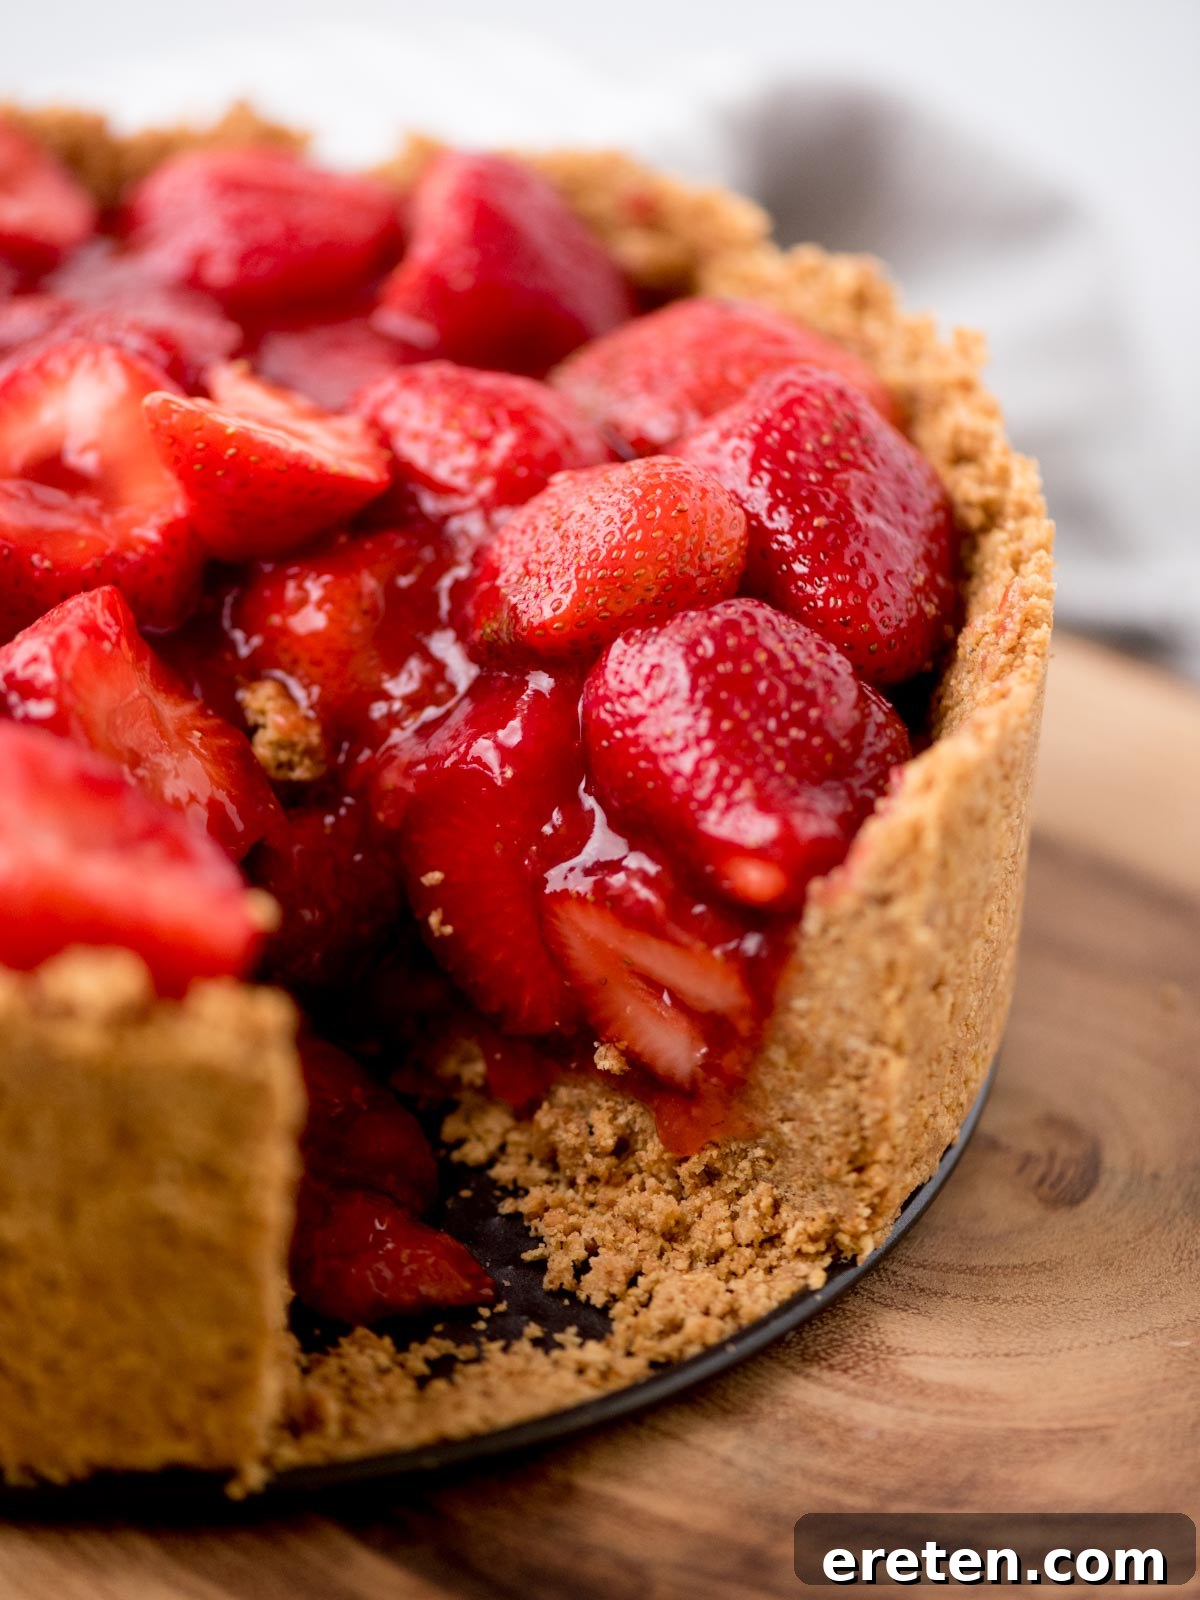
Imagine sinking your teeth into a slice of pure summer bliss: a vibrant, sweet strawberry pie nestled in a perfectly crisp graham cracker crust. What makes this recipe truly special? It’s entirely no-bake, meaning no oven time and less fuss, and it achieves its delightful jam-like consistency without a trace of jello or gelatin. This means you get to experience the authentic taste and texture of fresh strawberries, elevated to an unforgettable dessert. Prepare to be amazed by how simple and utterly delicious this fresh strawberry pie can be!
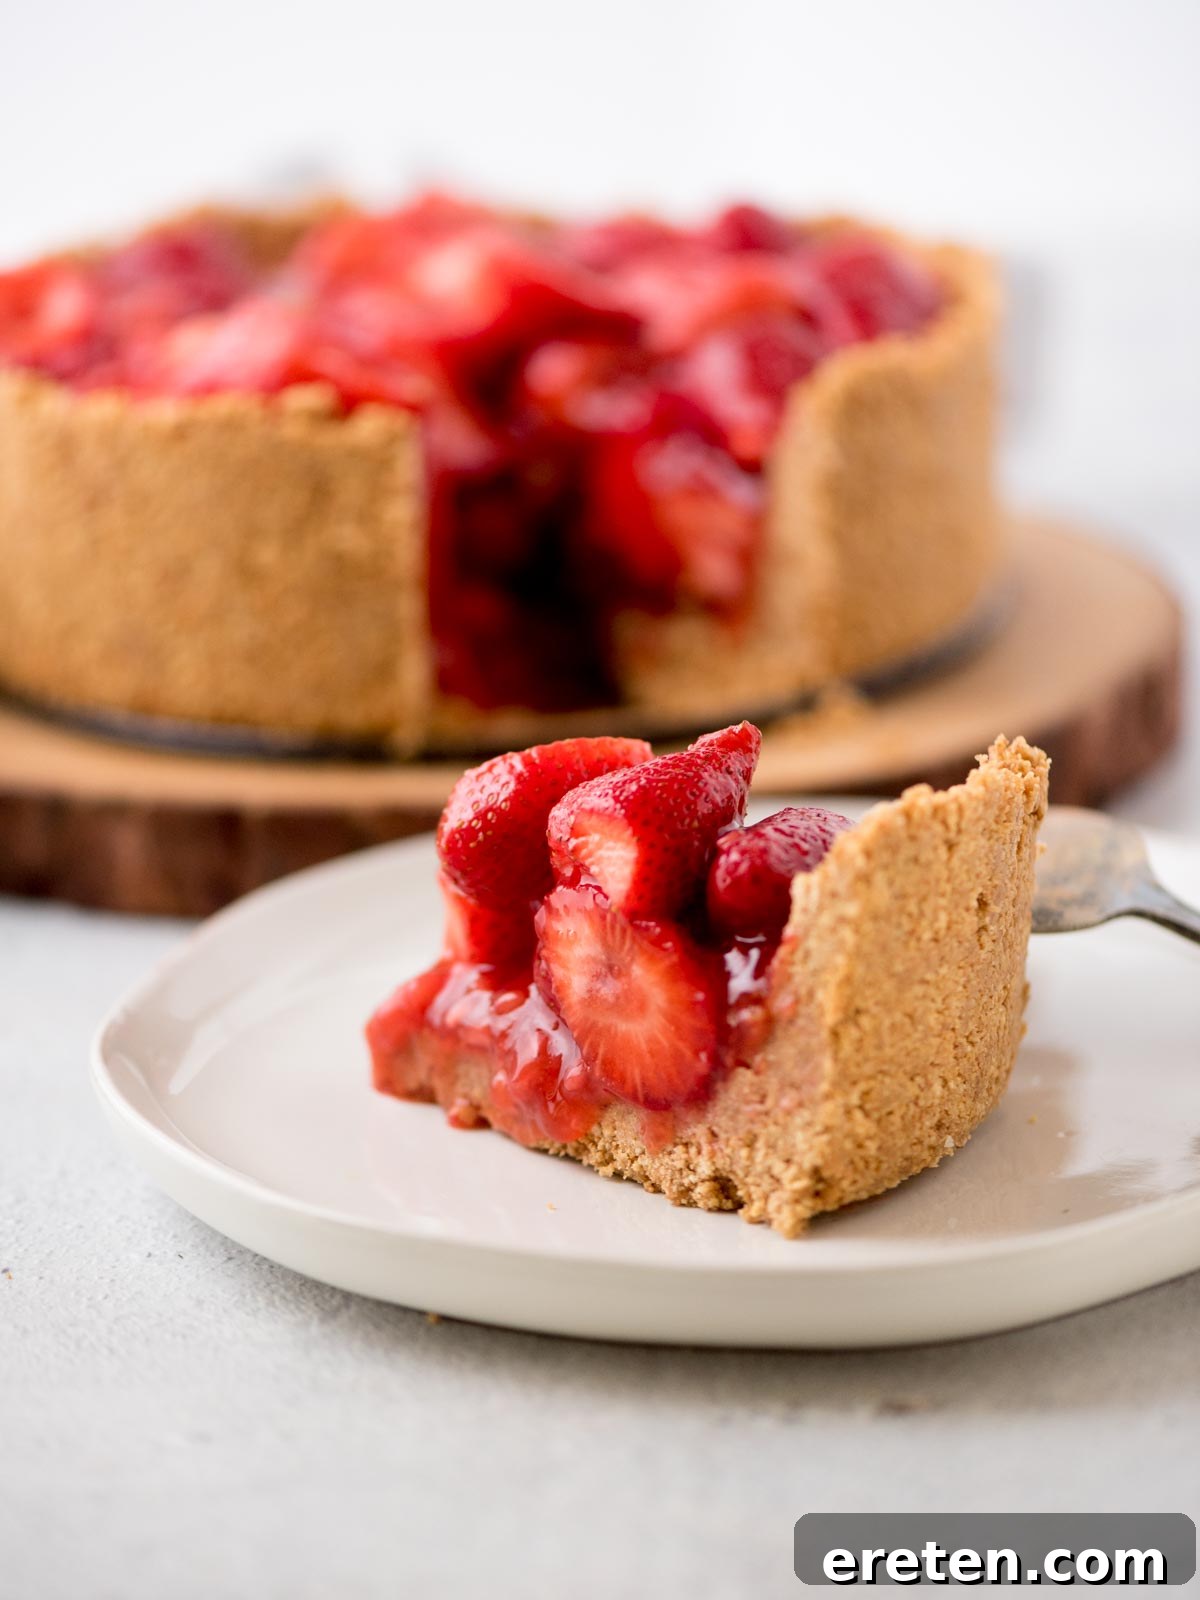
For many, the crust can be an afterthought, often just a vessel for the glorious filling. But not with a homemade graham cracker crust! There’s something undeniably satisfying about its buttery, slightly spiced crunch that complements the sweet fruit filling so beautifully. This recipe embraces that love for a good crust, pairing it with a filling that’s all about natural strawberry flavor and a wonderfully smooth texture, free from any artificial additions. It’s a game-changer for pie lovers looking for a dessert that’s both impressive and surprisingly simple to create.
The magic of this fresh strawberry pie lies in its unique filling preparation. You’ll transform a portion of the ripe strawberries into a rich, homemade jam-like mixture, naturally thickened with cornstarch. This delicious concentrate is then gently folded with the remaining fresh, whole, or sliced strawberries, ensuring every bite is bursting with authentic fruitiness and a perfectly balanced texture. The result is a filling that’s wonderfully robust, allowing the natural sweetness and tang of the strawberries to shine through, creating a truly superior pie experience that celebrates the true essence of the fruit.
There’s an undeniable joy that comes with making and enjoying this pie when strawberries are at their peak season. It’s more than just a dessert; it’s a celebration of seasonal bounty and a testament to the power of fresh ingredients. The sweet aroma of fresh berries, combined with the comforting notes of the graham cracker crust, creates a truly heavenly sensation that transports you to warm summer days. While this pie is spectacular on its own, a dollop of freshly whipped cream can elevate it further, adding a cloud-like lightness that perfectly contrasts the rich, fruit-filled center. It’s truly a dessert that embodies simple elegance, delicious satisfaction, and nostalgic charm.
Why This No-Bake Strawberry Pie Will Become Your Go-To Dessert
This recipe isn’t just another strawberry pie; it’s a culinary triumph for a multitude of reasons, making it an ideal choice for any dessert occasion. Whether you’re a seasoned baker or a kitchen novice, you’ll find joy in every step of creating this delectable treat.
- Effortlessly Easy to Make: Forget complicated techniques, multiple baking stages, or hours spent laboring over a hot oven. This recipe is designed for maximum simplicity, requiring only a few straightforward steps. You won’t need to blind bake a fussy traditional pie crust or worry about whipping up a perfect strawberry glaze from scratch. The process is intuitive and enjoyable, making it a fantastic option for impromptu desserts, last-minute gatherings, or when you simply want maximum flavor with minimal effort. You’ll be amazed at how quickly you can assemble a pie that will have everyone asking for the recipe and begging you to make it on repeat.
- No Oven Required: The inherent beauty of a no-bake dessert, especially during warmer months or busy holidays, cannot be overstated. With absolutely no baking involved, your kitchen stays cool, and you’re free to enjoy other activities while your pie patiently chills to perfection in the refrigerator. This aspect makes it an ideal dessert for summer picnics, backyard barbecues, potlucks, or any occasion when you want a refreshing, impressive treat without the added stress or heat of turning on your oven.
- Authentic Flavor – No Jello or Gelatin: Unlike many conventional strawberry pie recipes that often rely on artificial jello or gelatin to set the filling, this recipe prides itself on using only natural ingredients. While it won’t have the jiggly, overly firm texture of a jello-based pie, it offers a far superior, more natural jam-like consistency that truly highlights the fresh strawberries. This commitment to real ingredients ensures a cleaner, more vibrant, and purer fruit flavor that artificial additives simply can’t match, providing a truly exquisite taste experience.
- Crafted Entirely from Scratch: You’ll appreciate the wholesome, homemade nature of this pie, made from basic, recognizable ingredients that you likely already have in your pantry or can easily find at any grocery store. There are no strange additives, no pre-packaged mixes with unpronounceable ingredients, and no complicated components. Just simple staples like fresh strawberries, sugar, cornstarch, graham crackers, and butter are transformed into a gourmet-quality dessert right in your own kitchen. This gives you complete control over the quality and freshness of every single element.
- Pure Fresh Strawberry Goodness: This is truly a fresh strawberry pie in every sense of the word. Every ounce of sweet, tangy, and aromatic flavor comes directly from real, ripe strawberries. You won’t find any artificial strawberry flavoring, extracts, or syrups here. This unwavering focus on fresh fruit ensures a taste that is bright, authentic, and utterly irresistible, especially when strawberries are harvested at their peak season. It’s a pure, unadulterated expression of summer’s bounty, delivering an unparalleled fresh fruit experience.
Key Ingredients for Your Delicious No-Bake Strawberry Pie
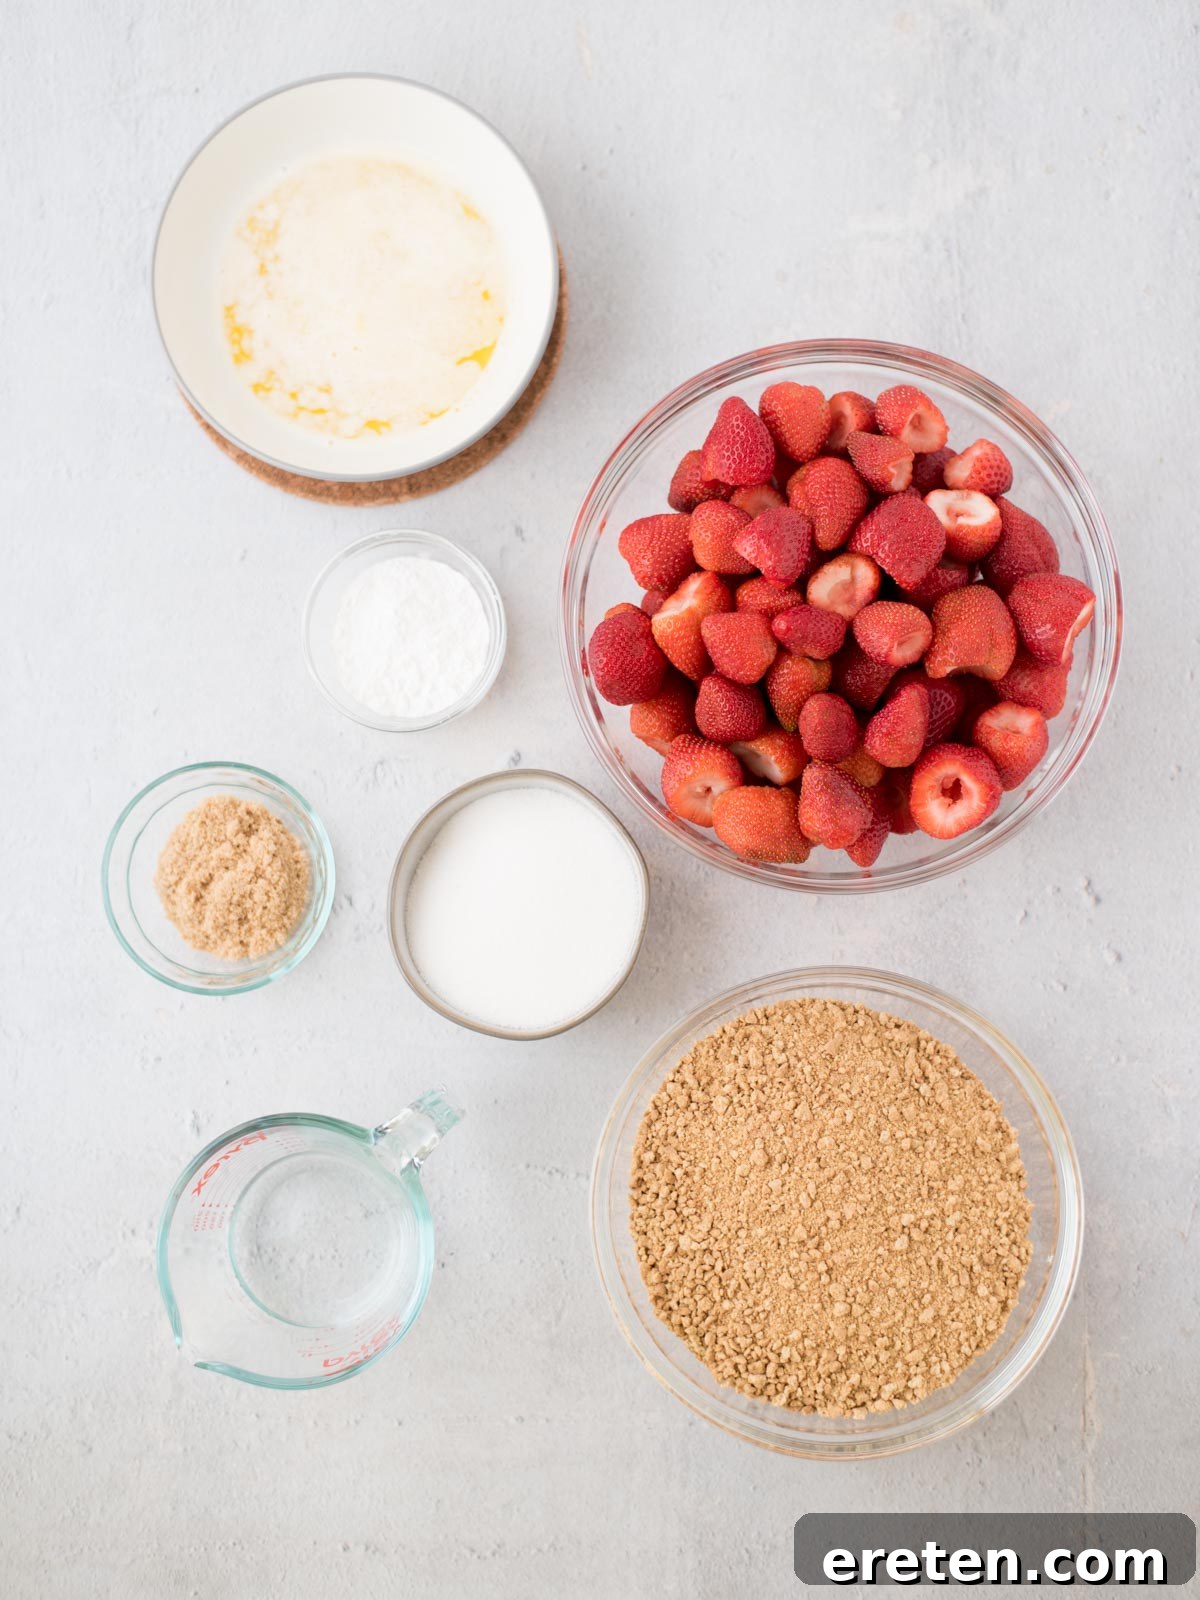
Crafting this incredible pie starts with selecting the right ingredients. Each component plays a vital role in achieving that perfect balance of sweetness, texture, and flavor, coming together to create a harmonious and unforgettable dessert.
- Fresh Strawberries: The undisputed star of the show! For the absolute best results, always opt for fresh, perfectly ripe strawberries, ideally when they are in season. Look for berries that are vibrantly red, plump, firm, and wonderfully fragrant. While frozen strawberries can technically work in a pinch, they often contain excess water, which can dilute the natural flavor and significantly alter the desired texture of your filling. If you absolutely must use frozen, ensure they are thoroughly thawed and meticulously drained of all excess moisture to minimize any impact on the pie’s consistency, but be prepared for a slightly different outcome.
- Granulated Sugar: This fine, white sugar is a crucial sweetening agent, both for the cooked jam-like filling and for enhancing the inherent sweetness of the fresh strawberries. Its fine texture ensures it dissolves easily, contributing to a smooth, uniform consistency without any undesirable grittiness. You can subtly adjust the amount of sugar based on the natural sweetness of your chosen strawberries and your personal preference for a sweeter or tarter pie.
- Cornstarch: A fantastic and readily available natural thickener, cornstarch is what gives our strawberry jam filling its luscious, stable consistency without the need for artificial gelatin or jello. When heated with the mashed strawberries and water, it creates a wonderfully thick, glossy, and beautifully set sauce that expertly binds the fresh berries together and helps the entire pie hold its elegant shape beautifully once thoroughly chilled.
- Graham Crackers: The delightful foundation of our irresistible, crunchy crust! You have the flexibility to choose between classic honey-flavored or cinnamon-flavored graham crackers, both of which yield equally delightful and aromatic results. The key is to crush them into very fine, uniform crumbs, which can be done effortlessly in a food processor or by hand using a rolling pin and a sturdy Ziploc bag. Fine crumbs ensure a uniform, sturdy, and well-bonded crust.
- Brown Sugar: While granulated sugar can be used in the crust, brown sugar is highly recommended for its superior qualities. Its inherent molasses content adds a deeper, more complex caramel-like flavor and a slightly chewier, richer texture to the crust compared to plain white sugar. You can confidently use either light or dark brown sugar for this recipe; light brown sugar will impart a milder caramel note, while dark brown sugar will offer a more intense, robust flavor.
- Unsalted Butter: This is the essential binding agent for your graham cracker crust. Melted unsalted butter thoroughly coats the crushed graham cracker and brown sugar mixture, allowing it to compact firmly and hold together perfectly in the pie pan. Using unsalted butter is preferred as it gives you precise control over the overall saltiness of the pie, ensuring the delicate balance of flavors remains just right.
Preparing Your Strawberries: How to Cut for the Perfect Pie
One of the most appealing aspects of this fresh strawberry pie is its forgiving nature when it comes to strawberry preparation. There’s no single “right” way to cut your berries, and you can adapt the method based on the size of your fruit and your desired aesthetic preference for the final presentation.
Before any slicing or dicing, you must first hull the strawberries. This simply means removing the green leafy stems and the small, firm white core at the top of the berry. For efficiency and a clean cut, you can purchase specialized strawberry hulling tools, which make the task incredibly quick and neat. Alternatively, a small paring knife works perfectly well; just carefully trim around the stem in a conical shape and gently pop out the core.
Once hulled, consider the size of your strawberries. If you happen to have a batch of smaller berries, you might choose to leave them whole for a charming, rustic look and satisfying bursts of fruitiness with every bite. For medium to large strawberries, however, slicing or quartering them lengthwise is highly recommended. This strategic cut allows the rich, jam-like filling to thoroughly envelop more of the fruit, creating a more cohesive and visually appealing texture throughout the pie. Furthermore, uniformly sized, smaller pieces make each slice of pie easier to manage and prevent the filling from separating when served. Larger, whole pieces of strawberry, while delicious, can sometimes make the pie harder to cut cleanly and might lead to an uneven distribution of filling.
Creative Substitutions and Alterations for Your Easy Strawberry Pie
This no-bake strawberry pie recipe is incredibly versatile, allowing for numerous simple modifications to perfectly suit your personal taste preferences, dietary needs, or what you happen to have on hand. Don’t be afraid to get creative and make this recipe truly your own!
- Crust Variations: While the classic graham cracker crust offers an undeniable charm, you can easily substitute it for other equally delicious cookie bases. Consider shortbread cookies for a buttery, delicate flavor, vanilla wafers for a lighter sweetness, or even chocolate cookies for a rich, indulgent twist. The fundamental process remains the same: simply crush your chosen cookies into fine crumbs, combine them with brown sugar (or granulated sugar, depending on your preference) and melted butter, then press the mixture firmly into your pie pan and chill. Each cookie choice will impart its own unique flavor profile and texture to the pie, offering a delightful and personalized experience.
- Berry Mix-Ins: While a pure strawberry pie is absolutely divine, you can readily experiment by incorporating other complementary berries to create a more complex flavor profile. A handful of fresh raspberries, plump blueberries, or thinly sliced blackberries can be gently folded into the fresh strawberry filling (after the jam base has completely cooled) for a vibrant mixed berry experience. This not only adds delightful layers of flavor but also enhances the visual appeal, making your pie even more captivating.
- Flavor Enhancers: To brighten the natural strawberry flavor even further, consider adding a touch of freshly grated lemon or orange zest, or a splash of pure vanilla extract (both should be added to the cooled jam mixture). For an elegant, adult-oriented twist, a tablespoon of a complementary fruit liqueur like Chambord (raspberry liqueur) or Grand Marnier (orange liqueur) can be stirred into the cooled jam for an extra layer of sophisticated aroma and taste.
- Sweetener Adjustments: If you prefer a less sweet pie, you can slightly reduce the amount of granulated sugar in the jam filling by 1-2 tablespoons. Conversely, if your strawberries happen to be particularly tart or you have a strong sweet tooth, you might consider adding an extra tablespoon or two of sugar. Always taste the jam mixture as it cooks (carefully!) to adjust the sweetness to your precise liking before it cools.
- Dairy-Free Option: To make this pie dairy-free, simply substitute the unsalted butter in the crust with a plant-based butter alternative. Ensure the alternative melts and binds the crumbs similarly to regular butter. The rest of the ingredients are naturally dairy-free.
How to Make a Heavenly No-Bake Strawberry Pie: Step-by-Step Guide
Creating this stunning no-bake strawberry pie is a remarkably straightforward process, broken down into manageable and easy-to-follow steps. By adhering to these instructions carefully, you will achieve a perfectly set, deliciously fresh, and utterly irresistible dessert that will impress everyone.
Step 1: Prepare the Graham Cracker Crust
- In a large mixing bowl, combine your finely crushed graham cracker crumbs, the rich brown sugar, and the completely melted unsalted butter. Ensure the butter is fully melted but not scorching hot, to avoid burning the crumbs.
- Mix these ingredients thoroughly using a spoon, spatula, or even your hands. It’s crucial to ensure that every single graham cracker crumb is evenly and generously coated with the buttery sugar mixture. This uniform coating is essential for a cohesive and sturdy crust.
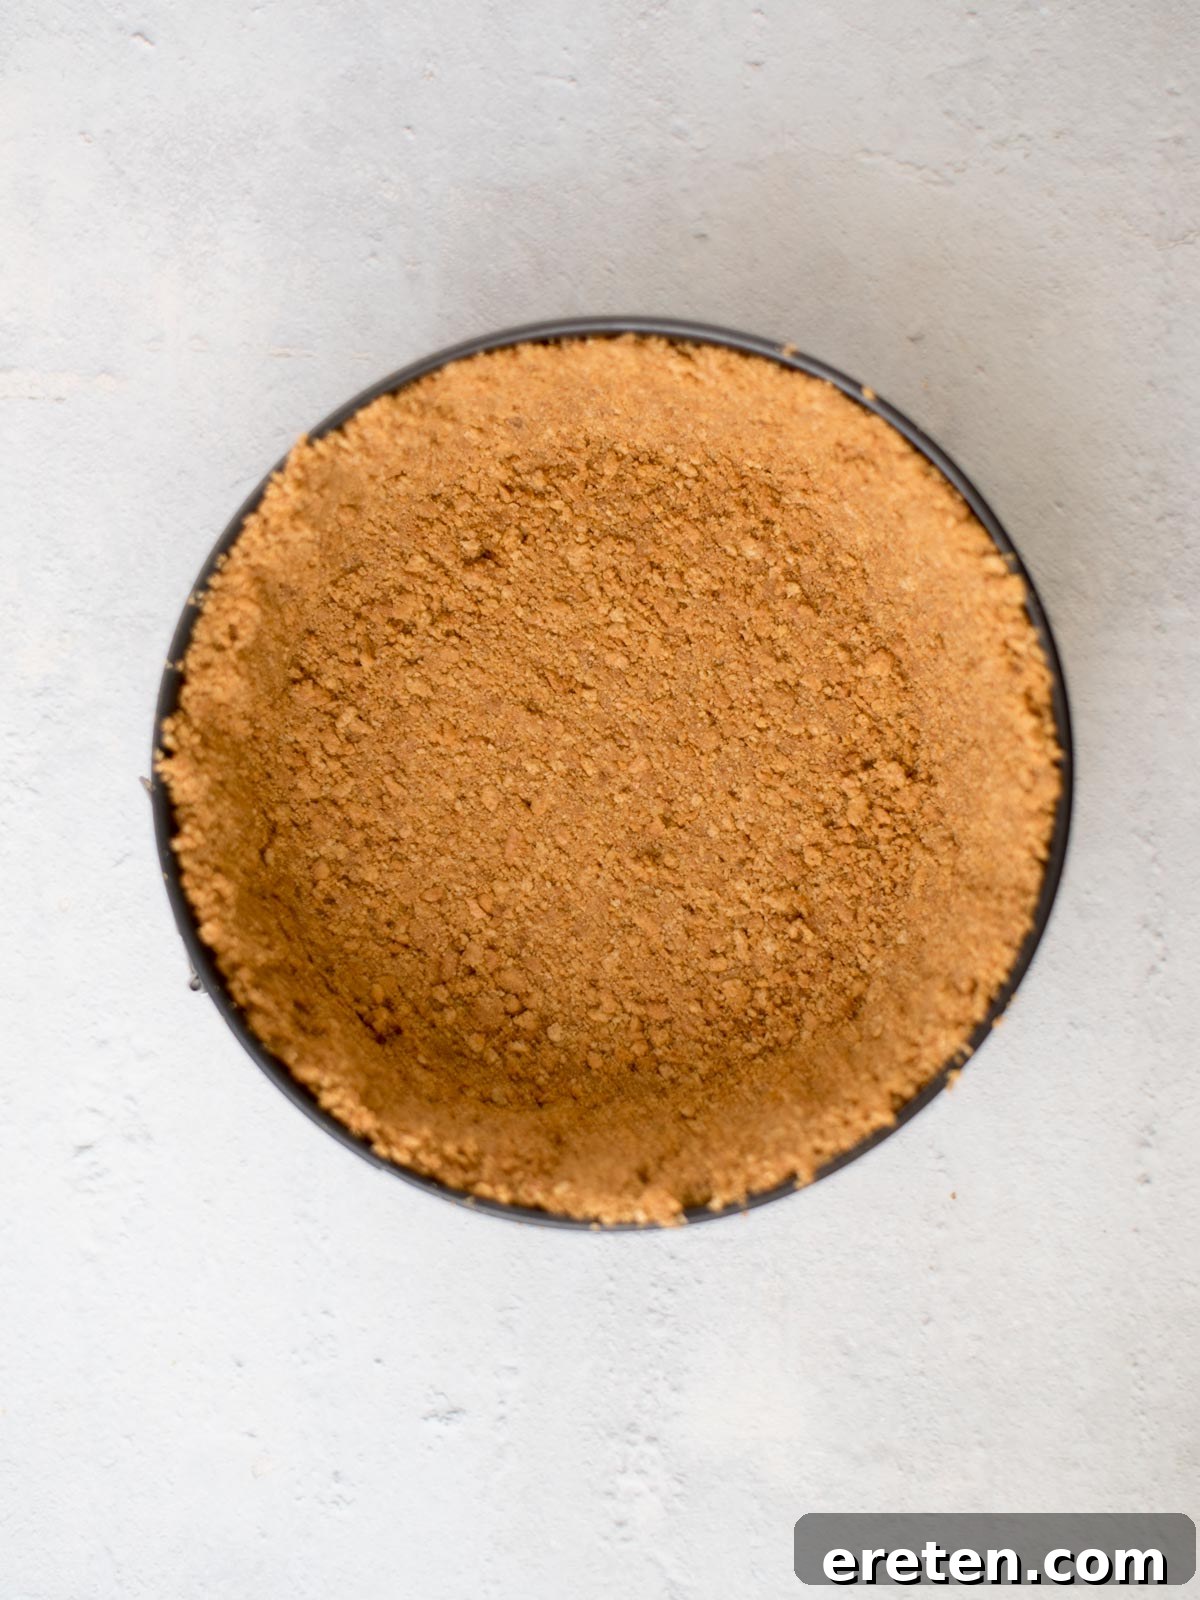
- Transfer the prepared mixture to the bottom of a 9-inch springform pan. Begin by evenly spreading the crumbs across the base of the pan, then carefully work your way up the sides of the pan, forming a consistent crust wall.
- To ensure a firm, solid, and structurally sound crust, press the mixture down very firmly and evenly. The flat back of a measuring cup or a sturdy flat-bottomed glass works wonderfully for compacting the crumbs tightly. A well-compacted crust is absolutely key to preventing sogginess and ensuring your pie holds its shape.
- Once pressed, place the springform pan with the crust into the refrigerator for at least 1 hour. This crucial chilling time allows the butter to solidify, effectively setting the crust and making it wonderfully firm and ready to hold its delicious filling.
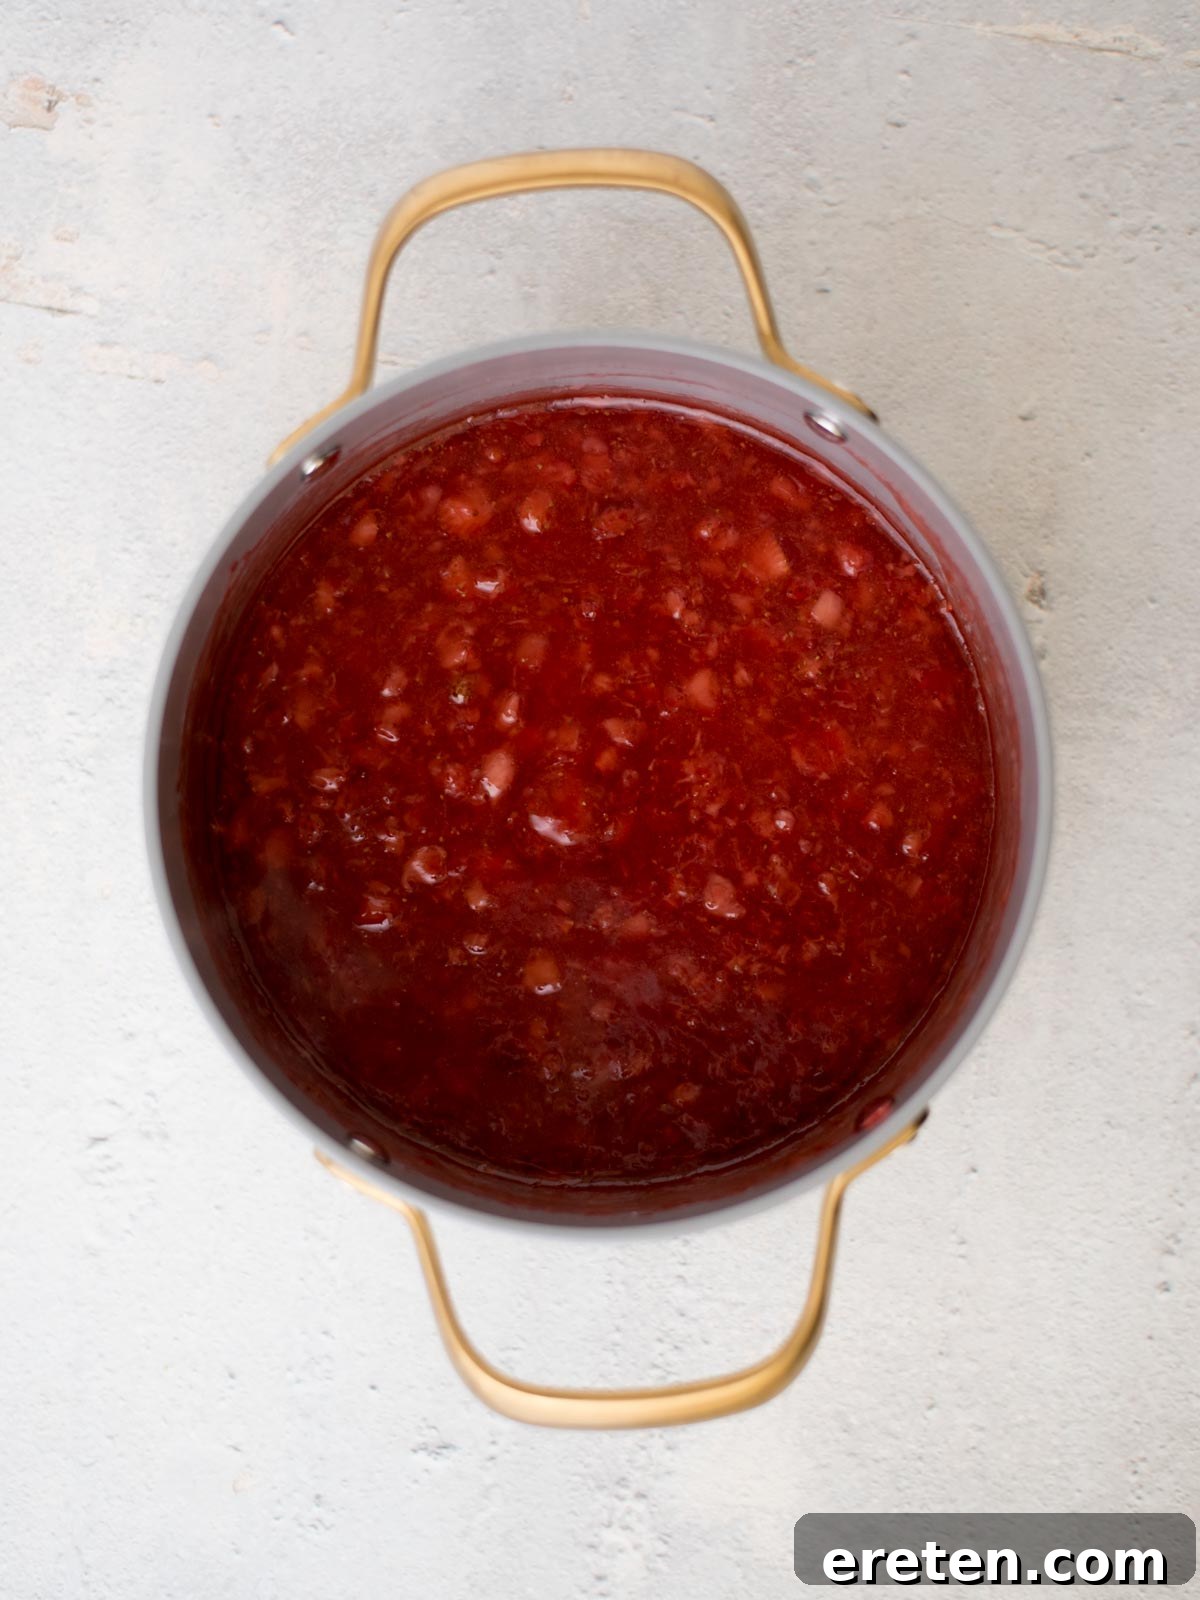
Step 2: Create the Luscious Strawberry Jam Filling Base
- Take 2 cups of your hulled and roughly chopped (or already mashed) strawberries and place them in a medium saucepan over medium heat. Using a meat chopper or a potato masher, thoroughly mash the strawberries down as they heat, until they release their vibrant juices and become a pulpy, sauce-like consistency.
- Add the granulated sugar, water, and cornstarch to the mashed strawberries in the saucepan. Stir everything together very well, ensuring the cornstarch is completely dissolved to prevent any unsightly lumps from forming in the final jam.
- Bring this delicious mixture to a gentle, low boil, stirring constantly. It’s vitally important to stir continuously to prevent the mixture from sticking to the bottom of the pan and to properly activate the cornstarch for effective thickening.
- Continue to boil the mixture for exactly 1 minute while stirring diligently. You will notice the mixture visibly thickening as it cooks. After one minute, remove it from the heat immediately to prevent over-thickening.
- Transfer the hot jam filling base to a separate, clean bowl and allow it to cool completely to room temperature. This step is absolutely critical for the success of your pie; if the jam is even slightly warm when mixed with the fresh strawberries, it can cause them to soften too much, releasing excess moisture and potentially making the entire pie runny. A fully cooled jam base will be very thick, resembling a luscious fruit preserve.
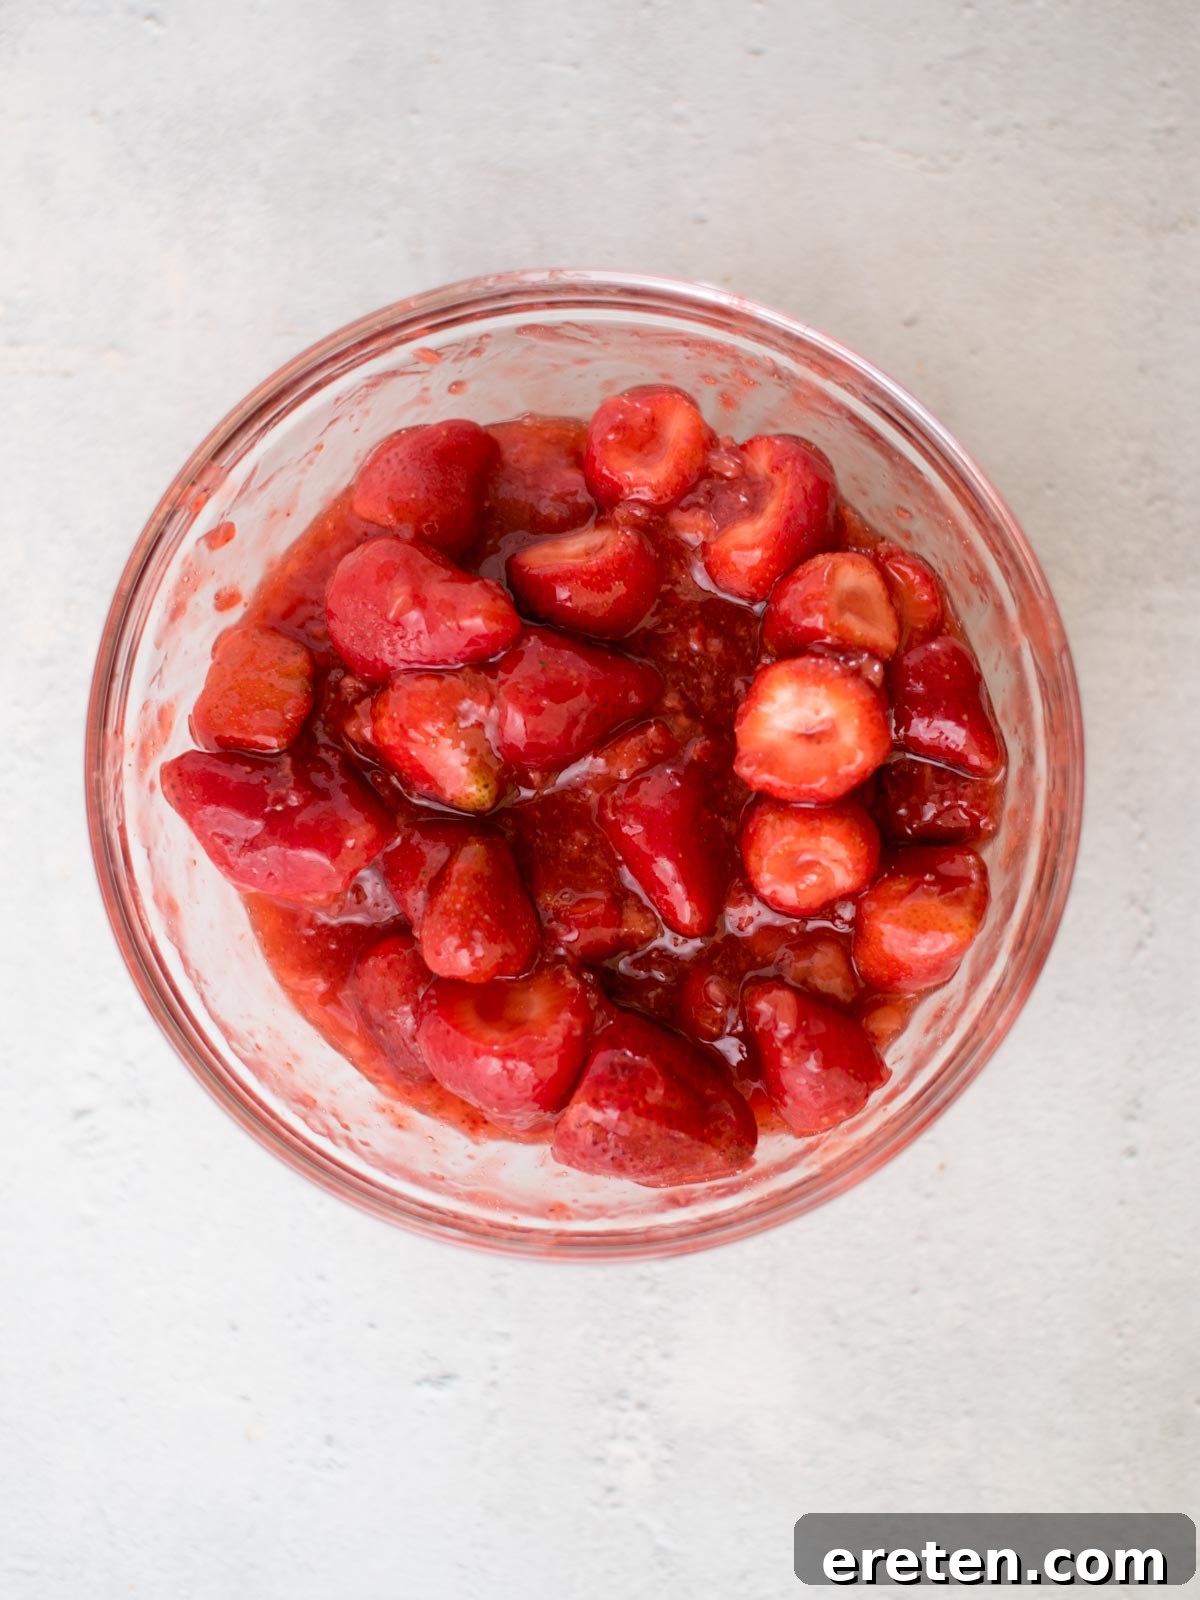
Step 3: Combine Fresh Berries for the Pie Filling
- Once your jam filling base has completely cooled and achieved its thick, jam-like consistency, add the remaining prepared fresh strawberries (which should be hulled, and sliced or quartered if they were large) to a large mixing bowl.
- Carefully pour the completely cooled jam filling over the fresh strawberries. Gently fold the jam and berries together with a spatula or large spoon until all the fresh strawberries are beautifully and evenly coated. Exercise caution during this step to avoid mashing or bruising the fresh berries; you want to maintain their shape, vibrant color, and delightful texture.
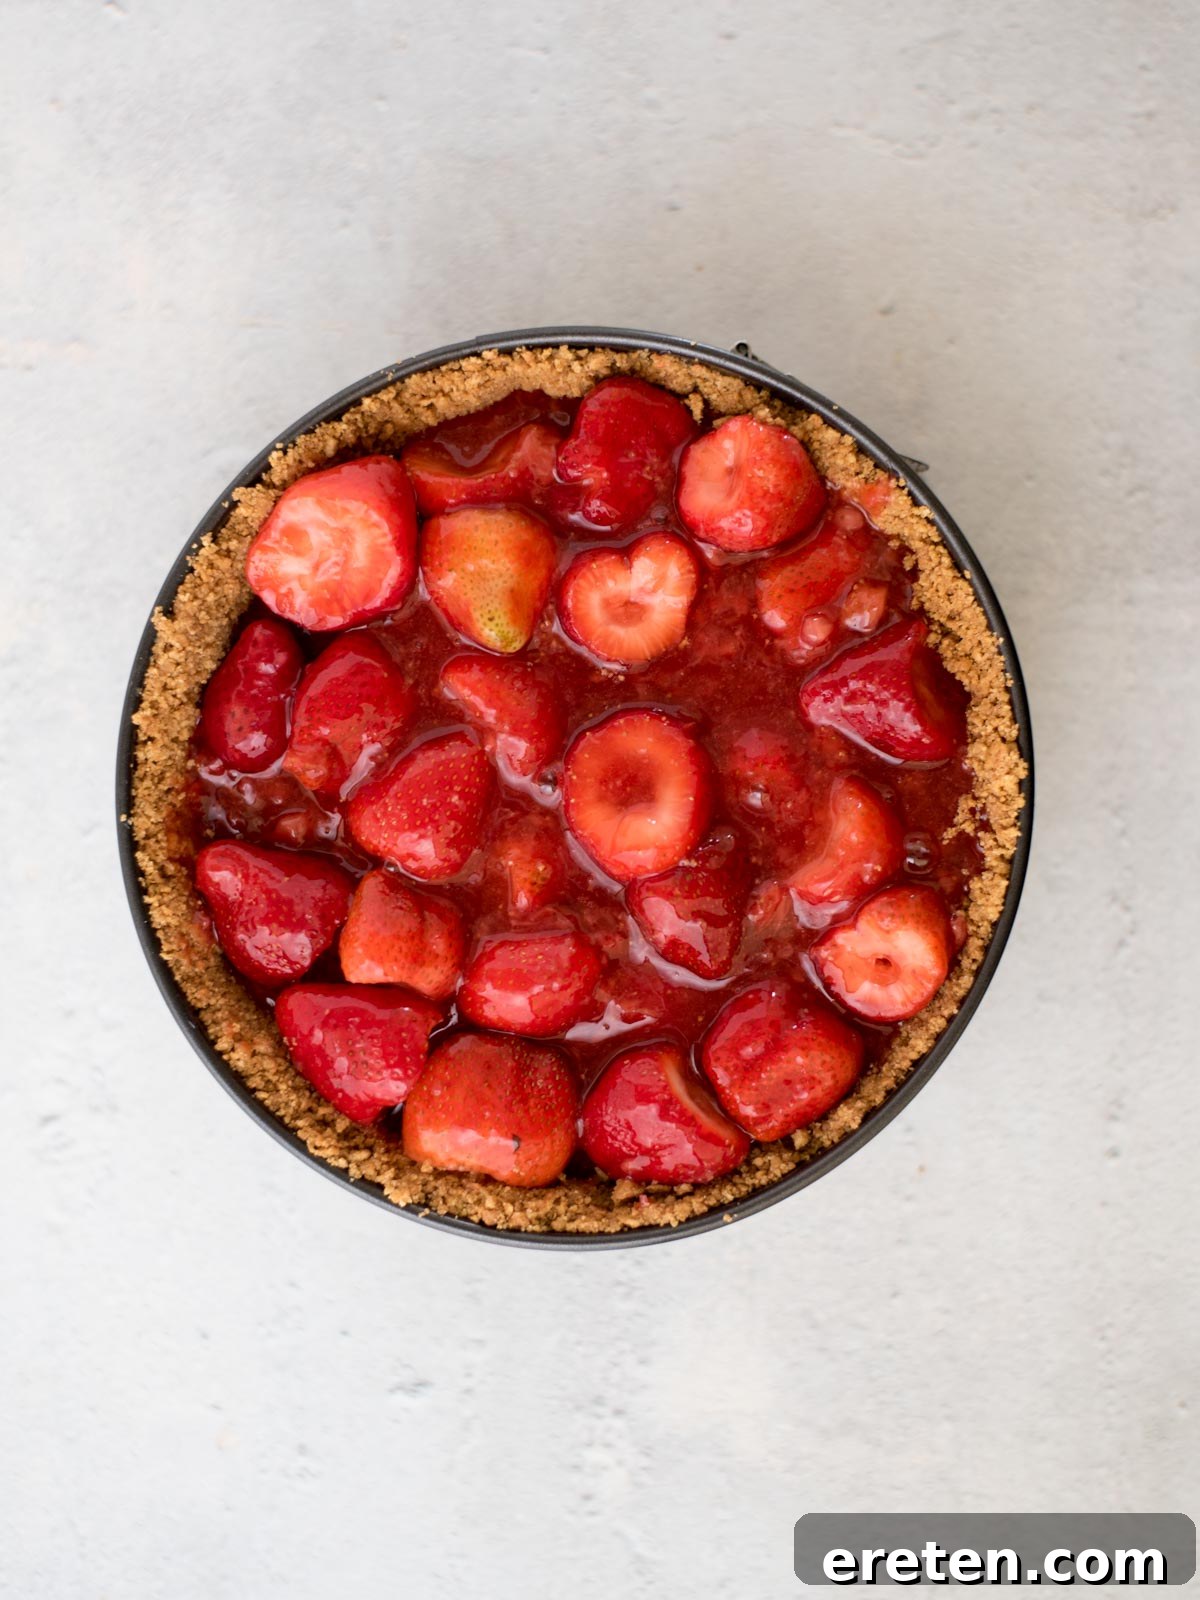
Step 4: Assemble and Chill the Pie
- Carefully pour the combined fresh strawberry and jam filling mixture into your previously chilled and set graham cracker crust within the springform pan.
- Gently spread the filling out evenly with a spatula, making sure to distribute the fresh berries throughout the entire pie. Be mindful and gentle around the crust edges to avoid dislodging any of the compacted crumbs.
- Place the assembled pie back into the refrigerator and chill for a minimum of 3 hours. For the absolute best results, allowing it to chill overnight is highly recommended. This extended cooling period allows the filling to fully set, firm up, and allows all the wonderful flavors to meld beautifully, ensuring a perfectly stable and sliceable pie.
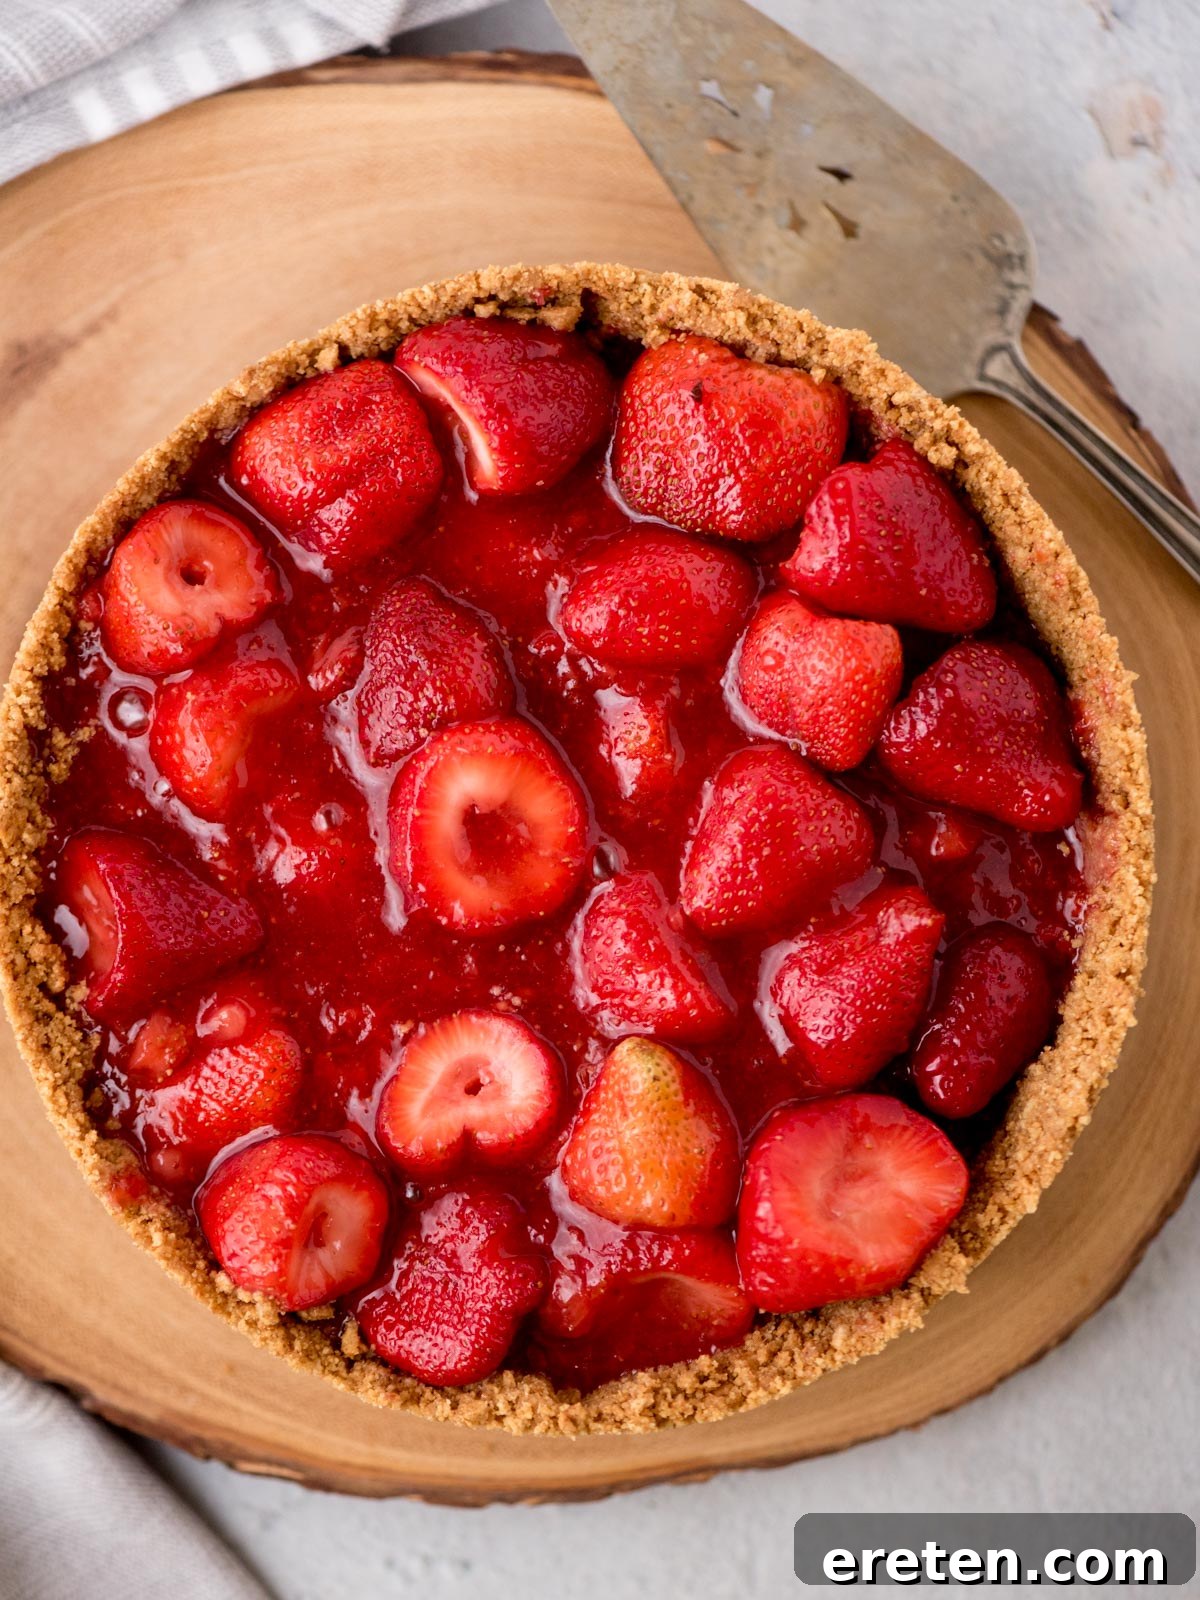
Step 5: Remove from Pan and Serve
- Once the pie is thoroughly chilled and firm to the touch, carefully remove it from the refrigerator. Gently release and lift the sides of the springform pan. You may find it helpful to run a thin, warm knife around the edge of the crust first if it’s exceptionally firm.
- Slice the pie into individual servings using a sharp, clean knife. For a truly indulgent experience, serve it as is, or enhance it with a generous dollop of freshly whipped cream, a delicate sprig of mint, or a few extra fresh strawberry slices for garnish. Enjoy your homemade masterpiece!
Expert Tips and Tricks for Your Best No-Bake Strawberry Pie
Achieving pie perfection is a delightful journey, and with these expert insider tips, you’ll ensure your no-bake strawberry pie is a showstopper every single time:
- Strawberry Size Matters for Texture: While you can certainly leave smaller, uniformly sized strawberries whole for a lovely and interesting texture contrast, larger berries truly benefit from being sliced or quartered lengthwise. This strategic preparation ensures that the luscious jam filling can thoroughly coat each piece of fruit, creating a more cohesive and wonderfully easy-to-slice pie. Uniformly sized pieces also contribute to an even distribution of fruit in every delightful bite.
- Crust Compaction is Key to Integrity: Never underestimate the critical importance of firmly pressing your graham cracker crust into the pie pan. A well-compacted crust doesn’t just hold together; it acts as a strong, impenetrable barrier, preventing any moisture from the delicious strawberry filling from seeping through and making the crust soggy. Use the flat back of a measuring cup or a sturdy, flat-bottomed glass to really press those crumbs down firmly and evenly, paying special attention to the crucial edges.
- Patience with Chilling is a Virtue: The chilling times specified throughout the recipe are not merely suggestions; they are absolutely crucial for the success of your pie. Rushing this essential step, particularly for the final chilling of the assembled pie, can unfortunately result in a runny, unstable, or less-than-firm dessert. Allow the crust to set fully, and then give the assembled pie ample, undisturbed time in the refrigerator (preferably overnight) for the filling to thicken and stabilize completely.
- Optimal Pan Choice: While a 9-inch springform pan is highly recommended for its incredible ease of removal and stunning presentation, this versatile pie can also be successfully made in a standard 9-inch pie plate. Just be aware that if you opt for a traditional pie plate, you might need slightly less crust mixture, and serving will require a pie server directly from the plate rather than a freestanding slice.
- Embrace Peak Season Berries: The unparalleled flavor of this pie heavily relies on the quality of your chosen strawberries. For the most vibrant and delicious outcome, always choose berries that are fully ripe, inherently sweet, and wonderfully aromatic. These peak-season berries will provide the richest and most authentic strawberry flavor, truly elevating your pie.
- Cool Down Completely: The jam filling MUST be completely cooled to room temperature before being combined with the fresh strawberries. Even slight warmth can cause the fresh berries to release excess water, leading to a runny pie. Plan ahead and give it ample time to chill.
Essential Kitchen Tools for Your No-Bake Strawberry Pie
Having the right equipment at your fingertips makes the pie-making process even smoother and more enjoyable. Here are some recommended tools that will help you craft this delicious no-bake strawberry pie with ease:
Springform Pan: This specialty pan is essential for achieving a beautifully presented pie that can be easily removed from its mold without damage, thanks to its removable sides.
Glass Mixing Bowls: Versatile and practical, these bowls are perfect for combining both the crust ingredients and the various components of the strawberry filling. Glass allows you to see the mixing process clearly.
Saucepan: A medium-sized saucepan is needed for cooking the strawberry jam-like base, ensuring even heat distribution for proper thickening.
Meat Chopper / Potato Masher: An incredibly handy tool for thoroughly mashing the strawberries into a pulp for the jam base, ensuring a smooth and consistent texture.
Measuring Cups: Essential for accurate ingredient quantities and, as a bonus, the flat bottom of a measuring cup is perfect for firmly compacting the graham cracker crust.
Measuring Spoons: Crucial for precise measurements of smaller ingredients like cornstarch, ensuring your recipe’s consistency is perfect.
Troubleshooting: How to Prevent and Fix a Runny Strawberry Pie
A perfectly set pie is a true delight to behold and devour, but sometimes, despite our best efforts, things don’t go exactly as planned. The key to avoiding a runny strawberry pie lies largely in meticulous preparation and ample patience, especially since this recipe relies on natural thickening rather than artificial gelatin.
Preventing a Runny Pie: Proactive Steps for Success
- Thicken and Cool the Jam Base Completely: This is arguably the most crucial step for a successful, firm pie. Ensure your strawberry jam filling base boils for the full recommended minute and visibly thickens to a rich, jam-like consistency. After cooking, it’s absolutely vital that this mixture cools down completely to room temperature (or even slightly chilled in the fridge for a short period) before you combine it with the fresh strawberries or add it to the crust. If the jam is even slightly warm, it will rapidly start to soften the fresh strawberries, causing them to release more of their natural moisture and thereby preventing the entire filling from setting properly. A fully cooled jam base will be notably very thick, almost like a preserve, and should cling to a spoon.
- Proper Crust Compaction and Chilling: A well-compacted and adequately chilled graham cracker crust serves as an essential barrier, preventing excess moisture from the fruit filling from seeping in and making it soggy. Press the crust down very firmly with the back of a measuring cup or a sturdy flat-bottomed glass, paying extra attention to the sides. Then, give it the full recommended hour (or even more) to chill in the refrigerator. This allows the butter to solidify thoroughly, creating a sturdy, water-resistant base.
- Adequate Final Chilling Time: Once the pie is fully assembled, it requires a significant amount of time in the refrigerator for the filling to properly set and stabilize. The minimum recommended 3 hours is a starting point; ideally, allow it to chill overnight for the best results. This extended cooling period provides the cornstarch-thickened jam and the fresh fruit ample time to firm up and bind together, resulting in a perfectly firm, clean, and sliceable pie. Patience truly pays off here!
- Mindful Strawberry Selection: For the freshest and firmest pie, always use fresh, ripe, but firm strawberries. Overly soft or bruised berries naturally contain more water and can release excessive liquid, significantly contributing to a runnier filling. If you absolutely must use frozen strawberries, ensure they are fully thawed and meticulously drained of all excess liquid before you even begin processing them for the jam or adding them to the filling.
How to Fix an Already Runny Pie (Limited Options)
If, despite your best efforts, your pie is already runny after the recommended chilling time, remember that because this recipe proudly doesn’t use jello or gelatin, it will never be as artificially firm or “jiggly” as those versions. However, you can try a few things to firm it up further:
- Extend Refrigeration: The simplest and often most effective solution is to simply return the pie to the refrigerator and chill it for several more hours, or even a full overnight period. Sometimes, the cornstarch just needs more time at a cold temperature to fully do its job and thicken the mixture to its maximum potential.
- Serve Extra Cold: Always serve this pie directly from the refrigerator. It will be at its absolute firmest when thoroughly chilled. As it begins to warm up to room temperature, it will naturally soften, so move quickly from fridge to plate.
- Embrace the Jammy Texture: If it’s still softer than your ideal “sliceable” consistency, don’t despair! You’ve essentially created an incredibly delicious, rich strawberry compote nestled in a crunchy crust. Embrace this delightful, rustic texture. Serve it gracefully in individual bowls with a spoon, generously topped with a dollop of fresh whipped cream or a scoop of vanilla ice cream. It will still be incredibly flavorful and enjoyable, even if it doesn’t hold a perfect, pristine slice.
Storage Solutions: How to Freeze Your No-Bake Strawberry Pie
This no-bake strawberry pie freezes remarkably well, making it an excellent option for meal prepping desserts for future enjoyment or saving any delicious leftovers for a quick, convenient treat. Proper freezing techniques are absolutely essential to maintain its delightful taste, vibrant color, and pleasing texture.
- Ensure Complete Chilling: Before even thinking about freezing, ensure the pie is completely chilled and fully set in the refrigerator. It’s generally best to freeze the entire pie rather than individual slices, as this helps maintain its structural integrity and prevents excessive moisture loss that can occur with smaller, exposed pieces.
- Wrap Thoroughly in Plastic: Start by wrapping the entire pie (still in its springform pan bottom or carefully transferred to a sturdy, freezer-safe plate) in several generous layers of plastic wrap. Be meticulous in your wrapping, ensuring every single part of the pie, including the critical edges of the graham cracker crust, is tightly covered. This airtight seal is crucial for preventing dreaded freezer burn and preserving the pie’s peak freshness.
- Add an Extra Protective Layer: For an additional and invaluable layer of protection against freezer burn and odor absorption, place the plastic-wrapped pie inside a large, heavy-duty resealable freezer bag, an airtight freezer-safe container, or wrap it securely in heavy-duty aluminum foil. This double-layer approach significantly reduces the risk of ice crystals forming and helps shield the pie from absorbing any unwanted freezer odors.
- Freeze Flat and Unstacked: Carefully place the securely wrapped pie in the freezer on a flat, even surface. It’s important to avoid stacking any other items on top of it, especially during the initial freezing period, to prevent the pie from getting squashed or misshapen before it’s fully frozen solid.
- Label for Future Reference: Do not overlook this incredibly important step! Clearly label the wrapped pie with the exact date it was frozen and its contents (e.g., “No-Bake Strawberry Pie – [Date]”). This simple act will save you immense guesswork and frustration later on when trying to identify mystery items in your freezer.
- Optimal Storage Duration: When stored properly using the meticulous methods described above, this no-bake strawberry pie can be safely kept in the freezer for up to 3 months without any significant decline in quality, taste, or texture. Beyond this period, while it will still be safe to eat, you might notice some subtle changes in texture or a slight reduction in overall flavor intensity.
- Gentle Thawing Instructions: When you’re ready to enjoy your frozen masterpiece, transfer it directly from the freezer to the refrigerator and allow it to thaw slowly and gradually overnight, or for at least 8-12 hours. Avoid thawing at room temperature, as this rapid temperature change can lead to a soggy crust and a less desirable, watery texture in the filling. Once thoroughly thawed, serve cold and savor every delightful bite!
Frequently Asked Questions About No-Bake Strawberry Pie
Absolutely! This no-bake strawberry pie freezes beautifully and is a fantastic make-ahead dessert. For the best results, wrap it tightly in several layers of plastic wrap and then in aluminum foil or place it in an airtight freezer-safe container. It will maintain its quality in the freezer for up to 3 months. Remember to thaw it slowly overnight in the refrigerator before you plan to serve it.
This particular recipe is specifically for a delicious no-bake strawberry pie, meaning you won’t need to turn on your oven at all! The graham cracker crust sets firmly in the refrigerator, and the luscious strawberry filling thickens on the stovetop before chilling to perfect consistency. If you were making a strawberry pie with a traditional pastry crust, that would indeed typically require baking.
This refreshing no-bake strawberry pie is unequivocally designed to be eaten cold. Its crisp, chilled filling and firm crust are best enjoyed straight from the refrigerator. There’s absolutely no need to heat it up; in fact, warming it would likely cause the cornstarch-thickened filling to soften significantly and become runny, compromising its texture.
To prevent a soggy graham cracker crust, several crucial steps must be followed. First, ensure the crust is very firmly and evenly compacted in the pan using the back of a measuring cup. Second, give the crust ample time to chill in the refrigerator (at least an hour) before adding the filling. This allows the butter to solidify and create a protective barrier. Finally, and most importantly, make sure your strawberry jam filling base is completely cooled and fully thickened before combining it with the fresh berries and adding it to the crust. This recipe incorporates a slightly thicker crust to further minimize any potential sogginess.
When stored properly in an airtight container or covered tightly with plastic wrap, your no-bake strawberry pie will stay wonderfully fresh and delicious in the refrigerator for 3-4 days. The flavors often have a chance to meld and deepen beautifully over this time, making it an enjoyable treat even on the second or third day.
Yes, this pie is an absolutely excellent make-ahead dessert! Because it requires several hours of chilling for the filling to fully set, it’s actually ideal to prepare it the day before you plan to serve it. This allows all the flavors to meld perfectly and the filling to achieve its optimal firmness, ensuring a picture-perfect and delicious slice every single time.
Other Delicious Dessert Recipes You Might Enjoy
If you loved this no-bake strawberry pie, you’re in for a treat! Explore these other fantastic dessert recipes that are sure to satisfy your sweet tooth and become new favorites:
- Homemade Cherry Ice Cream: A refreshing and intensely fruity frozen treat, perfect for hot days.
- Fresh Peach Cobbler: A warm, comforting dessert highlighting the juicy sweetness of fresh peaches beneath a golden, tender biscuit topping.
- Fresh Cherry Crisp: A delightful blend of sweet and tart cherries baked to perfection with a buttery, crunchy oat topping.
- Strawberry Graham Cracker Icebox Cake: Another fantastic no-bake strawberry dessert option that’s layered and incredibly easy to assemble.
- Peanut Butter Pretzel Pie: For those craving a uniquely delightful sweet and salty indulgence with a creamy texture.
If you make this recipe and absolutely love it, we would be incredibly grateful for a 5 ⭐️⭐️⭐️⭐️⭐️ rating! Your valuable feedback helps us continue to provide delicious, free recipes to our wonderful community.
No-Bake Strawberry Pie with Graham Cracker Crust Recipe
Prep Time: 20 mins | Cook Time: 5 mins | Chill Time: 4 hrs | Total Time: 4 hrs 25 mins
Servings: 8 people
This ultimate no-bake strawberry pie features a deliciously sweet graham cracker crust and a luscious, jello-free fresh strawberry filling. It’s the perfect easy dessert for any occasion!
Equipment
- Springform pan (9-inch recommended)
- Large mixing bowls
- Medium saucepan
- Meat chopper or potato masher
- Measuring cups
- Measuring spoons
Ingredients
Pie Filling
- 3 lbs fresh strawberries, hulled and prepped (approximately 2 cups mashed for jam, remaining sliced/quartered)
- 1 cup granulated sugar
- 1/3 cup water
- 3 tablespoons cornstarch
Crust
- 14 ounces graham crackers, crushed into fine crumbs (about 2.5 cups)
- 1/4 cup brown sugar
- 1 cup unsalted butter, melted
Instructions
- Make the Graham Cracker Crust:
- In a large mixing bowl, combine the graham cracker crumbs, brown sugar, and melted butter.
- Mix thoroughly until all crumbs are fully coated in butter.
- Press the mixture firmly into the bottom and up the sides of a 9-inch springform pan. Use the back of a measuring cup to compact it tightly and evenly.
- Chill the crust in the refrigerator for at least 1 hour to set.
- Prepare the Jam Filling Base:
- In a saucepan over medium heat, add 2 cups of the hulled and mashed strawberries. Continue to mash them further with a meat chopper or potato masher as they heat.
- Stir in the granulated sugar, water, and cornstarch until combined and smooth, ensuring no lumps remain.
- Bring the mixture to a low boil, stirring constantly to prevent sticking and activate the cornstarch. Continue boiling for 1 minute.
- Remove from heat and transfer the jam filling base to a separate bowl. Let it cool completely to room temperature until it achieves a very thick, jam-like consistency. This step is crucial for pie stability.
- Assemble the Pie Filling:
- Add the remaining prepared fresh strawberries (sliced or quartered, depending on size) to a large mixing bowl.
- Pour the completely cooled jam filling base over the fresh strawberries.
- Gently fold the ingredients together until all the fresh strawberries are evenly coated with the jam mixture. Be careful not to mash the fresh berries.
- Final Assembly and Chilling:
- Carefully pour the combined strawberry filling into the chilled and set graham cracker crust. Spread it out evenly, being gentle near the crust edges.
- Place the entire pie in the refrigerator and chill for a minimum of 3 hours. For the best, most stable results, chilling overnight is highly recommended.
- Serve:
- Once thoroughly chilled and firm, gently remove the pie from the refrigerator and carefully release and lift the sides of the springform pan.
- Slice the pie with a sharp knife and serve cold, either on its own or topped with a generous dollop of fresh whipped cream.
Notes
- It’s important to remember that this pie does not use jello or gelatin, so its texture will be a natural, thickened jam consistency rather than a firm, jiggly gel.
- Ensure the jam filling base is completely cooled before mixing it with the fresh strawberries to prevent the pie from becoming runny. This is a critical step!
- Properly compacting the crust and allowing sufficient chilling time for both the crust and the assembled pie are crucial for the pie to hold its beautiful shape.
- You can leave smaller strawberries whole for a rustic look, but larger berries should be sliced or quartered lengthwise for better distribution and easier slicing.
- If you opt to make this pie in a standard 9-inch pie plate instead of a springform pan, you may need slightly less crust mixture.
Nutrition Information (Approximate per 1 slice serving)
- Serving: 1 slice
- Calories: 602 kcal
- Carbohydrates: 85g
- Protein: 5g
- Fat: 29g
- Saturated Fat: 15g
- Polyunsaturated Fat: 1g
- Monounsaturated Fat: 8g
- Trans Fat: 1g
- Cholesterol: 61mg
- Sodium: 335mg
- Potassium: 365mg
- Fiber: 5g
- Sugar: 51g
- Vitamin A: 730 IU
- Vitamin C: 100mg
- Calcium: 80mg
- Iron: 3mg
Nutrition information is automatically calculated and should only be used as an approximation.
Additional Info
- Course: Dessert
- Cuisine: American
Loved this recipe? Share your thoughts and leave a comment below!