

Unlock the secret to baking incredibly soft, irresistibly buttery dinner rolls in just about an hour, even if you’re a complete novice in the kitchen. This comprehensive guide to crafting easy yeast rolls is designed specifically for beginners, eliminating any fear or intimidation often associated with bread making. Follow our straightforward, step-by-step instructions, and you’ll consistently achieve light, fluffy, and perfectly golden yeast rolls that will impress everyone at your table.

Why You’ll Adore This One-Hour Dinner Rolls Recipe
These homemade dinner rolls are more than just a recipe; they’re a revelation for anyone who loves the comforting taste of freshly baked bread. Their simplicity means they don’t need to be reserved for grand occasions like Thanksgiving, Christmas, or Easter. While they certainly elevate any holiday feast, their quick preparation makes them ideal for an ordinary weeknight dinner, transforming a simple meal into something special.
Imagine enjoying warm, pillowy rolls alongside your family’s favorite dishes, any day of the week. If you cherish the memory of your grandma’s homemade yeast rolls but felt daunted by the process, this recipe empowers you to recreate that same magic entirely on your own. It’s perfect for beginners for several compelling reasons:
- Uncomplicated Instructions: We’ve distilled the baking process into clear, easy-to-follow steps, ensuring you feel confident and in control at every stage. No complex techniques or confusing terminology here.
- No Starter Required: Forget about the lengthy process of creating and nurturing a sourdough starter. This recipe lets you dive right into baking without any prior preparation or waiting days for fermentation.
- Swift from Start to Finish: The entire process, from mixing to baking, takes approximately one hour. This isn’t a labor-intensive bread recipe that demands hours of rising time; it’s perfect for busy schedules.
- Minimal, Accessible Ingredients: You’ll only need six basic ingredients, all of which are common pantry staples. There are no exotic or hard-to-find items, making grocery shopping a breeze.
- Effortless Browning: Achieve a beautiful golden-brown crust without the fuss of an egg wash. A quick broil at the very end is all it takes to give these rolls their appealing finish.
Essential Ingredients for These Classic Yeast Rolls
Crafting these delectable, old-fashioned sweet yeast rolls begins with understanding the role of each simple ingredient. Quality ingredients are key to a successful bake, but you don’t need anything fancy – just fresh and ready to go!
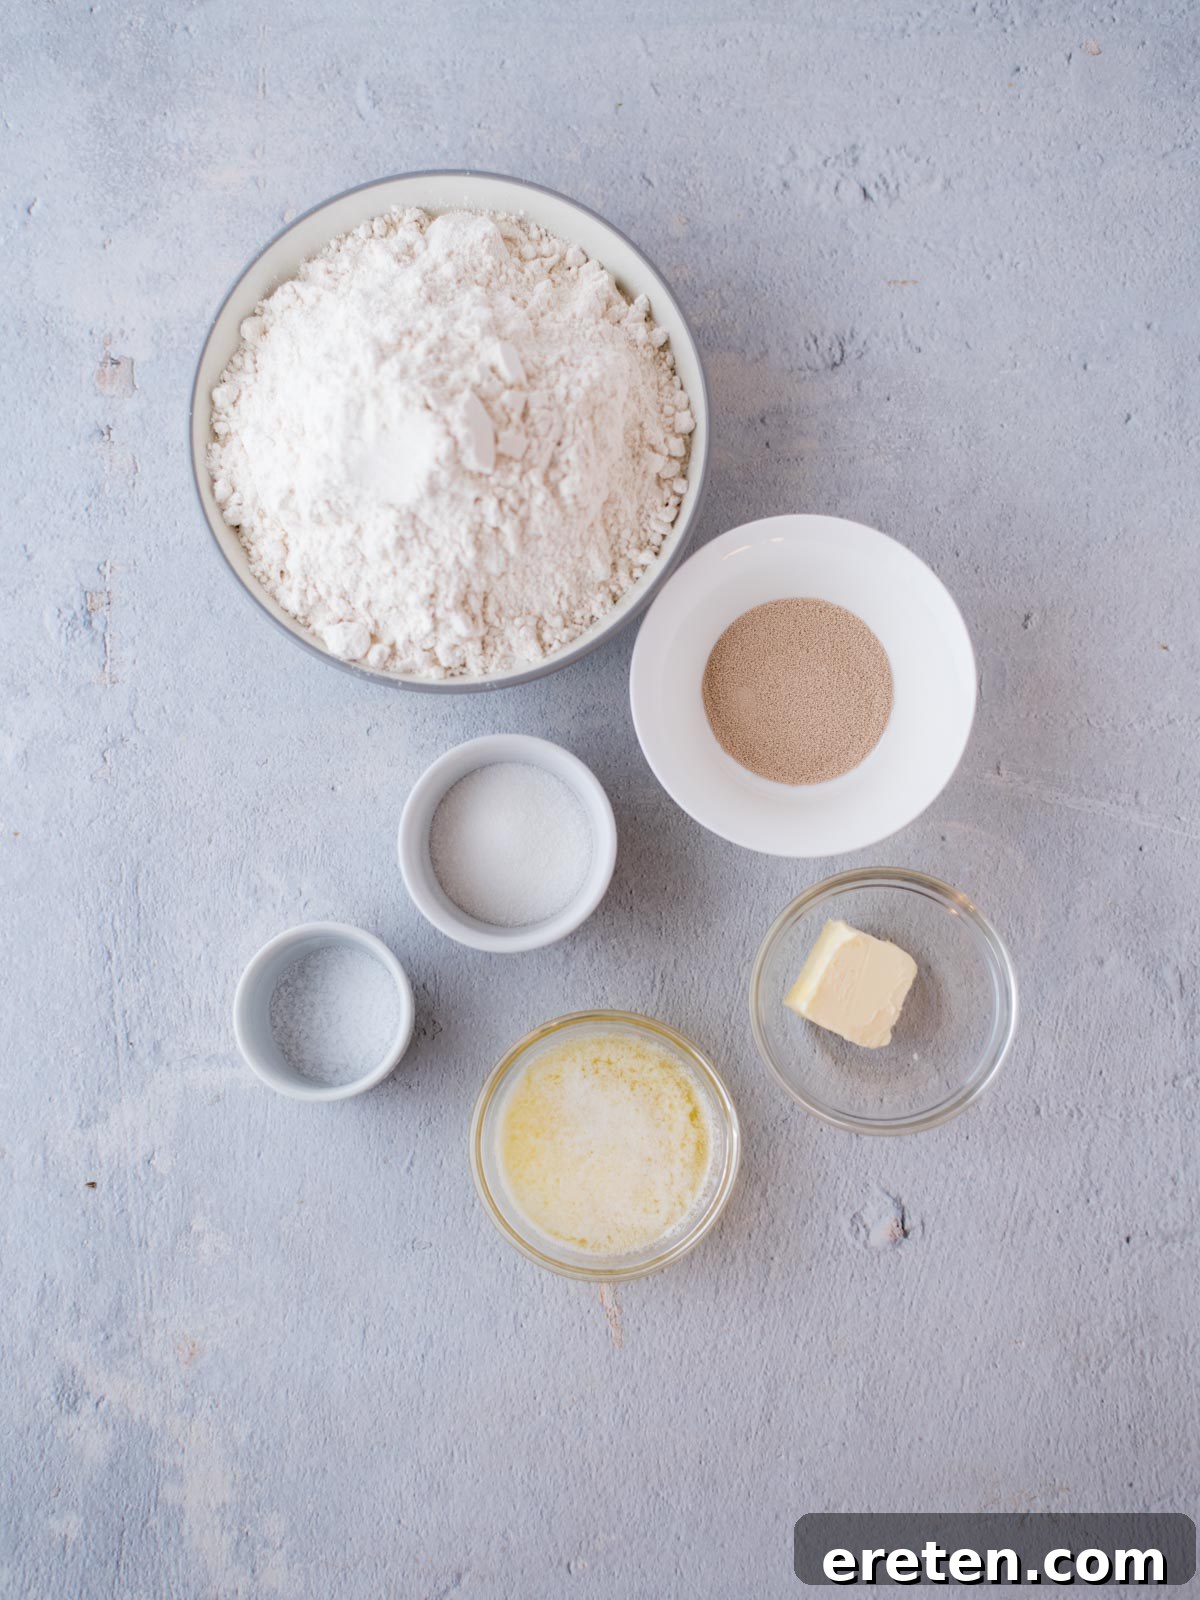
- Warm Water: This is the crucial element for waking up your yeast. The ideal temperature range is typically between 105ºF and 115ºF (40º-46ºC). Water that’s too cold won’t activate the yeast, while water that’s too hot can kill it, leading to rolls that won’t rise. Always check your yeast package for specific temperature recommendations.
- Yeast: For this recipe, we recommend using active dry yeast. While instant dry yeast can be used, active dry yeast offers a significant advantage: you can visibly confirm its freshness and activity before incorporating it into the main dough. This simple “blooming” step saves you potential frustration and wasted ingredients later on, ensuring your rolls rise perfectly every time.
- Granulated Sugar: Sugar serves a dual purpose here. Firstly, it acts as food for the yeast, helping it activate and produce the carbon dioxide needed for the dough to rise. Secondly, it contributes a subtle sweetness to the rolls, enhancing their overall flavor and making them truly “sweet yeast rolls.”
- Butter: You’ll need butter in two forms for this recipe: softened and melted. Softened butter is incorporated into the dough, providing richness, tenderness, and a beautiful texture. Melted butter is brushed over the rolls before and after baking, adding moisture, flavor, and contributing to that irresistible golden-brown crust. Feel free to use either salted or unsalted butter, depending on your preference and what you have on hand.
- Coarse Kosher or Sea Salt: Salt is vital for balancing the flavors in your rolls and enhancing the taste of the other ingredients. We specifically recommend coarse kosher or sea salt because a light sprinkle on top of the finished rolls adds a delightful crunch and a burst of savory flavor, elevating the simple roll to something truly special.
- All-Purpose Flour: No need for special bread flour or elaborate blends here! Standard all-purpose flour is perfectly suited for these easy yeast rolls. Its balanced protein content creates a tender yet structured crumb, ideal for light and fluffy results.
Essential Equipment for Homemade Yeast Rolls
Having the right tools can make your baking experience smoother and more enjoyable. While some items are optional, they certainly enhance efficiency. Here’s what you’ll need:
KitchenAid Stand Mixer
Buy Now →
Measuring Cups
Buy Now →
Measuring Spoons
Buy Now →
9×13 Baking Dish
Buy Now →
Basting Brush
Buy Now →
While an electric stand mixer with a dough hook attachment will make the kneading process significantly easier and faster for this old-fashioned sweet yeast rolls recipe, it is not strictly necessary. If you don’t own a stand mixer, you can absolutely make this recipe using a large mixing bowl, a sturdy wooden spoon, and your own two hands. Be prepared to knead the dough by hand for the full two minutes to develop the gluten adequately for that perfect chewy-soft texture.
How to Make Perfect Yeast Rolls: A Step-by-Step Guide
Embark on your journey to baking perfection with these simple, clear steps. Each stage is designed for success, ensuring you create the softest, most delicious yeast rolls with ease.
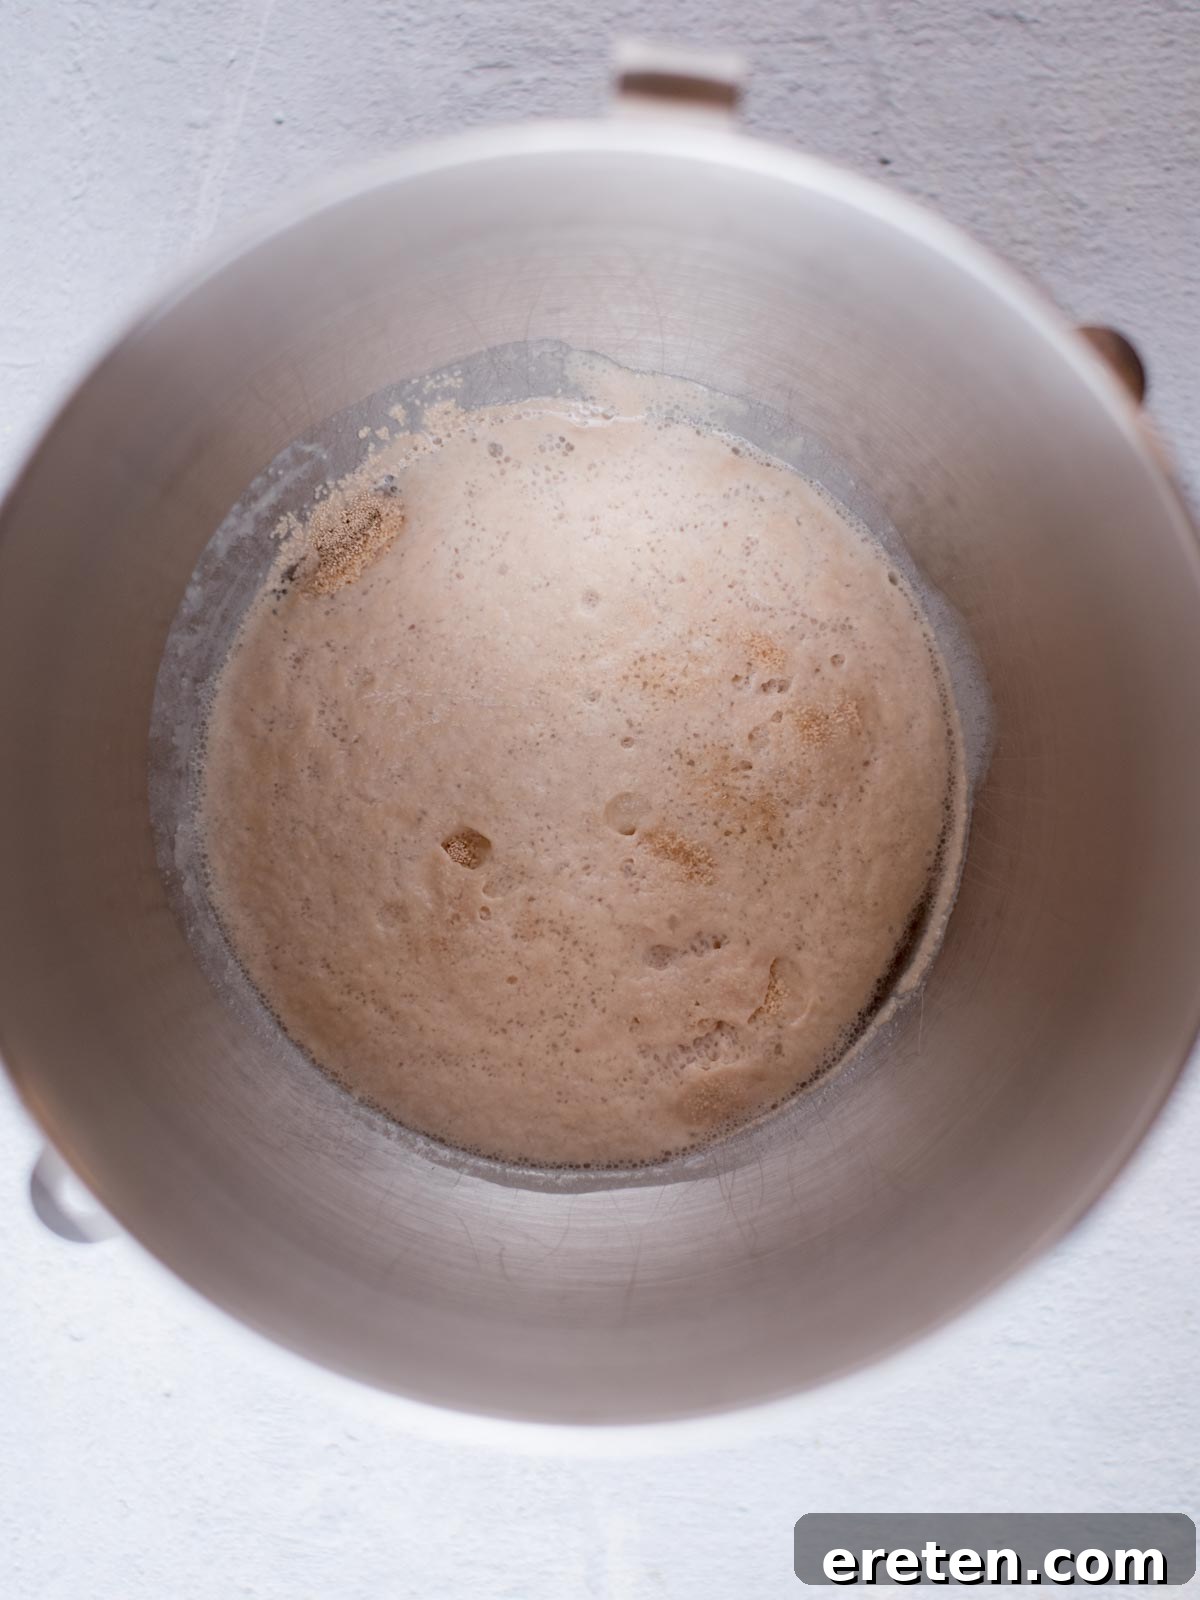
Step 1: Activate the Yeast
In a large mixing bowl, combine the warm water (remembering the ideal temperature range of 105ºF-115ºF or 40º-46ºC for active dry yeast) and granulated sugar. Sprinkle the active dry yeast over the surface of the water. Gently stir to combine, then let this mixture rest undisturbed for about 5 minutes. During this time, the yeast will “bloom” – you’ll observe little puffs of expanded yeast floating to the top, and the surface will become delightfully foamy. This indicates your yeast is active and ready to work its magic!
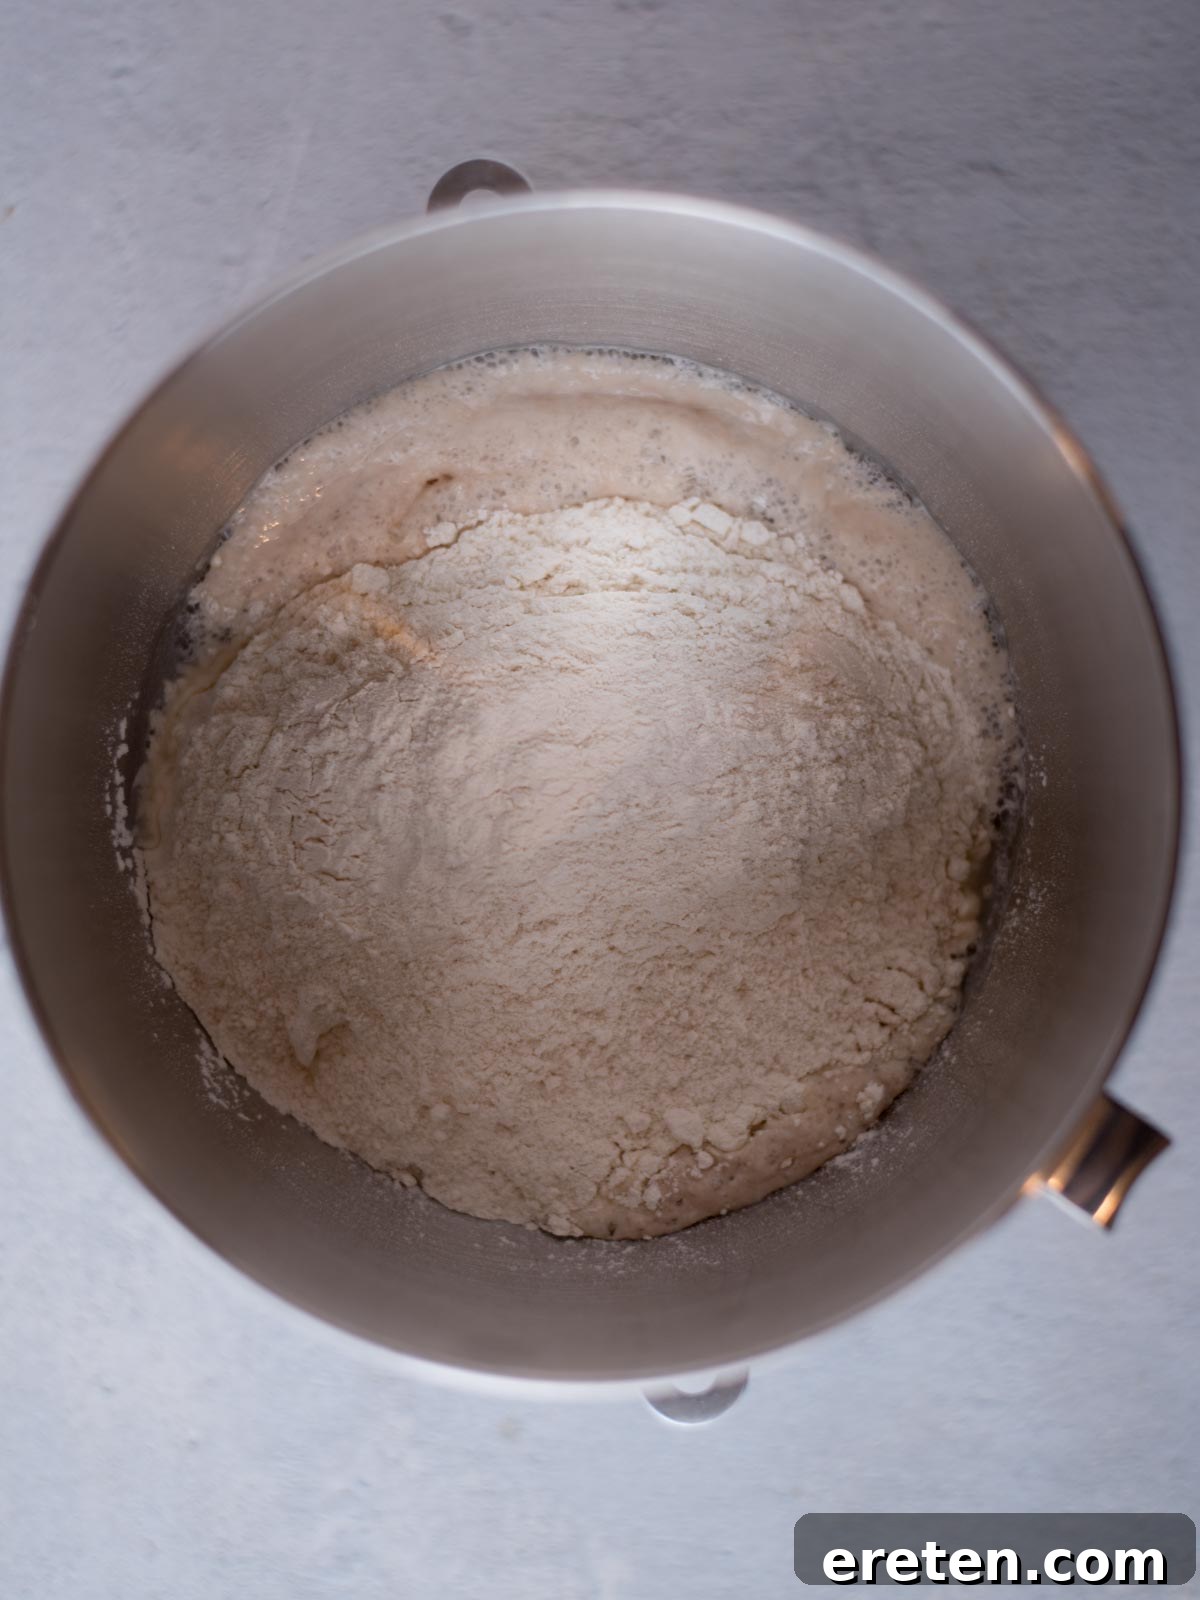
Step 2: Combine Wet and Dry Ingredients
Once your yeast has bloomed, add the softened butter, salt, and 3 cups of all-purpose flour to the bowl. If using a stand mixer, attach the dough hook and turn the mixer on medium speed. Mix the ingredients until they are thoroughly combined and a shaggy dough begins to form. Gradually add in the remaining ¼ cup of flour, a little at a time, until the dough is cohesive and only slightly sticky to the touch. The exact amount of flour can vary based on humidity and how accurately you measured, so trust your judgment here.
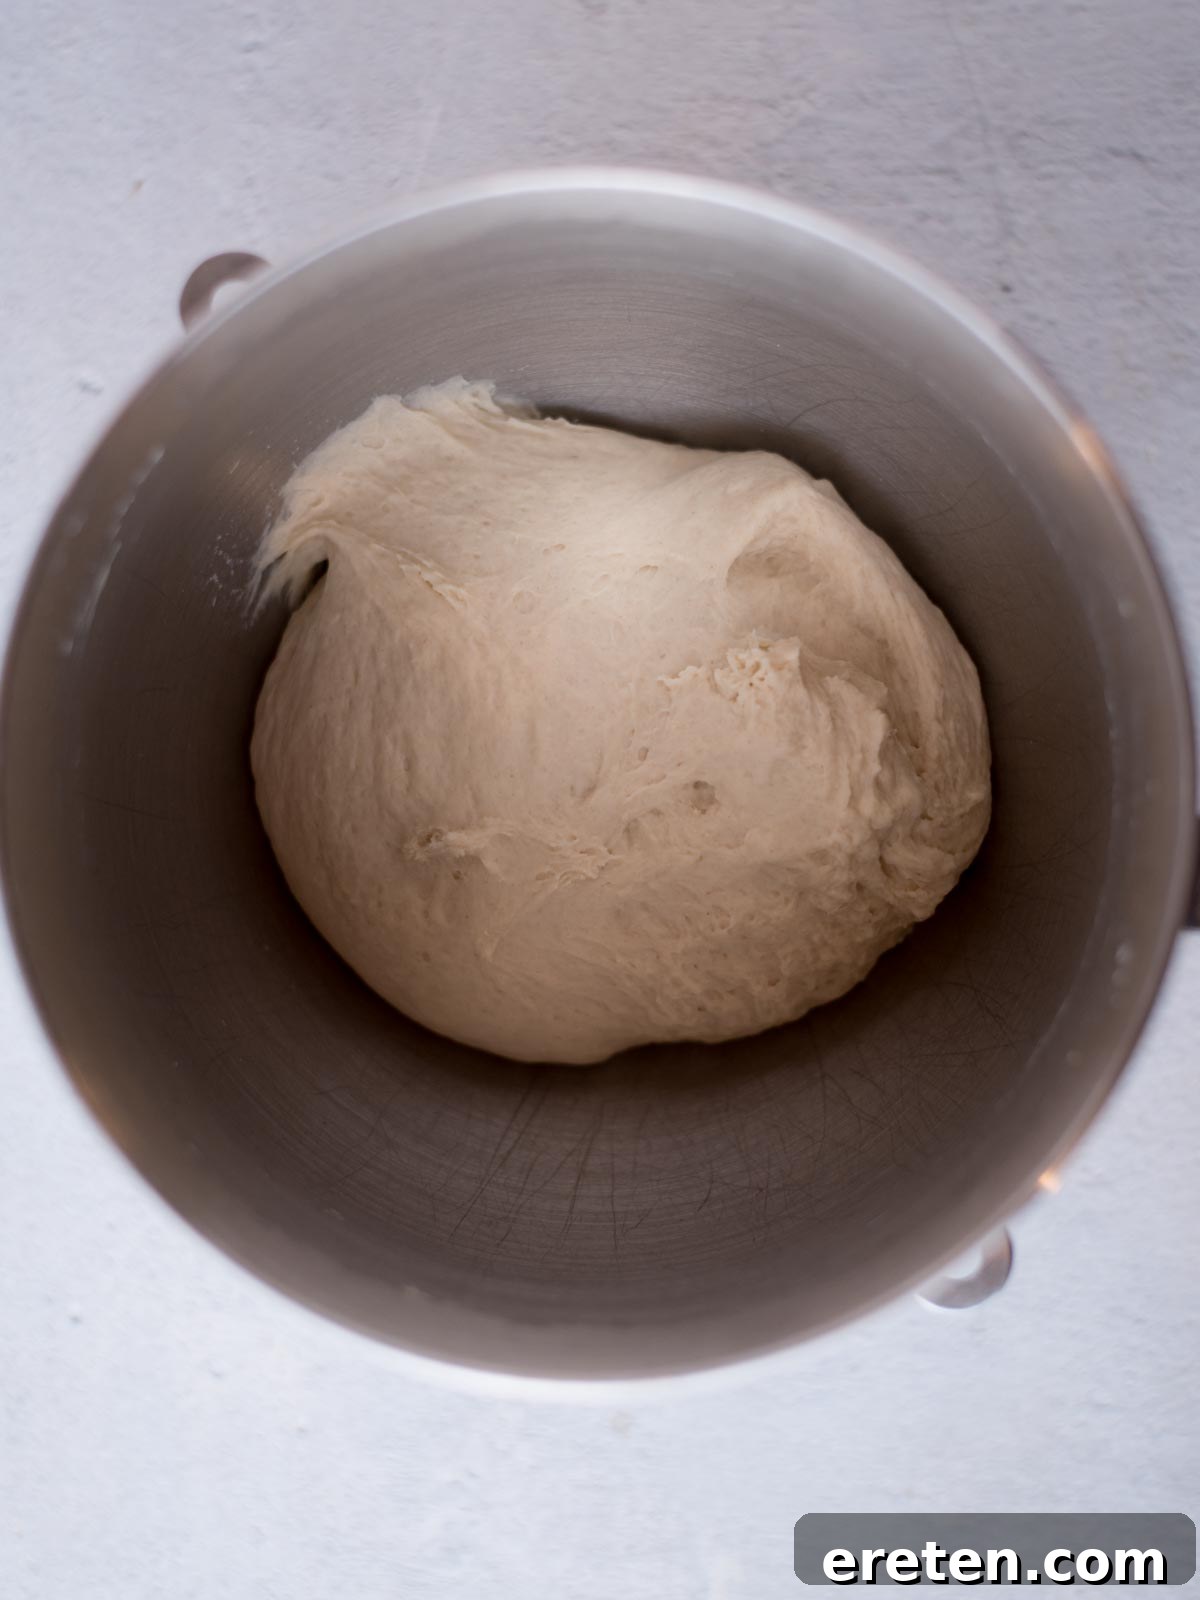
Step 3: Knead the Dough to Perfection
Continue to knead the dough using your stand mixer on low speed for 2 minutes. If kneading by hand, turn the dough out onto a lightly floured surface and knead vigorously for 2 minutes. The goal is to achieve a smooth, elastic dough that springs back slightly when gently poked. Proper kneading is essential for developing the gluten structure, which gives your rolls their light and chewy texture.
Step 4: First Rise (Proofing)
Lightly grease the mixing bowl, then place the kneaded dough back into it, turning it once to coat all sides with a thin layer of oil. Cover the bowl tightly with plastic wrap or a clean kitchen towel. Place the bowl in a warm, draft-free spot to rise for 20 minutes. A warm place could be a sunny windowsill, near a preheating oven, or even inside an oven that’s turned off with just the light on to create a warm environment.
Step 5: Prepare Your Baking Environment
While the dough is undergoing its first rise, preheat your oven to 400ºF (200ºC). This ensures your oven is at the correct temperature when the rolls are ready. Liberally spray a 9×13 inch baking dish with a nonstick cooking spray, or grease it with butter, to prevent the rolls from sticking.
Step 6: Shape the Rolls
Once the dough has risen, gently remove the cover from the bowl and “punch down” the dough to release the accumulated gases. Turn the dough out onto a lightly floured surface. Divide the dough into 20 equal pieces. For best results and even baking, try to make each piece as close to the same size as possible. A kitchen scale can be helpful for precision, but simply eyeballing and adjusting works fine too.
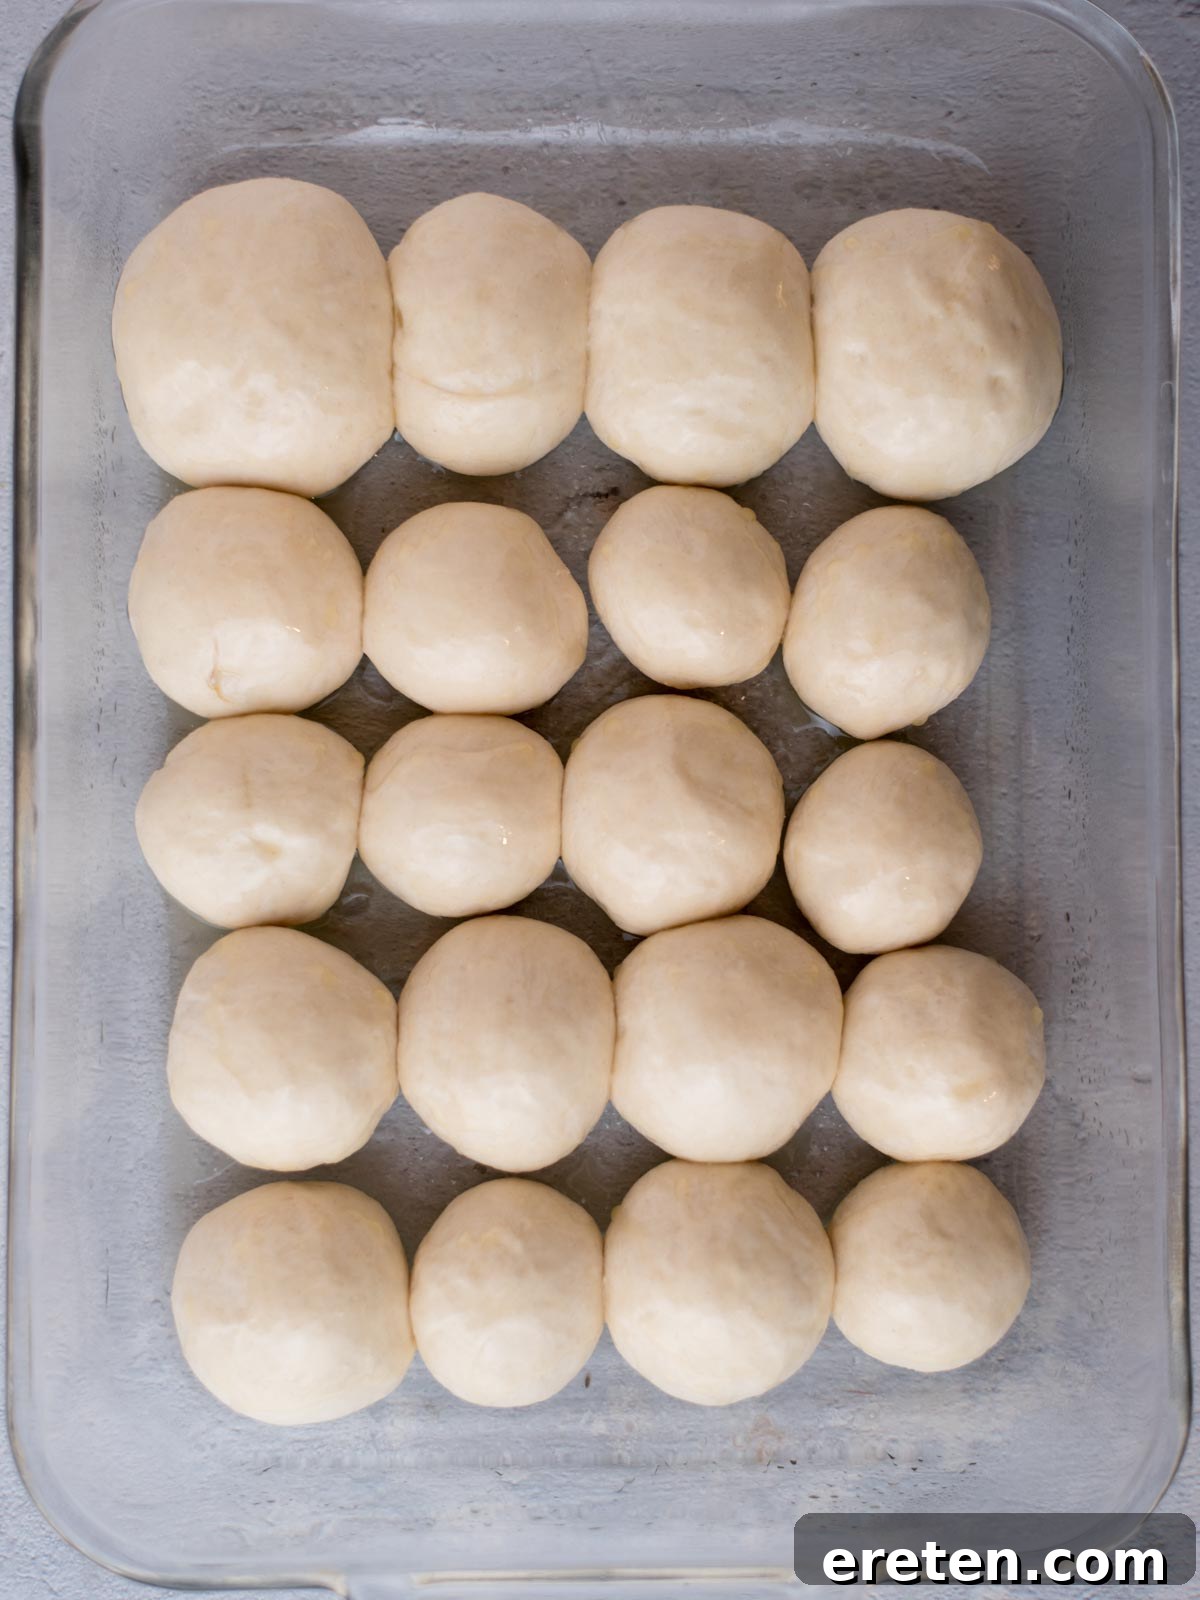
Step 7: Form and Arrange the Rolls
Take each individual piece of dough and roll it into a smooth, round ball. To achieve a perfectly smooth top, gently stretch the top surface of the dough ball and then pinch the bottom edges together to seal it. Place the shaped rolls seam-side down in the prepared 9×13 inch baking dish, arranging them snugly together. The close proximity helps them rise upwards and form that classic pull-apart texture.
Step 8: Second Rise and Butter Brush
Once all the rolls are arranged in the pan, lightly brush their tops with a portion of the melted butter. This adds flavor and helps with browning. Cover the pan loosely with plastic wrap or a tea towel and let the rolls undergo a second rise in a warm spot for an additional 15 minutes. They will puff up noticeably, becoming even more light and airy.
Step 9: Bake to Golden Perfection
Remove the cover from the rolls and place the baking dish into the preheated 400ºF (200ºC) oven. Bake for approximately 13 minutes. Keep an eye on them; they should be golden brown on top. For that extra touch of golden perfection, turn on your oven’s broiler for just 1 minute at the very end. Watch carefully to prevent burning, as broilers can work quickly!
Step 10: Final Touch and Serve
Carefully remove the beautiful, golden-brown rolls from the oven. Immediately brush the tops generously with the remaining melted butter. This not only adds a wonderful glossy finish and rich flavor but also keeps them soft. For an exquisite finish, sprinkle a pinch of coarse kosher or sea salt over the buttered tops. Allow them to cool slightly before pulling them apart and enjoying their incredible softness and flavor!
Troubleshooting: Tips and Tricks for Easy Dinner Rolls
Baking can sometimes present unexpected challenges, especially when working with yeast. But don’t fret! We’ll address some of the most common hiccups you might encounter when making these old-fashioned yeast rolls, along with simple solutions to ensure your success.
Dough Not Rising for Rolls
If your dough isn’t rising as expected, it’s almost always related to the yeast. There are a few possible culprits:
- Expired or Inactive Yeast: Yeast is a living organism, and like all living things, it has a shelf life. Check the expiration date on your yeast package. Even within a multi-pack, some packets can be inactive. This is precisely why we recommend active dry yeast – the blooming step in warm water allows you to verify its vitality upfront. If it doesn’t foam, it’s likely dead.
- Incorrect Water Temperature: Water that’s too cold (below 100°F / 38°C) won’t activate the yeast, making it sluggish or entirely dormant. Conversely, water that’s too hot (above 120°F / 49°C for active dry) will kill the yeast. Aim for a “bathwater warm” feel, ideally between 105ºF and 115ºF (40º-46ºC). Use a kitchen thermometer for accuracy.
- Lack of Warmth for Rising: Yeast thrives in warm environments. If your rising spot is too cool or drafty, the dough will take much longer to rise, or may not rise at all. Find a cozy, warm place, such as a sunny spot, near a heating vent, or even in a turned-off oven with the light on.
Solution: Always check yeast expiration dates. Use a thermometer to ensure precise water temperature. Provide a consistently warm, draft-free environment for rising. If your active dry yeast doesn’t bloom after 5-10 minutes, discard it and start with fresh yeast.
Dough is Too Sticky or Too Dry
Dough consistency can be finicky, often affected by imprecise measurements or even environmental factors like kitchen humidity.
Too Sticky: If your dough feels excessively sticky and unmanageable, it likely needs more flour. This can happen if you accidentally added too much liquid or if your flour was packed too loosely during measurement.
Too Dry: If the dough is crumbly, stiff, or won’t come together, it’s too dry and requires more liquid. This might be due to over-measuring flour or low humidity in your kitchen.
Solution: Adjust slowly and gradually. If too sticky, add flour one tablespoon at a time, incorporating it fully before adding more, until the dough is only slightly tacky. If too dry, add water or milk (for richer rolls) a teaspoon at a time until the dough reaches the desired smooth and elastic consistency.
Tough or Dense Rolls
Nobody wants a brick for a roll! This issue typically stems from two main causes:
- Overmixing: While kneading develops gluten, over-kneading can make the gluten strands too tight, resulting in tough rolls. Follow the kneading times precisely.
- Insufficient Rising Time: Yeast needs adequate time to produce enough gas to lighten and tenderize the dough. If the dough doesn’t get enough time to rise and double in size, the rolls will be dense.
Solution: Stick to the recommended kneading time (2 minutes for this recipe). Be patient and allow the dough to rise for the full specified time, or until it has visibly doubled in size. A gentle poke test – if an indentation remains, it’s ready – can also help.
Unevenly Shaped Rolls
While homemade rolls have a charming rustic appeal, significant size differences can lead to uneven baking. Smaller rolls might burn while larger ones remain undercooked.
Solution: Pay close attention when dividing the dough. If you have a kitchen scale, use it to ensure each piece weighs the same. Practice shaping each piece into a smooth ball; a light touch is key here. Avoid mashing the dough, as this can compress the air and result in dense spots. Gentle handling promotes light and fluffy results.
Burnt Tops
Achieving that beautiful golden-brown top without burning can be tricky, especially with broiling.
Solution: The most common cause is an inaccurate oven temperature. Consider double-checking your oven’s calibration with an inexpensive oven thermometer if burnt tops are a recurring problem. When broiling, stay vigilant. Broilers heat very quickly. If you notice the tops browning too rapidly during the main bake, loosely tent the baking dish with aluminum foil for the remainder of the baking time to protect them.
Bland Rolls
Flavor is paramount! If your rolls taste dull or lack a certain “oomph,” it’s usually an easy fix.
Solution: Ensure you’ve added the correct amount of salt to the dough; it’s crucial for flavor balance. Don’t skip the step of brushing the rolls generously with melted butter after baking – this adds richness and moisture. And finally, ensure your yeast was fully bloomed and active, as active yeast contributes to the complex, appealing flavors of baked bread.
Rolls Deflate or Go Flat During Baking
This disheartening issue typically points to one problem:
Over-proofing: If dough rises for too long, the yeast consumes all the available sugars and runs out of energy, or the gluten structure becomes overstretched and weak. When placed in the oven, this over-proofed dough lacks the strength to hold its structure and collapses.
Solution: Pay close attention to the recommended rising times. While these are estimates, try to gauge when the dough has doubled in size rather than strictly adhering to a clock. If your kitchen is very warm, dough might rise faster than expected. Trust your visual cues!
Yeast Rolls vs. Dinner Rolls: Understanding the Nuance
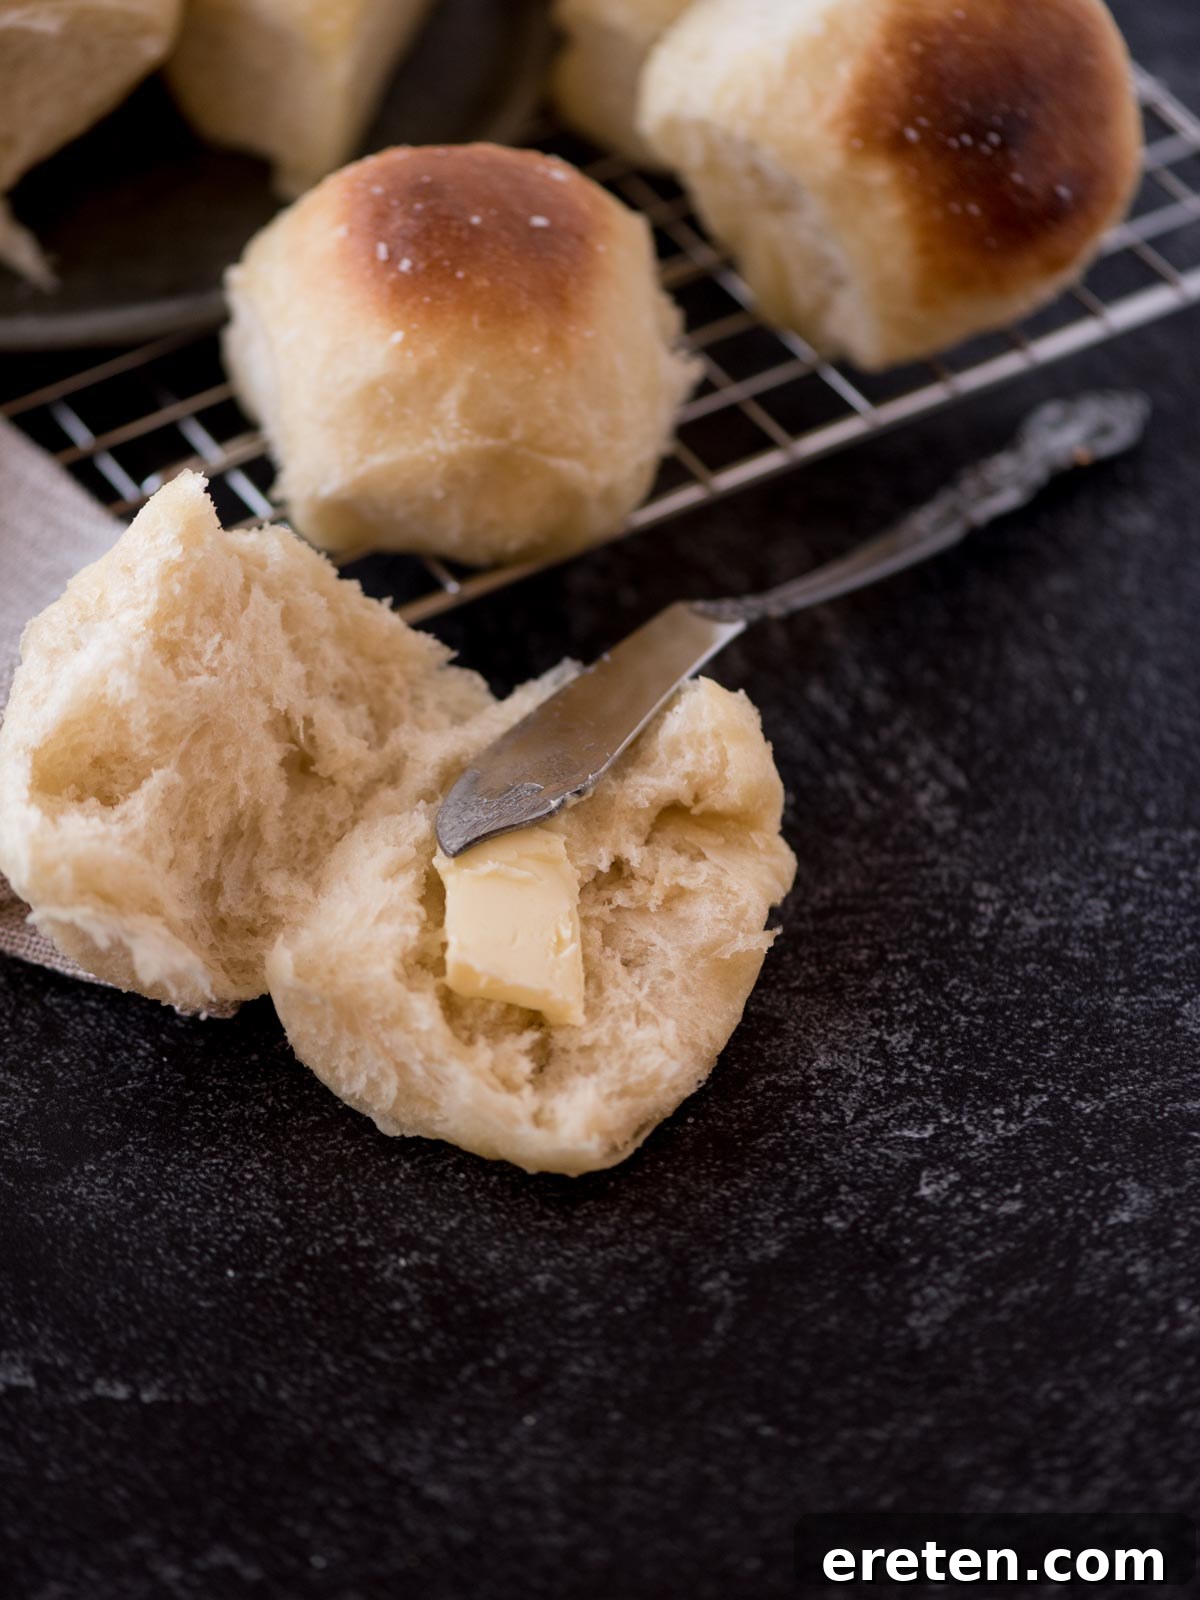
The terms “yeast rolls” and “dinner rolls” are often used interchangeably in everyday conversation, and indeed, they frequently refer to a very similar type of small, soft bread served with a meal. Conceptually, all yeast rolls can be considered a type of dinner roll. However, not all dinner rolls are made with yeast, which highlights a subtle distinction between the two.
Yeast Rolls
Yeast rolls specifically denote bread rolls that have been leavened using yeast as the primary, and often sole, leavening agent. The magical action of yeast consuming sugars and producing carbon dioxide is what gives these rolls their characteristic light, airy, and fluffy texture, along with a distinct, often slightly sweet, yeasty flavor. This biological leavening process contributes significantly to their tender crumb and signature chewiness.
Dinner Rolls
Dinner rolls, on the other hand, is a broader category. It refers to any small, individual-sized portion of bread designed to be served as an accompaniment to a meal. This definition isn’t restricted by the leavening method. While many popular dinner rolls are indeed made with yeast (like the ones in this recipe), others might utilize chemical leavening agents such as baking powder or baking soda. For example, biscuits or some quick breads, which are also often served as “dinner rolls,” rely on these chemical leaveners. Dinner rolls made with butter, milk, and eggs often have a richer texture and denser crumb compared to some simpler yeast rolls, depending on the specific recipe.
(Please note: The original form for downloading the ebook contained JavaScript. For security and functionality, the interactive form elements have been removed. To access this exclusive collection, please visit the main blog or signup page directly.)
Active Dry Yeast vs. Instant Dry Yeast: Choosing Your Leavener
When it comes to baking with yeast, you’ll primarily encounter two types in most home kitchens: active dry yeast and instant dry yeast. While both are effective leavening agents derived from the same species of fungus (Saccharomyces cerevisiae), they differ in how they’re processed and, consequently, how they’re used in recipes. Understanding these differences is crucial for successful bread making.
- Active Dry Yeast: This type of yeast typically comes in granular form and requires “activation” or “blooming” before being mixed into the rest of your ingredients. This means dissolving it in warm liquid (usually water) along with a pinch of sugar for about 5 to 10 minutes. This step rehydrates the dormant yeast cells and allows you to confirm their activity. If the mixture becomes foamy and bubbly, your yeast is alive and well. If it doesn’t, it’s inactive, and you’ll know to replace it before proceeding with your recipe.
- Instant Dry Yeast: As its name suggests, instant dry yeast is formulated to be used directly, or “instantly,” without the need for prior activation. Its granules are finer than active dry yeast, and it’s milled to dissolve more quickly. This allows you to mix it directly with your dry ingredients before adding the liquid. Instant yeast also tends to work a bit faster than active dry yeast.
While both can often be substituted for one another (usually with a slight adjustment in quantity), I personally prefer using active dry yeast for one critical reason: you can verify its activity before committing to the entire recipe.
Imagine the frustration of spending time and ingredients mixing a dough with instant yeast, only to find hours later that it hasn’t risen at all. This usually means your yeast was expired or inactive, and now your efforts are wasted. With active dry yeast, that initial 5-minute blooming step acts as an insurance policy. If your active dry yeast doesn’t become foamy in warm water, you know it’s time to get a fresh batch, and you’ve saved yourself much more time and ingredients than if you had used an inactive instant yeast.
Although waiting those few minutes for active dry yeast to bloom might feel like an extra step, it’s a small investment that pays off immensely in peace of mind and consistent baking success. It’s well worth the slight delay to ensure your dough rises beautifully and your rolls turn out perfectly fluffy.
How to Store Your Delicious Yeast Rolls
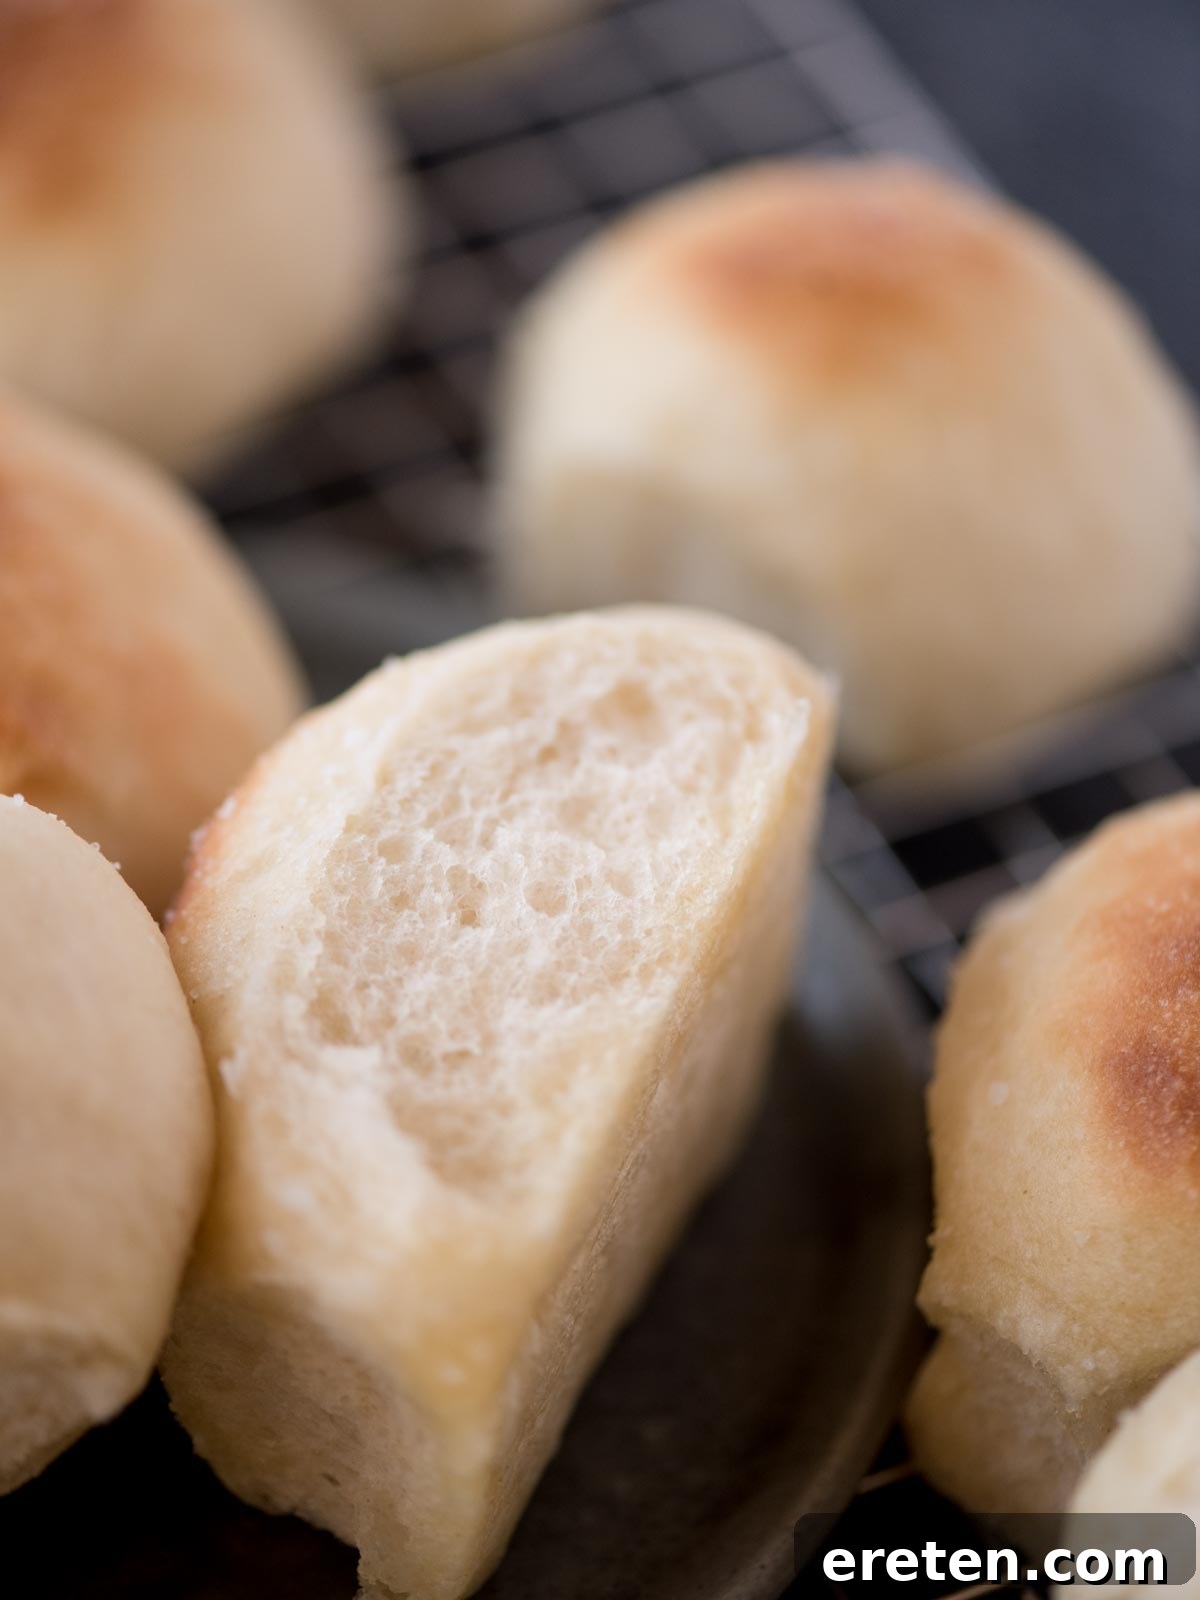
Proper storage is key to maintaining the freshness, softness, and delightful texture of your homemade yeast rolls. While they are undoubtedly best enjoyed fresh from the oven, you can keep them delicious for a few days with the right approach.
To store them at room temperature, follow these steps:
- Cool Completely: This is the most critical first step. Ensure the rolls have cooled completely to room temperature before attempting to store them. If you wrap warm rolls, the trapped heat will create condensation, leading to soggy spots and, eventually, mold. Patience here is rewarded!
- Wrap Tightly: Once cooled, wrap the rolls tightly in plastic wrap or aluminum foil. The goal is to minimize their exposure to air, which is the primary cause of staleness. For extra protection, you can wrap them individually or in small batches.
- Airtight Container: After wrapping, place the rolls in a zip-top bag or an airtight container. This provides an additional barrier against air and helps maintain their moisture.
- Cool, Dry Place: Store the wrapped and contained rolls at room temperature in a cool, dry place, away from direct sunlight or any heat sources. Properly stored, they will remain fresh and wonderfully soft for 1 to 2 days.
A Note on Refrigeration: While it might seem counterintuitive, we strongly recommend avoiding refrigerating your yeast rolls. Although refrigeration can extend the shelf life of many foods, it paradoxically causes yeast-based breads to become stale much more quickly. The cool temperatures accelerate a process called starch retrogradation, where the starch molecules recrystallize, resulting in a dry, crumbly, and tough texture. Your rolls will dry out rapidly in the refrigerator.
How to Freeze Yeast Rolls for Long-Term Freshness
If you’ve baked a large batch or want to enjoy your rolls over a longer period, freezing is an excellent option that preserves their taste and texture beautifully. The secret lies in flash-freezing them first:
- Cool and Flash Freeze: Allow the baked rolls to cool completely to room temperature. Once cooled, arrange them in a single layer on a baking sheet. Place the baking sheet in the freezer for 1 to 2 hours, or until each individual roll is frozen solid. This prevents them from sticking together when stored.
- Package for Freezing: Once flash-frozen, transfer the solid rolls into a heavy-duty freezer bag or an airtight freezer-safe container. Press out as much air as possible from freezer bags to prevent freezer burn. Don’t forget to date and label your package!
Your yeast rolls can be stored in the freezer for up to 2-3 months without a significant loss in quality. When you’re ready to enjoy them, simply remove the desired number of rolls from the freezer and allow them to thaw at room temperature. For optimal enjoyment, follow the rewarming instructions below.
How to Warm Up Yeast Rolls to Restore Freshness
There’s nothing quite like a warm, soft roll, even if it’s a day or two old or has been frozen. Reheating properly can revive that fresh-baked quality. I find that heating yeast rolls in the oven is the best method to restore their original softness and appealing warmth.
- Preheat Your Oven: Set your oven to a moderate temperature, around 300°F (150°C). This gentle heat ensures the rolls warm through without drying out.
- Wrap in Foil: To lock in moisture and prevent the rolls from becoming dry or crusty, wrap them loosely in aluminum foil. Place the foil-wrapped rolls on a baking sheet.
- Heat Through: Place the baking sheet with the wrapped rolls into the preheated oven. Allow them to heat for approximately 10-12 minutes, or until they are warmed thoroughly to the center. For rolls thawed from frozen, this might take a few minutes longer.
- Unwrap and Serve: Just before serving, carefully unwrap the rolls from the foil. This allows any accumulated steam or moisture to escape, preventing them from becoming soggy. Serve them immediately while they are delightfully warm and soft.
Other Warming Options: While the oven is preferred, you can also warm rolls in a microwave for a very quick reheat (use short bursts to avoid toughness) or in an air fryer for a crispy exterior (at a lower temperature for a shorter time, usually without foil).
Frequently Asked Questions About Easy Yeast Rolls
Here are answers to some common questions bakers have when making these delicious and easy yeast rolls:
Yes, you can absolutely substitute warm milk for warm water in this recipe. Using milk will result in a richer, slightly sweeter, and even more tender roll with a softer crust, thanks to the added fat and sugar in the milk. Ensure the milk is warmed to the same temperature as you would warm water for activating the yeast (105ºF-115ºF / 40º-46ºC).
Absolutely! While a stand mixer makes kneading quicker and easier, these rolls can be made by hand. Combine ingredients in a large bowl with a sturdy spoon until a shaggy dough forms, then turn it out onto a lightly floured surface and knead by hand for about 2 minutes, or until smooth and elastic. It’s a great arm workout!
The best way to tell if your dough has risen sufficiently is to perform the “poke test.” Gently press two fingers about half an inch into the dough. If the indentation remains, or springs back very slowly, your dough is ready. If it springs back immediately, it needs more time to rise. If it completely deflates, it might be over-proofed.
Yes, you can! After the first rise (Step 4), you can punch down the dough, form the rolls (Step 7), and then cover the baking dish tightly with plastic wrap. Place it in the refrigerator overnight (up to 12-18 hours). The next day, remove the dish from the refrigerator and let it sit at room temperature for 30-60 minutes while your oven preheats, allowing the rolls to warm up and complete their final rise before baking.
You absolutely can! If you won’t be eating your delicious homemade yeast rolls within 1-2 days, freezing them is the best method to preserve their exquisite taste, delightful texture, and overall freshness for future enjoyment.
Other Easy Bread Recipes You Might Enjoy
If you loved making these quick and easy yeast rolls, you might be ready to explore more delightful bread recipes. Here are some other simple and satisfying options to expand your baking repertoire:
- Honey Dinner Rolls
- Southern Cornbread
- Parmesan Garlic Breadsticks
- Spicy Zucchini Bread
If you make this recipe and love it, we would absolutely adore a 5 ⭐️⭐️⭐️⭐️⭐️ rating! Your feedback helps us continue to provide delicious, free recipes to our wonderful community of bakers.
Easy Yeast Rolls Recipe
10
14
35
59
20 rolls
Equipment
-
kitchenaid stand mixer
-
measuring cups
-
measuring spoons
-
9×13 baking dish
Ingredients
- 1½ cups warm water
- 1 tablespoon yeast
- 2 tablespoons sugar
- 2 tablespoons butter softened
- 1 teaspoon salt
- 3 3/4 cup all purpose flour
- 3 tablespoons butter melted
- coarse kosher salt for topping
Instructions
-
Add the yeast and sugar to warm water and allow the yeast to bloom. This will take about 5 minutes. You’ll know it’s blooming when you see little puffs of expanded yeast float to the top and it gets nice and foamy.
-
Add the softened butter, salt, and 3 cups of flour to the bowl. Turn the mixer on medium speed and mix the ingredients until they are combined. Add in the remaining flour a little at a time just until the dough is only slightly sticky.
-
Knead the dough for 2 minutes on low speed until the dough is smooth.
-
Cover the bowl with plastic wrap or a tea towel. Let it rise in a warm place for 20 minutes.
-
Preheat the oven to 400ºF while the dough rises. Spray a 9×13 baking dish with nonstick spray.
-
Remove the cover on the bowl and punch down the dough. Divide the dough into 20 equal pieces.
-
Roll each piece of dough into a smooth ball and place them in the pan. You want to stretch the top of the ball and pinch the bottom together so that there is a smooth top.
-
Brush them with melted butter and let them rise an additional 15 minutes.
-
Place them in the oven, uncovered for 13 minutes. Turn on the broiler and broil them for 1 minute to get the golden brown tops.
-
Remove the rolls from the oven and brush them with butter. Sprinkle the tops with coarse salt and enjoy!
Notes
Nutrition
Serving:
1roll
,
Calories:
116kcal
,
Carbohydrates:
19g
,
Protein:
3g
,
Fat:
3g
,
Saturated Fat:
2g
,
Polyunsaturated Fat:
0.2g
,
Monounsaturated Fat:
1g
,
Trans Fat:
0.1g
,
Cholesterol:
8mg
,
Sodium:
118mg
,
Potassium:
28mg
,
Fiber:
1g
,
Sugar:
1g
,
Vitamin A:
87IU
,
Vitamin C:
0.001mg
,
Calcium:
5mg
,
Iron:
1mg
Nutrition information is automatically calculated, so should only be used as an approximation.
Additional Info
Bread, Side Dish
American