
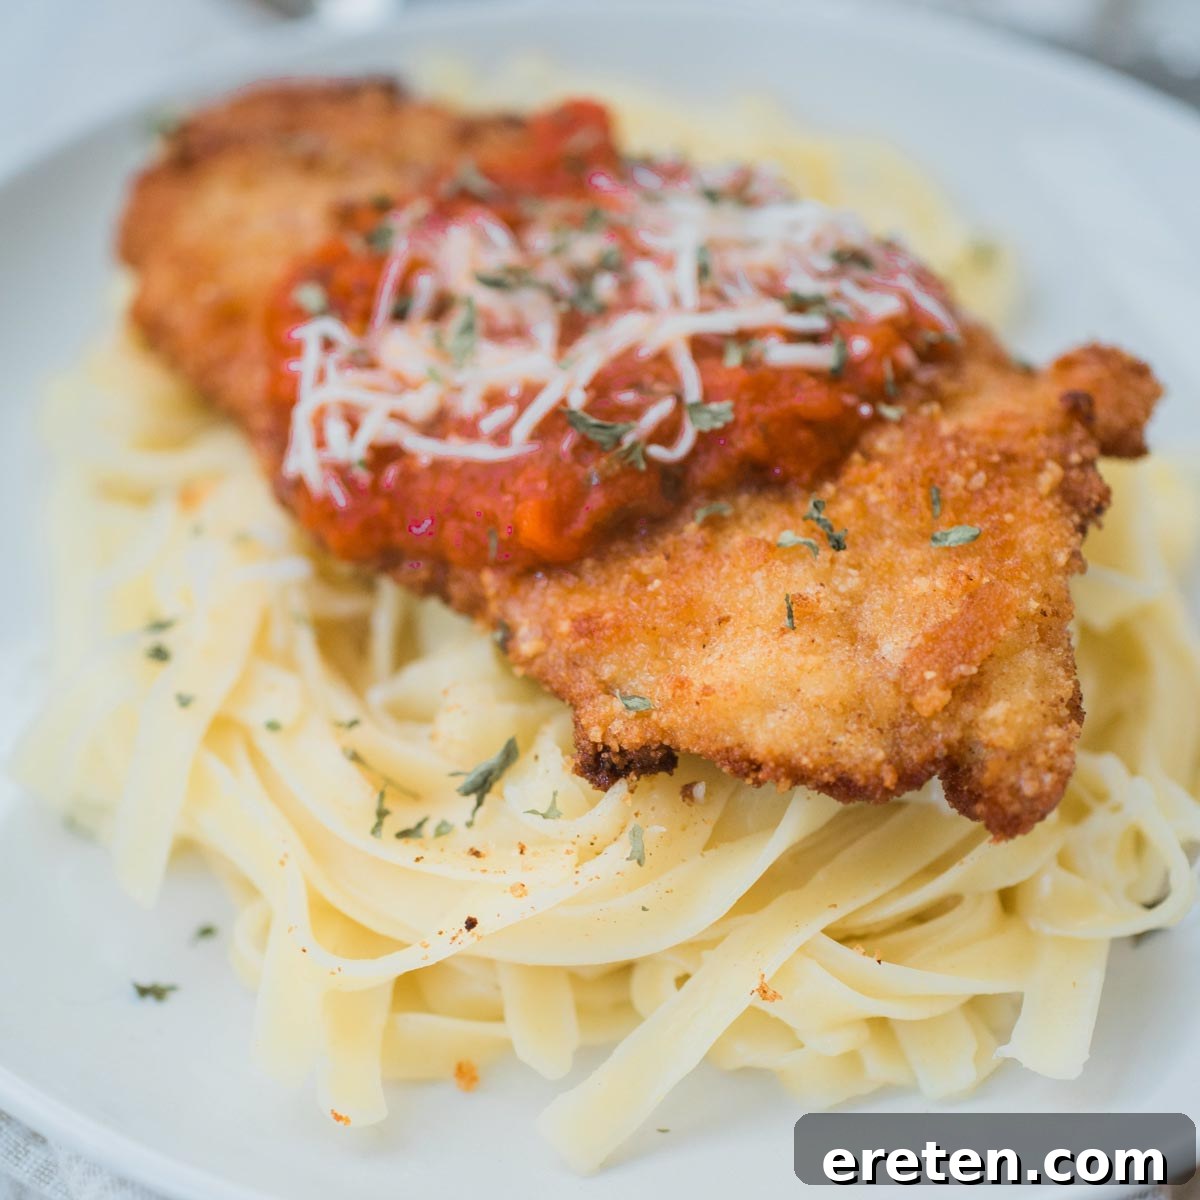
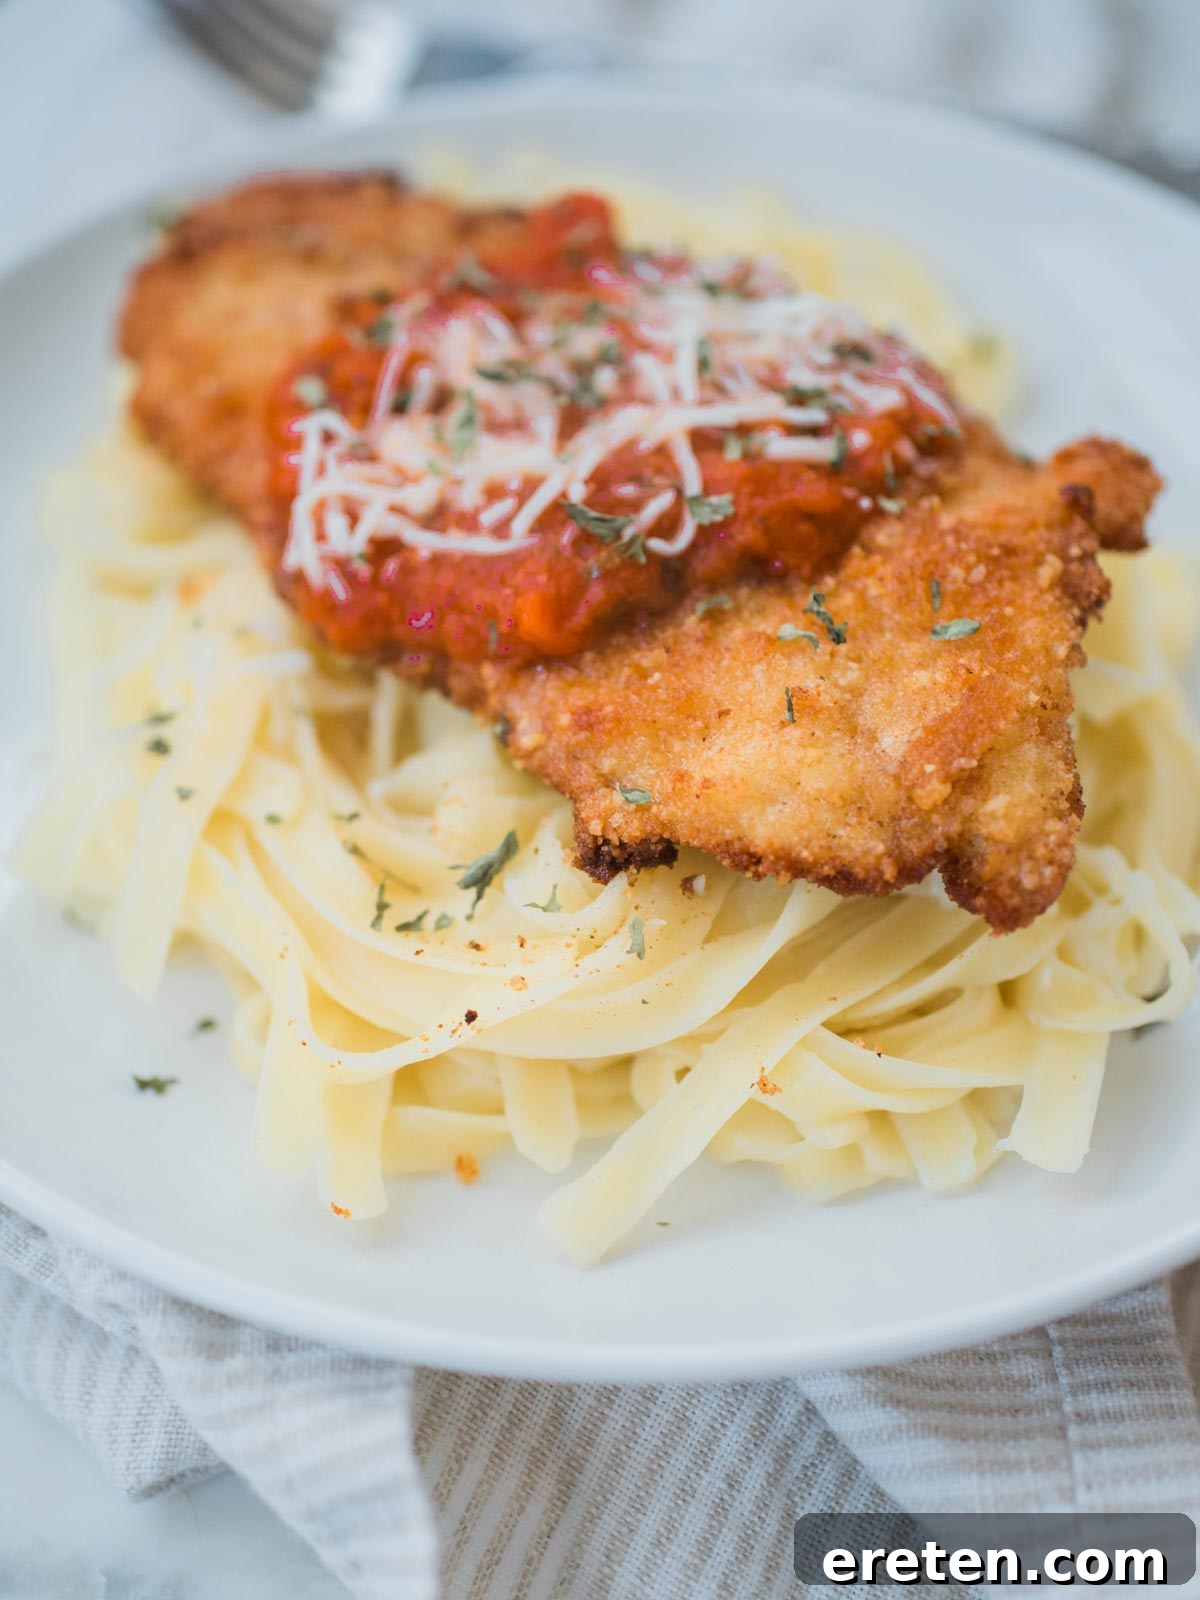
Chicken Parmesan often feels like a dish reserved for fancy Italian restaurants or seasoned home chefs, appearing intimidating with its multi-step process. Many perceive it as an arduous and time-consuming culinary endeavor, but the truth is, a truly delicious and crispy chicken parm is surprisingly accessible for any home cook. With the right techniques and a few clever shortcuts, you can master this classic Italian-American comfort food in under 30 minutes. This recipe focuses on delivering restaurant-quality flavor and texture without the fuss, making it a perfect weeknight meal that will undoubtedly become a staple in your family’s repertoire.
The secret to this recipe’s ease and irresistible taste lies in selecting the right cut of meat and a genius breading combination. We opt for thin-cut chicken breasts, ensuring quick and even cooking, which is paramount for maximum moisture retention and tenderness. Paired with a unique, flavor-packed breading mixture, each bite delivers a satisfying crunch followed by succulent, juicy chicken. Traditionally, chicken parm is served atop a generous bed of buttered spaghetti or fettuccine, creating a perfect canvas for the rich marinara and gooey melted mozzarella. A key tip for optimal enjoyment, especially when considering leftovers, is to add the sauce and cheese just before serving. This simple trick prevents sogginess and keeps your chicken perfectly crispy, making any remaining portions an ideal base for fresh salads or hearty sandwiches. Get ready to impress your family and friends with this effortlessly delicious and incredibly crispy Homemade Chicken Parmesan!
Why You’ll Fall in Love with This Easy Chicken Parmesan Recipe
Prepare to add this homemade chicken parmesan to your list of all-time favorite meals. This isn’t just another chicken recipe; it’s a game-changer for busy weeknights and a crowd-pleaser for any occasion. Here’s why you’ll absolutely adore this easy version, which brings the taste of Italy straight to your dining table:
- Unbelievably Fast & Efficient: Forget spending hours slaving away in the kitchen! This recipe is meticulously designed to be on your table in under 30 minutes. From initial preparation to the final plating, the efficiency built into this method means you can enjoy a gourmet-level meal even on your busiest evenings. It’s the ultimate solution for when you crave something hearty, satisfying, and reminiscent of a classic Italian eatery but are severely short on time.
- Guaranteed Family Favorite: Its classic, comforting flavors and universal appeal make it an instant hit with both discerning adults and picky eaters alike. The irresistible combination of perfectly crispy chicken, tangy marinara, and gooey melted cheese rarely fails to delight. You’ll quickly find consistent requests for “that delicious chicken parm,” solidifying its place as a cherished and frequently requested family meal.
- The Secret to Flavor-Packed Breading: The ingenious use of pre-seasoned garlic butter croutons fundamentally transforms ordinary breaded chicken into something truly extraordinary. These convenient croutons eliminate the tedious need for measuring and mixing multiple spices, instead infusing every delightful crunch with a rich, savory garlic butter flavor that is simply irresistible. This smart shortcut not only saves valuable time but significantly elevates the taste profile, making your breading exceptionally delicious.
- Achieve Restaurant Quality at Home: Imagine savoring the authentic taste and perfect texture of your favorite Italian restaurant’s chicken parm, all from the comfort of your own kitchen. This recipe guides you through simple, foolproof steps to create perfectly crispy, tender chicken that confidently rivals any dine-out experience, proving that gourmet doesn’t have to mean complicated.
- Versatile and Delicious Leftovers: Unlike many dishes that lose their appeal overnight, this Crispy Chicken Parmesan remarkably transforms into fantastic leftovers. By thoughtfully keeping the marinara sauce and cheese separate until the moment of serving, the chicken diligently maintains its pristine crispness. Enjoy these delightful remnants cold on a fresh, vibrant salad, tucked into a hearty sandwich, or reheated for another equally satisfying and quick meal.
- Consistently Tender & Moist Chicken: The fundamental key to preventing tough, dry chicken lies in using thin cutlets. This crucial aspect ensures that the chicken cooks rapidly and evenly, remaining wonderfully moist and tender on the inside while simultaneously achieving that coveted golden-brown, utterly crisp exterior. It’s the perfect balance of texture and juiciness.
Essential Ingredients for Your Easy Chicken Parmesan
Crafting the perfect Crispy Chicken Parmesan begins with assembling a carefully selected list of ingredients. Each component plays a vital role in building the harmonious layers of flavor and texture that make this dish so universally beloved. Here’s what you’ll need to gather for your culinary masterpiece:
- Thin-Cut Boneless, Skinless Chicken Breast: This is the cornerstone of our quick-cooking, tender chicken parm. The “thin-cut” aspect is paramount for this recipe’s success. If your chicken breasts are thicker than about 1/2 inch, you must either purchase pre-sliced thin cutlets (many grocery stores offer these conveniently) or pound them to an even thickness of about 1/4 to 1/2 inch using a meat mallet. This ensures fast, even cooking and keeps the chicken incredibly moist and tender by the time the breading achieves its beautiful golden-brown perfection.
- Large Eggs: Essential for creating the perfect binder. When whisked, the eggs provide a sticky, viscous surface for the breading mixture to adhere to, ensuring a thick, even coating that will crisp up beautifully when fried.
- Garlic Butter Flavored Croutons: This is our celebrated secret weapon for an explosion of flavor with minimal effort! Instead of painstakingly measuring and mixing garlic powder, Italian seasoning, and various other spices into plain breadcrumbs, these pre-seasoned croutons come robustly packed with all the savory, aromatic goodness you need. They impart a deeper, richer, and more complex flavor to the breading that truly sets this chicken parm apart from traditional recipes.
- Panko Breadcrumbs: While traditional finely ground Italian breadcrumbs are common, panko breadcrumbs are an absolute game-changer for achieving superior texture and crunch. Their flaky, airy, and larger crumb structure results in a much crispier, lighter coating than regular breadcrumbs, giving your chicken an incredibly satisfying and delightful bite.
- Grated Parmesan Cheese: This adds a distinct salty, umami depth to the breading mixture, contributing significantly to the overall flavor profile. Beyond taste, it also assists in creating a wonderfully golden-brown and flavorful crust during the frying process.
- Olive Oil: Used generously for pan-frying the chicken to a golden crisp. Choose a good quality extra virgin olive oil for its nuanced flavor, or opt for avocado oil, which boasts a higher smoke point, making it excellent for frying. You’ll need enough to generously coat the bottom of your skillet, ensuring the chicken fries evenly and becomes beautifully golden.
- Marinara Sauce: The heartwarming core of any excellent chicken parm. You have the flexibility to use your favorite store-bought marinara sauce for ultimate convenience – just look for one with high-quality ingredients and a robust, balanced flavor profile. Alternatively, if you possess a cherished homemade sauce recipe, this is the perfect opportunity to showcase its richness.
- Shredded Mozzarella Cheese: The quintessential, melty topping for classic chicken parm. While pre-shredded mozzarella is convenient and melts quickly, using freshly shredded mozzarella will often yield a creamier, more luxurious melt and undeniably superior flavor. Fresh mozzarella, although requiring a bit more effort to shred, consistently offers the best, most authentic Italian taste and texture.
How to Prepare Crispy Chicken Parmesan: A Detailed Step-by-Step Guide
Follow these detailed steps diligently to create perfectly crispy, incredibly juicy, and intensely flavorful chicken parmesan right in your kitchen. Efficiency and precise technique are the hallmarks to achieving that beloved restaurant-quality dish with ease!
- Prepare the Breading Mixture (Crouton Base): Begin by transforming your garlic butter flavored croutons into fine crumbs. Place the entire package of croutons into a food processor and pulse repeatedly until they reach a consistency similar to coarse breadcrumbs. You want a texture that’s fine enough to adhere effectively to the chicken but still retains enough texture to provide a satisfying crunch. Once processed, carefully transfer these flavorful crouton crumbs to a large, wide shallow bowl or, ideally, a sturdy pie plate, which is excellent for dredging.
- Combine All Breading Ingredients: To the bowl containing the crouton crumbs, add the panko breadcrumbs and the grated parmesan cheese. Using a fork or whisk, stir these ingredients thoroughly until they are uniformly combined. This crucial step ensures an even distribution of flavor and texture across every single piece of chicken you bread.
- Prepare the Egg Wash Station: In a second separate shallow bowl (another pie plate works wonderfully here for organization), crack the two large eggs. Using a whisk, beat the eggs vigorously until the yolks and whites are fully incorporated, creating a homogenous, slightly frothy egg wash. This will serve as your essential binding agent for the breading.
- Preheat Skillet and Olive Oil: Place a large, heavy-bottomed skillet (a cast iron pan or a good quality stainless steel skillet works exceptionally well for even heating) over medium heat. Pour in enough olive oil to generously coat the entire bottom of the pan, aiming for about 1/4 inch deep. Allow the oil to heat up for several minutes until it begins to shimmer slightly and looks fluid, but critically, do not let it smoke. The correct oil temperature is paramount for achieving a beautifully golden and exquisitely crispy crust without burning.
- Dredge the Chicken in Egg: Take one thin-cut chicken breast at a time and completely submerge it into the whisked egg mixture, ensuring both sides are thoroughly coated. Lift the chicken gently, allowing any excess egg to drip back into the bowl before moving to the next step.
- Coat the Chicken in Breading: Immediately transfer the egg-coated chicken breast to the prepared crouton-panko-parmesan mixture. Gently but firmly press the breading onto both sides of the chicken, ensuring an even and comprehensive coating. Do not be timid; make sure every inch of the chicken surface is covered to maximize crispiness and flavor.
- Pan-Fry the Chicken to Perfection: Carefully place the fully breaded chicken breast into the preheated skillet with the shimmering hot oil. Cook for approximately 2-3 minutes per side, or until it develops a beautiful golden-brown color and is thoroughly cooked through. The inherent thinness of the chicken cutlets ensures remarkably quick cooking. It is absolutely vital to cook only one or two pieces at a time, depending on the precise size of your skillet, to stringently avoid overcrowding the pan. Overcrowding will dramatically drop the oil temperature, causing the chicken to steam rather than fry, resulting in a decidedly soggy, rather than crispy, outcome.
- Drain Excess Oil: As each individual piece of chicken finishes cooking and achieves its golden crispness, carefully remove it from the skillet using tongs. Immediately transfer it to a plate that has been lined with several layers of paper towels. This crucial step will help absorb any lingering excess oil, which is key to maintaining maximum crispiness.
- Top with Sauce and Cheese: Once all the chicken pieces have been cooked to perfection and thoroughly drained, it’s time for the final, delectable topping stage. You can either place all the cooked chicken breasts back into the clean skillet (you might need to do this in batches again, or use a larger oven-safe baking dish for convenience). Top each piece with approximately 2 generous tablespoons of your marinara sauce, followed by an equally generous 2 tablespoons of shredded mozzarella cheese.
- Melt the Cheese to Gooey Perfection: You have two excellent options for melting the cheese to a bubbly, golden state:
- Skillet Method: If using the skillet, cover it tightly with a lid and continue heating on low to medium-low heat for a few minutes until the mozzarella is beautifully bubbly, completely melted, and wonderfully gooey.
- Broiler Method: Alternatively, for a slightly golden, blistered cheese top, transfer the chicken pieces to a casserole baking dish or a sturdy sheet pan. Pop it under a preheated broiler for a brief 1-2 minutes, keeping an extremely close eye on it to prevent burning, until the cheese is gorgeously melted and lightly golden brown.
- Serve Immediately with Pasta: Once the cheese is melted and bubbling, serve your Crispy Chicken Parmesan hot and fresh! It’s traditionally enjoyed over a generous pile of buttered pasta, such as classic spaghetti or elegant fettuccine, perhaps with a little extra marinara sauce on the side. Savor every single mouthwatering bite!
Expert Tips and Tricks for Perfect Chicken Parmesan Every Time
Achieving restaurant-quality Chicken Parmesan at home is simpler than you might imagine, especially when armed with these insider tips and tricks. Elevate your dish from merely good to absolutely unforgettable, ensuring a consistent triumph in your kitchen!
- Timing is Everything for Crispiness: To guarantee your chicken stays wonderfully crispy, always strategically add the marinara sauce and the mozzarella cheese right before you’re about to serve and enjoy the meal. Storing the chicken with the toppings already applied will inevitably lead to a soggy crust, particularly when dealing with leftovers. This simple, yet crucial, step makes an enormous difference in maintaining the desired texture.
- Mastering the Art of Leftovers: Properly cooked chicken parmesan makes for truly incredible leftovers, but only if stored and reheated correctly. Without the sauce and cheese already applied, the breaded chicken reheats beautifully, almost perfectly restoring its original crisp texture. Enjoy it conveniently sliced cold on a fresh, vibrant green salad for a light, healthy lunch, or layer it generously into a hearty sandwich for a satisfying and substantial meal.
- The Undeniable Importance of Thin Cutlets: This point cannot be stressed enough – thin chicken breasts are the absolute key to success for this recipe! Whether you wisely choose to buy them pre-sliced (a fantastic time-saver) or meticulously pound boneless, skinless chicken breasts yourself, always aim for an even thickness of approximately 1/4 to 1/2 inch. Thin cutlets ensure rapid, uniform cooking, which is vital for preventing the chicken from drying out and becoming tough. This precise thickness allows the breading to crisp up to perfection without concurrently overcooking the delicate meat inside, resulting in a delightfully tender, supremely juicy interior every single time.
- Smart Shortcut: Save Time with Pre-Sliced Chicken: Many modern grocery stores now conveniently offer boneless chicken breasts that are already expertly thinly sliced into perfect cutlets. Opting for these can significantly cut down on your meal preparation time, making this already quick recipe even faster and more appealing for busy schedules.
- Achieve the Perfect Internal Temperature: For the absolute best results – a beautifully crispy, golden-brown exterior coupled with a tender, juicy interior – ensure your chicken diligently reaches an internal temperature of 165ºF (74ºC). Use a reliable meat thermometer for accuracy. It is critically important not to cook it beyond this temperature, as even slight overcooking is the primary culprit for tough, dry chicken.
- Choose Your Sauce Wisely: There’s no need to overcomplicate the sauce component! Whether you personally prefer a rich, lovingly homemade tomato sauce or a high-quality, flavorful store-bought marinara, the golden rule is simple: use the one your family genuinely loves and enjoys. The sauce should elegantly complement the savory chicken, never overpower it. A good quality jarred sauce can be a fantastic, convenient shortcut that absolutely doesn’t compromise on the overall delicious flavor.
- Crucial Step: Pat Chicken Dry: Before you even consider dredging the chicken in the egg wash, take a few moments to meticulously pat each cutlet thoroughly dry with clean paper towels. This crucial preliminary step significantly helps the egg wash and subsequent breading adhere much better to the chicken surface, leading to a notably crispier, more even, and superior coating.
- Avoid Overcrowding the Pan at All Costs: Frying chicken in precise, manageable batches is absolutely essential for culinary success. Overcrowding the skillet dramatically lowers the oil’s temperature, which in turn causes the chicken to steam rather than fry. This detrimental effect inevitably results in a greasy, disappointingly soggy crust instead of the desired crisp, golden-brown perfection. Always give each piece of chicken ample space to cook properly and develop its ultimate crispness.
What to Serve Alongside Your Delicious Chicken Parmesan
While Chicken Parmesan is most commonly and famously served over a comforting bed of pasta with extra marinara, its inherent versatility allows for a surprisingly wide array of delightful accompaniments. These fantastic ideas will help you complete your meal, catering to various tastes, dietary preferences, and occasions, making every dining experience memorable:
- Classic Pasta Pairings (The Traditional Choice):
- Spaghetti or Fettuccine: These are the ultimate, quintessential traditional choices! Tossed simply with a touch of butter, a drizzle of high-quality olive oil, or a light coating of marinara sauce, these long noodles catch and hold the rich sauce beautifully, providing that familiar, comforting texture.
- Penne or Rigatoni: For those who distinctly prefer a pasta with a more substantial bite and a greater surface area, these tubular shapes are excellent for capturing and holding rich, chunky sauces within their hollows and ridges.
- Angel Hair Pasta (Capellini): A delicate and incredibly fine option that cooks remarkably quickly and offers a wonderfully light mouthfeel, perfect for a slightly less heavy accompaniment.
- Lighter & Healthier Alternatives (For a Fresh Spin):
- Zucchini Noodles (Zoodles): A fantastic low-carb and gluten-free alternative. Lightly sautéed until just tender-crisp or even served raw, they offer a wonderfully fresh and vibrant contrast to the richness of the chicken.
- Roasted Spaghetti Squash: Another excellent vegetable-based option that naturally mimics the stringy texture of pasta beautifully, while also adding a subtly sweet and earthy flavor to your meal.
- Simple Green Salad: A crisp, refreshing mixed greens salad, dressed lightly with a bright vinaigrette, provides a perfect, palate-cleansing counterpoint to the richness and robust flavors of the chicken.
- Flavorful Vegetable Sides (Adding Color and Nutrition):
- Roasted Broccoli: Florets roasted until they are tender-crisp with a delightful hint of char are a simple yet incredibly delicious and nutritious side dish.
- Sautéed Asparagus: A quick, elegant, and vibrant green vegetable that inherently pairs wonderfully with classic Italian flavors.
- Garlic Green Beans: Fresh green beans, steamed or lightly sautéed with fragrant garlic, add a pop of vibrant color and a satisfying fresh crunch to your plate.
- Roasted Brussels Sprouts: Roasting brings out their natural sweetness and creates a lovely caramelized exterior, transforming them into a surprisingly appealing side.
- Bread & Grains (For Sopping Up Every Last Drop):
- Garlic Bread: No traditional Italian-inspired meal feels truly complete without warm, crusty garlic bread, perfectly buttered and toasted, ready to soak up any precious extra sauce.
- Crusty Italian Bread: Simple yet incredibly satisfying, a fresh loaf of crusty Italian bread is perfect for dipping directly into the marinara sauce.
- Creamy Polenta: A comforting and velvety creamy alternative to pasta, offering a different, luxurious texture and a mild corn flavor that complements the chicken beautifully.
- Finishing Touches (For an Extra Flourish):
- Fresh Basil: A light sprinkle of freshly chopped basil leaves over the finished dish adds a burst of vibrant color and an aromatic, herbaceous freshness that brightens the entire plate.
- Extra Grated Parmesan: Always offer a small bowl of additional grated Parmesan cheese at the table for those who simply can’t get enough of that wonderful, salty, cheesy kick.
Storing and Reheating Your Homemade Chicken Parmesan
One of the many wonderful advantages of preparing homemade meals is the exciting potential for delicious leftovers. However, proper storage and reheating techniques are absolutely crucial for ensuring that you can enjoy your Crispy Chicken Parmesan days after it’s initially made, maintaining its delightful taste and texture as if it were fresh off the skillet.
- Cooling is the Critical First Step: Before attempting to store any leftovers, it’s absolutely essential to allow the cooked chicken parmesan to cool completely to room temperature. Placing hot food directly into the refrigerator can create unwanted condensation, which is a primary cause of sogginess, and can also potentially affect overall food safety by raising the internal temperature of the fridge.
- Optimal Storage for Preserving Crispness: For the absolute best results and to meticulously preserve that coveted crispy coating, it is highly recommended to store leftover breaded chicken cutlets separately from the pasta sauce and cheese. Place the thoroughly cooled chicken in a dedicated airtight container in the refrigerator. Any remaining marinara sauce and shredded mozzarella should be stored in their own separate airtight containers. This segregation is vital for texture.
- Refrigeration Lifespan: When properly stored in the refrigerator using airtight containers, your chicken parmesan (and its carefully separated components) will safely remain fresh and wonderfully delicious for up to 3 days.
- Reheating for Maximum Crispness (Avoid the Microwave!): To successfully bring your chicken parmesan back to its original crispy glory, it is strongly advised to avoid using the microwave if at all possible, as it notoriously tends to make breaded items unfortunately soggy. Instead, opt for these superior reheating methods:
- Air Fryer (Highly Recommended!): This is arguably the absolute best method for reheating breaded chicken. Place the cooled chicken cutlets in a single, even layer in your air fryer basket. Heat at 350°F (175°C) for approximately 5-7 minutes, or until they are thoroughly heated through and have regained their delightful crispness.
- Toaster Oven/Conventional Oven: Preheat your toaster oven or conventional oven to 375°F (190°C). Place the chicken cutlets on a baking sheet and heat for 10-15 minutes, making sure to flip them halfway through, until they are hot, crispy, and evenly warmed.
- Skillet Reheat: For a quick stovetop option, reheat the chicken in a lightly oiled skillet over medium heat for a few minutes per side until fully warmed through and satisfactorily crisped.
- Adding Toppings After Reheating: Once your chicken has been successfully reheated to your desired level of crispness, it is then time to add your warmed marinara sauce and either fresh or reheated mozzarella cheese. You can quickly melt the cheese under a broiler for a minute or two, or simply microwave the sauce and cheese separately and add them to the hot, crispy chicken just before serving. This ensures the chicken retains its perfect texture while the toppings are wonderfully warm and perfectly gooey.
Frequently Asked Questions About Chicken Parmesan
Chicken Parmesan and Chicken Parmigiana refer to the exact same beloved dish. The difference in nomenclature often boils down to regional variations in Italy and how the dish was adapted and popularized in Italian-American cuisine. ‘Parmigiana’ specifically references the city of Parma or, more precisely, the Parmigiano-Reggiano cheese originating from that esteemed region. While the name historically implies the use of Parmigiano cheese, the dish as we commonly know it today typically incorporates a variety of other cheeses, most notably creamy mozzarella. So, whether you lovingly call it Chicken Parmesan or elegantly refer to it as Chicken Parmigiana, you are indeed enjoying the same delicious, breaded chicken cutlet topped with rich sauce and melted cheese.
This is a very common and understandable point of confusion! While the final, beautifully melted topping on Chicken Parmesan is predominantly gooey mozzarella cheese, the name “Parmesan” primarily originates from the essential inclusion of grated Parmesan cheese within the breading mixture itself. Parmesan cheese contributes a distinctive salty, umami-rich, and nutty flavor, and also plays a crucial role in helping to create that wonderfully golden-brown and flavorful crust during the frying process. So, it is the fundamental presence of Parmesan cheese in the breading, rather than exclusively the topping, that gives the dish its enduring “Parmesan” identity, even though mozzarella undeniably plays a starring, visually prominent role in the melted layer.
Tough chicken parmesan is almost always a direct result of overcooking the meat. Chicken breasts are inherently lean and can unfortunately become dry, stringy, and fibrous very quickly if they are cooked for too long or at an excessively high temperature. The undisputed key to achieving consistently tender, juicy chicken is to specifically use thin cutlets (approximately 1/4 to 1/2 inch thick). These precisely thin pieces cook remarkably rapidly, which allows the breading to become perfectly golden and crispy without the interior drying out. Always ensure you cook to an internal temperature of 165°F (74°C) and promptly remove from the heat as soon as this temperature is reached.
Preventing soggy chicken parmesan, especially when considering the longevity and quality of leftovers, is entirely about strategic timing and meticulous storage. The primary culprit for sogginess is the marinara sauce and melted cheese sitting on the crispy breading for an extended period. For the absolute best results, always add the marinara sauce and melted mozzarella cheese to the chicken just before serving. When storing any leftovers, it is paramount to keep the breaded chicken cutlets completely separate from the sauce and cheese in individual airtight containers. When reheating, utilize an air fryer or oven to effectively restore the chicken’s crispness, and then add the warmed sauce and freshly melted cheese just before eating.
Yes, you absolutely can bake Chicken Parmesan as a lighter, alternative cooking method, although traditional pan-frying typically yields the crispiest and most authentic results. To bake: prepare the breaded chicken cutlets as instructed for dredging, then place the individual pieces on a wire rack that is set over a baking sheet (this clever setup helps air circulate evenly around the chicken for crispier bottoms). Bake in a preheated oven at 400°F (200°C) for approximately 15-20 minutes, or until the chicken is thoroughly cooked through and golden, remembering to flip it halfway for even browning. Add the marinara sauce and cheese during the last 5 minutes of baking, or briefly broil until the cheese is beautifully melted and bubbly.
While boneless, skinless chicken breasts are the traditional choice for Chicken Parmesan due to their lean meat and the ease with which they can be pounded into uniformly thin cutlets, you could technically experiment with boneless, skinless chicken thighs. However, chicken thighs possess a higher fat content and a distinctly different texture, which might slightly alter the classic ‘parmesan’ feel and flavor profile. If you choose to use thighs, ensure they are also meticulously pounded thin for consistent and even cooking. For a truly authentic and classic Chicken Parmesan experience, thinly cut chicken breast cutlets are universally recommended.
Yes, this recipe is indeed freezer-friendly, especially the perfectly breaded and cooked chicken cutlets themselves! To freeze: after frying the chicken and allowing it to cool completely to room temperature, arrange the individual cutlets on a baking sheet and place them in the freezer until they are completely solid (this prevents them from sticking together). Once thoroughly frozen, transfer the solid chicken cutlets to a freezer-safe airtight container or a heavy-duty freezer bag. They will maintain their quality and flavor for up to 2-3 months. When you are ready to enjoy them, reheat the frozen chicken in an oven or air fryer until they are hot, crispy, and cooked through, then proceed to add the sauce and cheese as directed in the recipe.
More Delicious Recipes You’ll Love
- Crockpot Sweet Honey Garlic Chicken
- Sticky Sweet Chicken Meatballs
- Creamy One Pot Chicken Alfredo
- Easy Baked Chicken
Crispy Chicken Parmesan Recipe
By: Kara Myers
Servings: 4
Average Rating: 5 stars from 4 votes
Ingredients
- 4 thin-cut chicken breasts
- 2 large eggs
- 1 package garlic butter flavored croutons
- 1/3 cup panko breadcrumbs
- 1/4 cup grated Parmesan cheese
- Olive oil (for frying, as needed)
- 1/2 cup marinara sauce
- 1/2 cup shredded mozzarella cheese
Instructions
- Place croutons in a food processor and pulse until they reach a fine breadcrumb consistency.
- Combine the processed croutons, panko breadcrumbs, and grated Parmesan cheese in a shallow dish (a pie plate works well), and stir thoroughly to combine.
- In a separate shallow dish, crack the eggs and whisk them vigorously until thoroughly combined.
- Preheat a large skillet over medium heat. Add enough olive oil to generously coat the bottom of the pan (about 1/4 inch deep).
- Take each chicken breast, dip it completely into the whisked egg mixture, ensuring both sides are fully coated, and allow any excess egg to drip off.
- Immediately transfer the egg-coated chicken to the breading mixture. Gently press the breading onto both sides, ensuring the entire piece is thoroughly covered.
- Carefully place the breaded chicken into the heated skillet. Cook for approximately 2-3 minutes per side, or until it turns a beautiful golden brown and is cooked through.
- Cook one piece of chicken at a time (or two, if your skillet is large enough) to avoid overcrowding the pan and maintaining a consistent oil temperature. This ensures maximum crispiness.
- Once each piece is cooked, remove it from the skillet and place it on a paper towel-lined plate to drain any excess oil.
- After all chicken pieces are cooked and drained, add 2 tablespoons of marinara sauce to the top of each piece, followed by 2 tablespoons of shredded mozzarella cheese.
- To melt the cheese: Either place the chicken back in the skillet with a lid and heat on low until the cheese melts, or transfer the chicken to a casserole dish and place under a preheated broiler for about 1 minute until the cheese is bubbly and beautifully melted.
- Serve your Crispy Chicken Parmesan immediately over a generous pile of buttered pasta. Enjoy every delicious bite!
Nutrition
Serving: 1 chicken breast
Calories: 353 kcal
Carbohydrates: 11 g
Protein: 38 g
Fat: 18 g
Saturated Fat: 6 g
Polyunsaturated Fat: 7 g
Trans Fat: 0 g
Cholesterol: 181 mg
Sodium: 583 mg
Fiber: 0 g
Sugar: 0 g
Nutrition information is automatically calculated and should be used as an approximation only.