
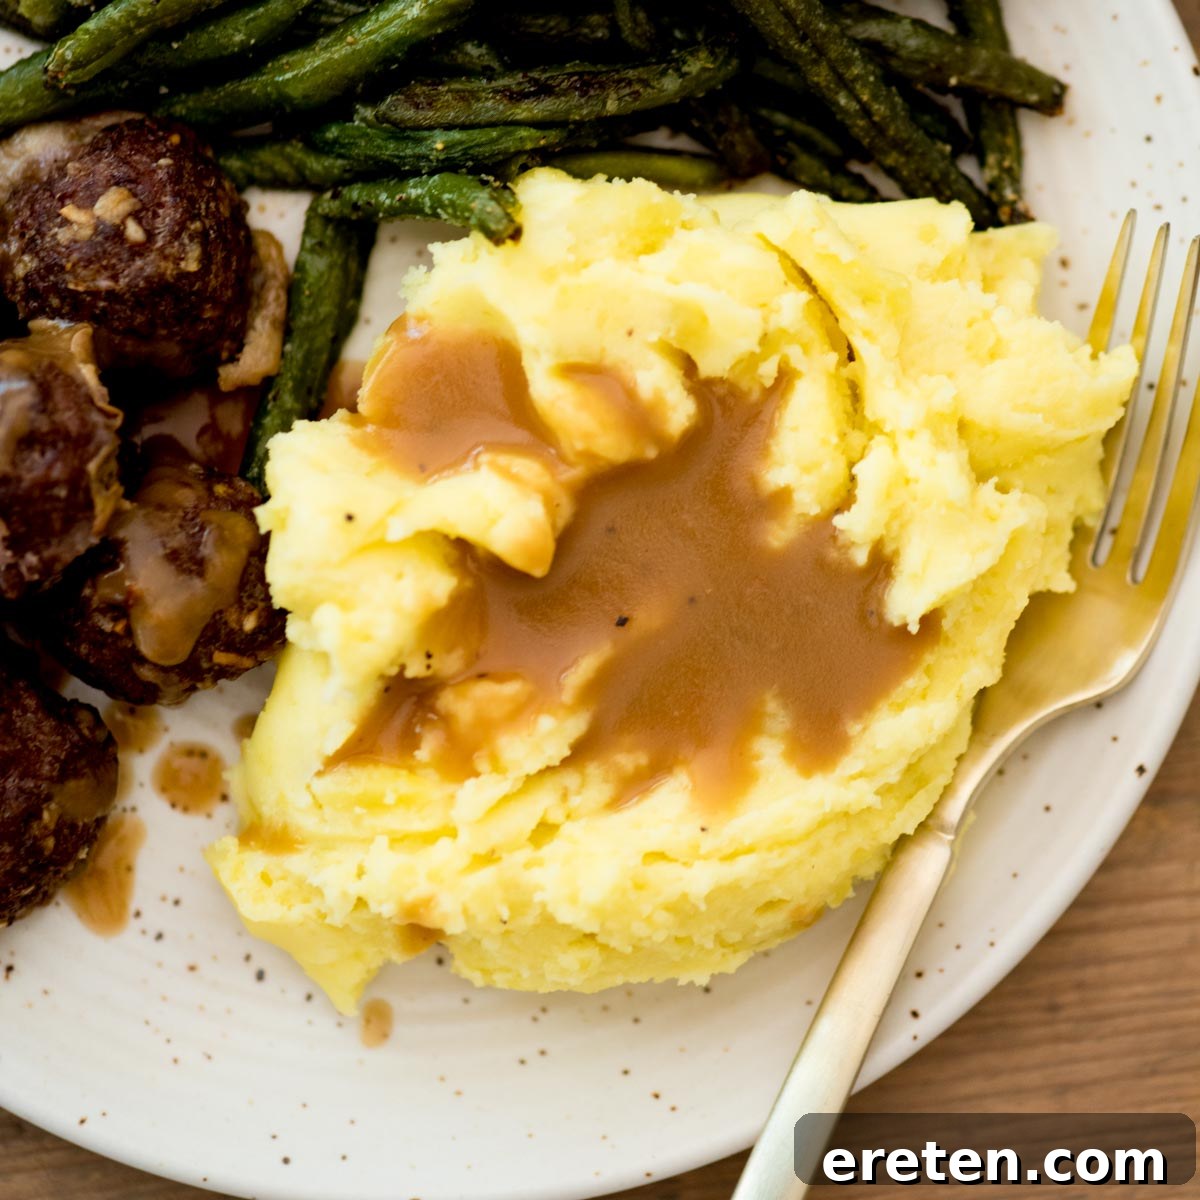
Have you ever shied away from preparing homemade brown gravy, believing it to be an overly complicated task? Perhaps you thought it required an elaborate beef roast or a large meat dish just to yield those precious pan drippings. It’s time to dispel those myths! You absolutely can enjoy a rich, flavorful, and incredibly satisfying beefy brown gravy without embarking on a grand culinary project. This recipe for silky Southern Brown Gravy simplifies the process, asking for just three core ingredients and a mere few minutes of your time. The best part? The sheer delight on people’s faces when you proudly announce, “I made this myself!”
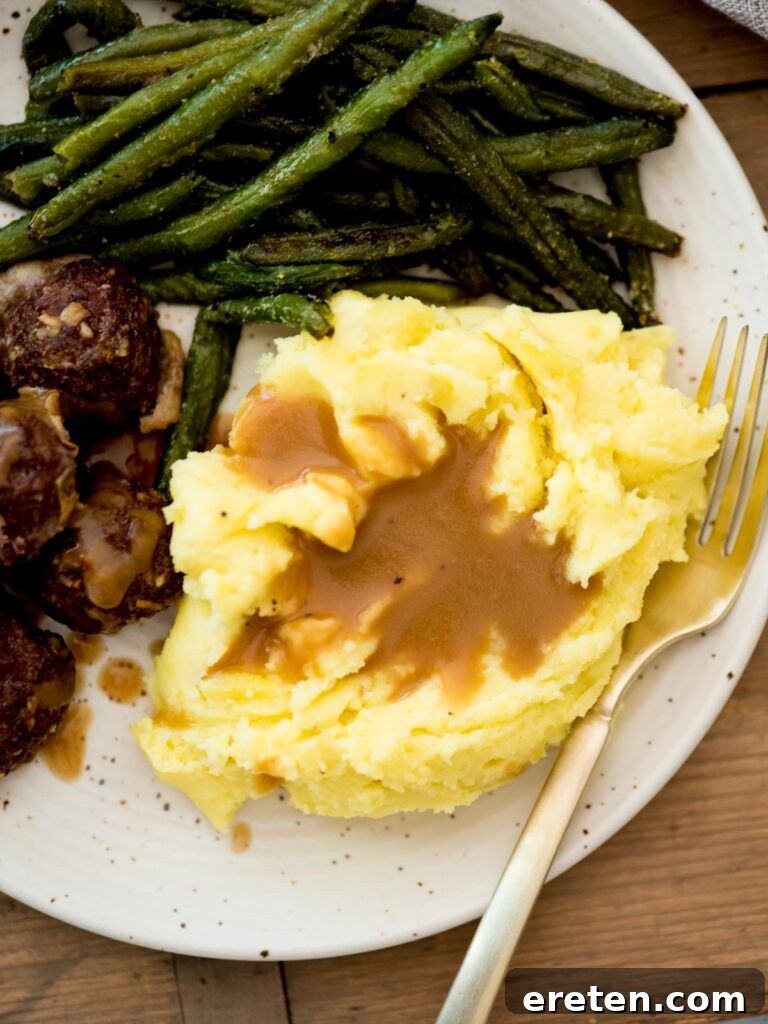
Discover the Magic of This Easy Homemade Brown Gravy Recipe
The notion that crafting your own brown gravy is an arduous culinary feat is a common misconception that this recipe is here to shatter. Imagine serving a lusciously thick, deeply flavored, beefy brown gravy that requires no prior roasting, no pan drippings, and minimal effort. This 5-star, 3-ingredient brown gravy isn’t just easy; it’s a revelation, proving that gourmet flavors are well within your reach. What’s more, not a single one of these essential ingredients demands hours of prep or a trip to the butcher for a special roast.
The culinary versatility of this brown gravy is truly remarkable. It’s equally at home gracing an elegant dinner table, elevating a holiday meal, or serving as the ultimate comfort food companion to a heaping bowl of fried chicken and mashed potatoes enjoyed in your coziest pajamas. I am thrilled to guide you through the simple steps to create this culinary masterpiece. Forget the elaborate beef roast and prepare to hop aboard the gravy train, where the destination is always “Delicious,” and the journey is surprisingly smooth!
Why This Stands Out as the Best Beef Gravy Recipe
Gravy often carries an underserved reputation for being tricky or intimidating to prepare. I’m here to assure you that it doesn’t have to be, especially with this foolproof method. This easy homemade gravy recipe earns its title as the best because of several key advantages:
- Effortless and Quick Preparation: Making this gravy with beef broth is not only incredibly simple but also remarkably fast. You’ll achieve that coveted lovely, velvety texture without the lengthy process of waiting for meat drippings. It’s perfect for busy weeknights or when unexpected guests arrive, offering gourmet taste in a fraction of the time.
- No Pan Drippings Required: A major hurdle for many home cooks is the prerequisite of pan drippings, often tying gravy to a large roast. This recipe liberates you from that requirement, relying instead on readily available beef broth or stock. While meat drippings certainly work if you have them, they are by no means essential for achieving incredible depth and flavor. This means you can whip up delicious gravy anytime the craving strikes!
- Bursting with Customizable Flavor: This foundational recipe is inherently rich in flavor, providing a robust beefy base. But its true brilliance lies in its customizability. You can easily adapt it with various seasonings like garlic or onion powder, and even experiment with different types of broth (though beef is recommended for classic brown gravy) to suit your specific meal or personal preferences. Adding a dash of Worcestershire sauce, for instance, can introduce an irresistible umami kick.
- Lower Sodium Content: Unlike many store-bought gravy mixes that are often laden with excessive sodium, this homemade recipe offers a significantly healthier alternative. By using unsalted broth and butter, you gain complete control over the salt content, allowing you to tailor it perfectly to your taste and dietary needs. This makes it a great choice for those monitoring their sodium intake without sacrificing flavor.
Essential Ingredients for Homemade Brown Gravy
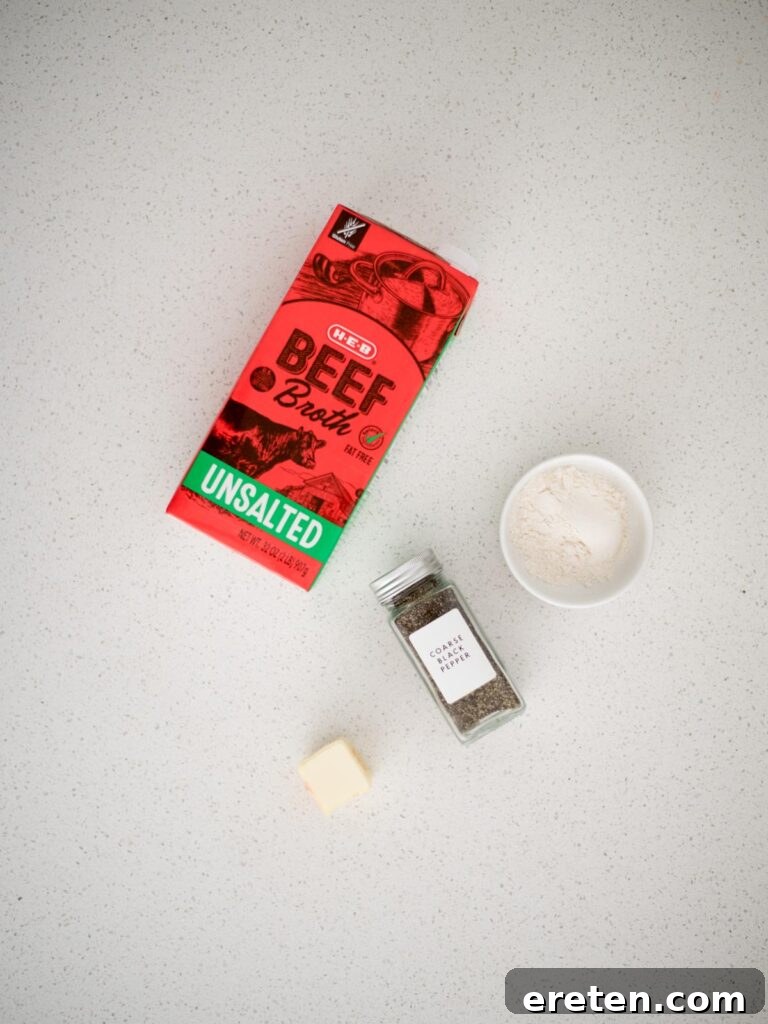
Creating this rich and incredibly easy brown gravy demands only three primary ingredients, with salt and pepper added to taste. Here’s a closer look at what you’ll need and why:
- Beef Broth or Beef Stock: This forms the flavorful foundation of your gravy. I highly recommend using unsalted varieties, as it allows you to precisely control the overall seasoning. Good quality beef broth provides a deep, savory umami base that is crucial for classic brown gravy. While beef bouillon cubes mixed with water can be a substitute in a pinch, be mindful that bouillon tends to be very high in sodium, which will significantly impact the final taste and nutritional profile of your gravy, making it harder to adjust the salt to your liking.
- Butter: Unsalted butter is my preferred choice here, primarily for salt control and its ability to create a smooth, rich roux. It contributes a wonderful richness and helps create the essential thickening base. However, feel free to experiment with other fats for different flavor nuances. Rendered beef drippings (if you have them!), lard, bacon drippings, bacon fat, or even a neutral oil like olive oil or vegetable oil can be used. Each will impart a subtle difference in taste, so choose what best complements your meal – bacon fat, for example, will give a smoky undertone.
- All-Purpose Flour: This common pantry staple is crucial for thickening the gravy, transforming it from a liquid into a luxuriously smooth sauce. The flour combines with the melted fat to form a roux, which is the base of many classic gravies and sauces. Cooking the flour properly in fat is essential not only for thickening but also for developing a nutty flavor and eliminating any raw flour taste. If you require a gluten-free option, please refer to the dedicated section below on Gluten-Free Brown Gravy for suitable alternatives, such as a cornstarch slurry. A cornstarch slurry is made by blending cornstarch with an equal amount of cold water until completely smooth, then whisking it into hot liquid to thicken without lumps.
- Salt and Pepper: These fundamental seasonings elevate all the other flavors in your gravy, bringing them into harmonious balance. For salt, I typically reach for coarse kosher salt or sea salt, as their larger crystals provide a more controlled and nuanced seasoning. This allows for layering of flavor without over-salting. When it comes to pepper, freshly ground black pepper from a pepper grinder offers superior aroma and taste compared to pre-ground versions, enhancing the overall sensory experience of your gravy. Remember to taste and adjust the seasoning carefully, especially if using salted broth or butter, as these already contribute to the sodium content.
How to Master Homemade Brown Gravy from Scratch
Even if this marks your very first foray into making a creamy, savory gravy, rest assured, this recipe is incredibly straightforward. You’ll quickly discover your new go-to gravy recipe, delivering impressive results every time. Follow these simple steps to create a truly delicious brown gravy that will impress everyone:
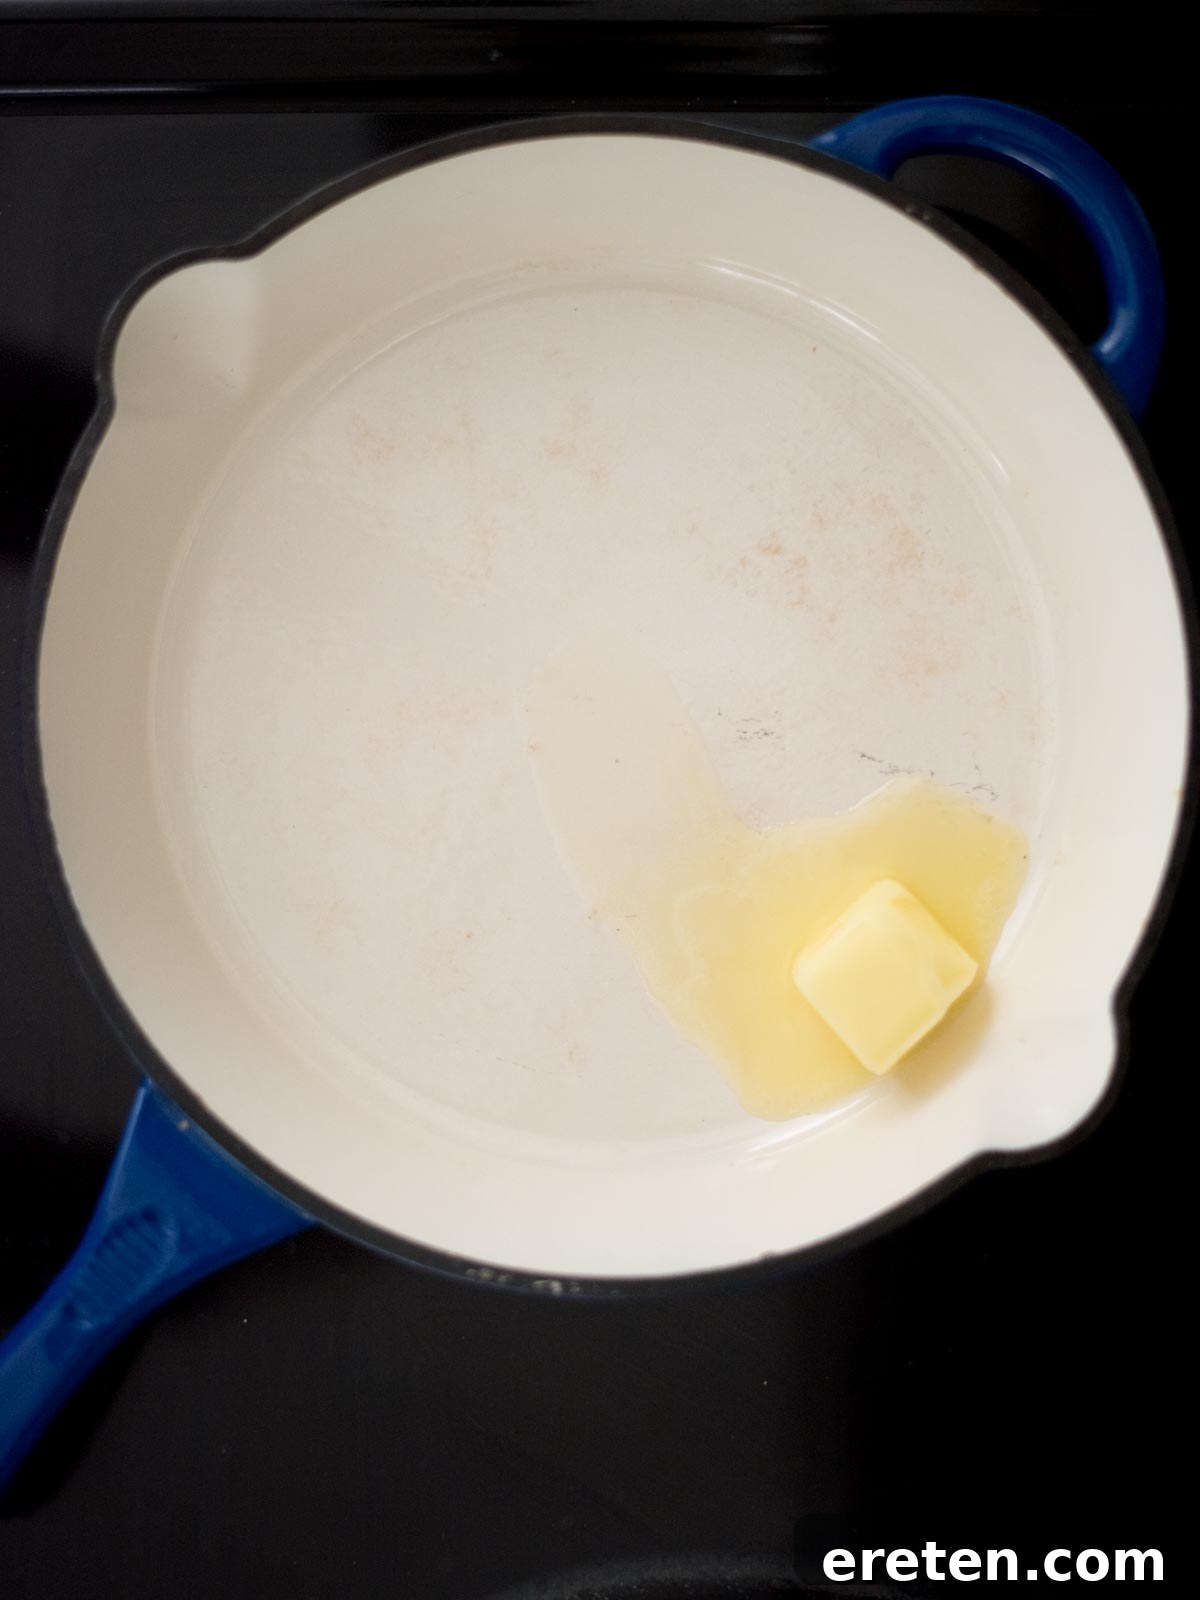
- Prepare Your Skillet: Begin by placing a large skillet or saucepan over medium-high heat on your stovetop. Allowing the skillet to heat properly before adding ingredients is key for an even cooking process, ensuring your butter melts smoothly and your roux browns consistently without scorching.
- Melt the Butter: Add the specified amount of butter to the hot skillet. Let it melt completely, swirling the pan gently to coat the bottom. Watch for it to become fragrant and slightly shimmering, which signals it’s ready for the next step. This melted fat is the foundation of your roux.
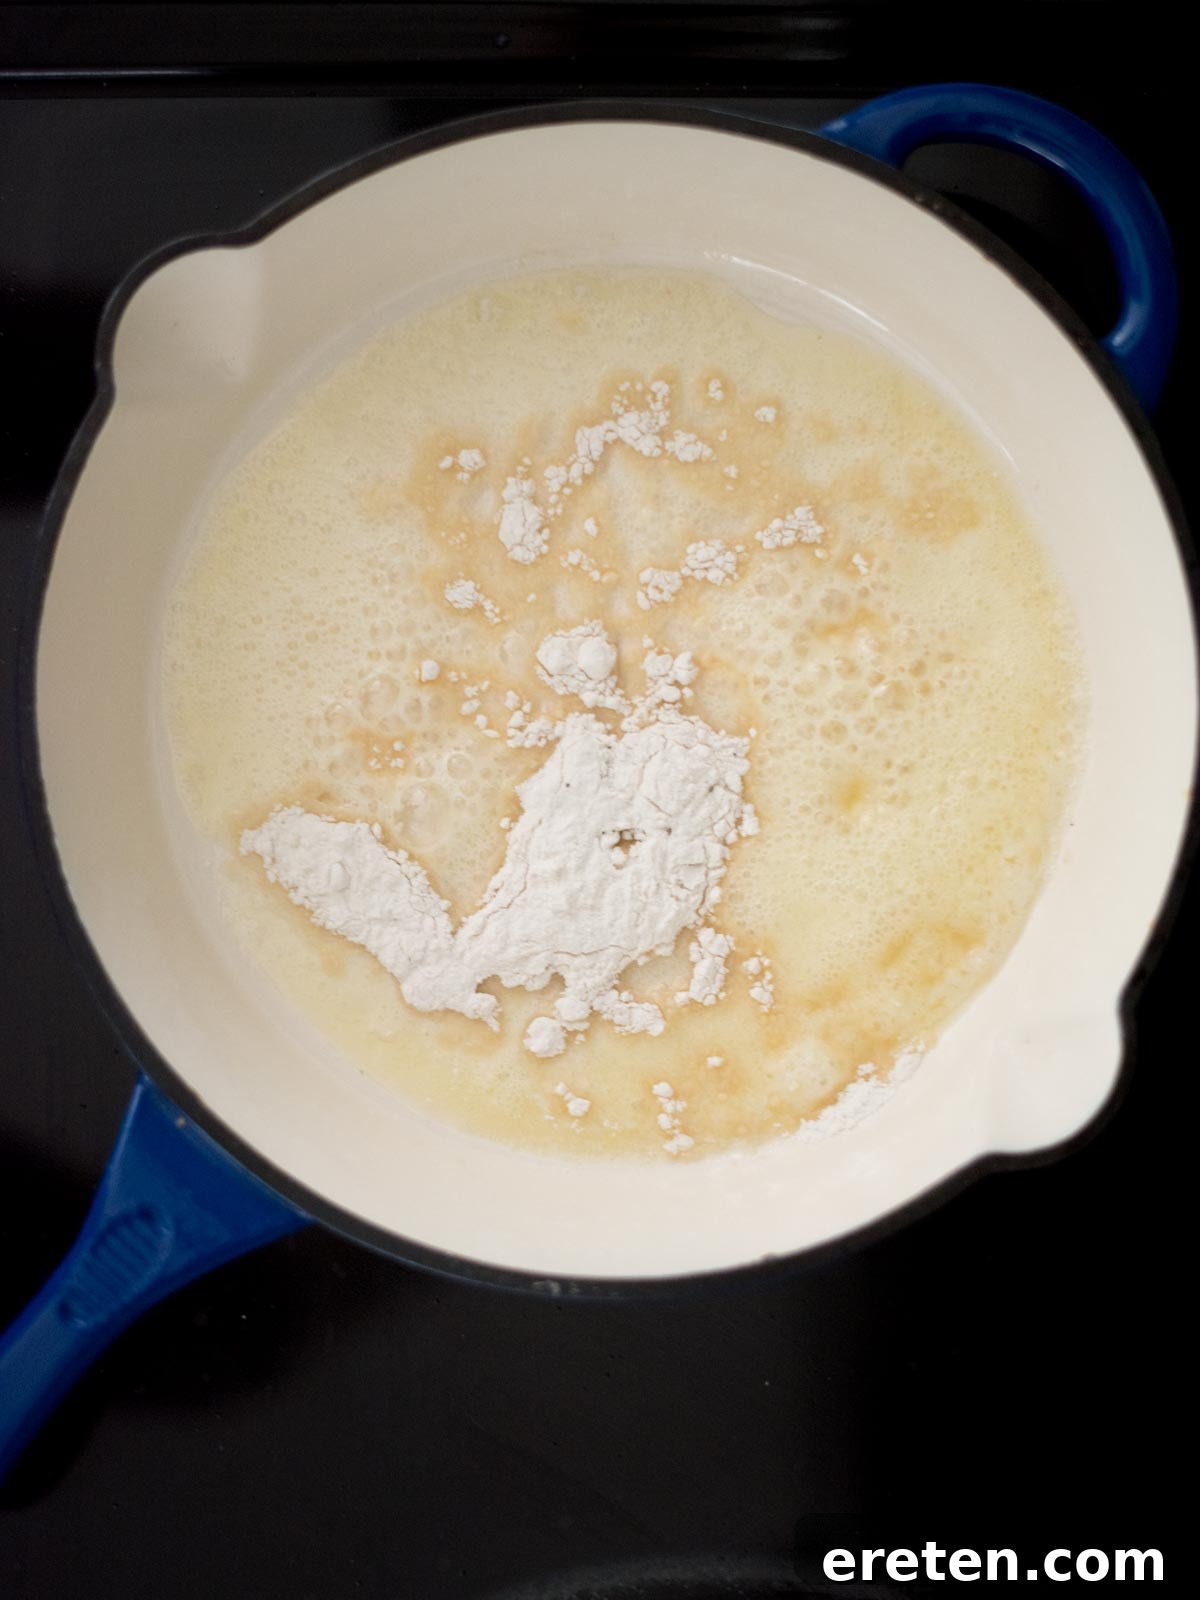
- Create the Roux: Once the butter has fully melted and is slightly shimmering, gradually sprinkle in the all-purpose flour. Immediately begin whisking continuously and vigorously. Your goal is to combine the flour and butter thoroughly, forming a smooth, thick paste known as a roux. This initial whisking helps prevent lumps from forming later and ensures a consistent texture.
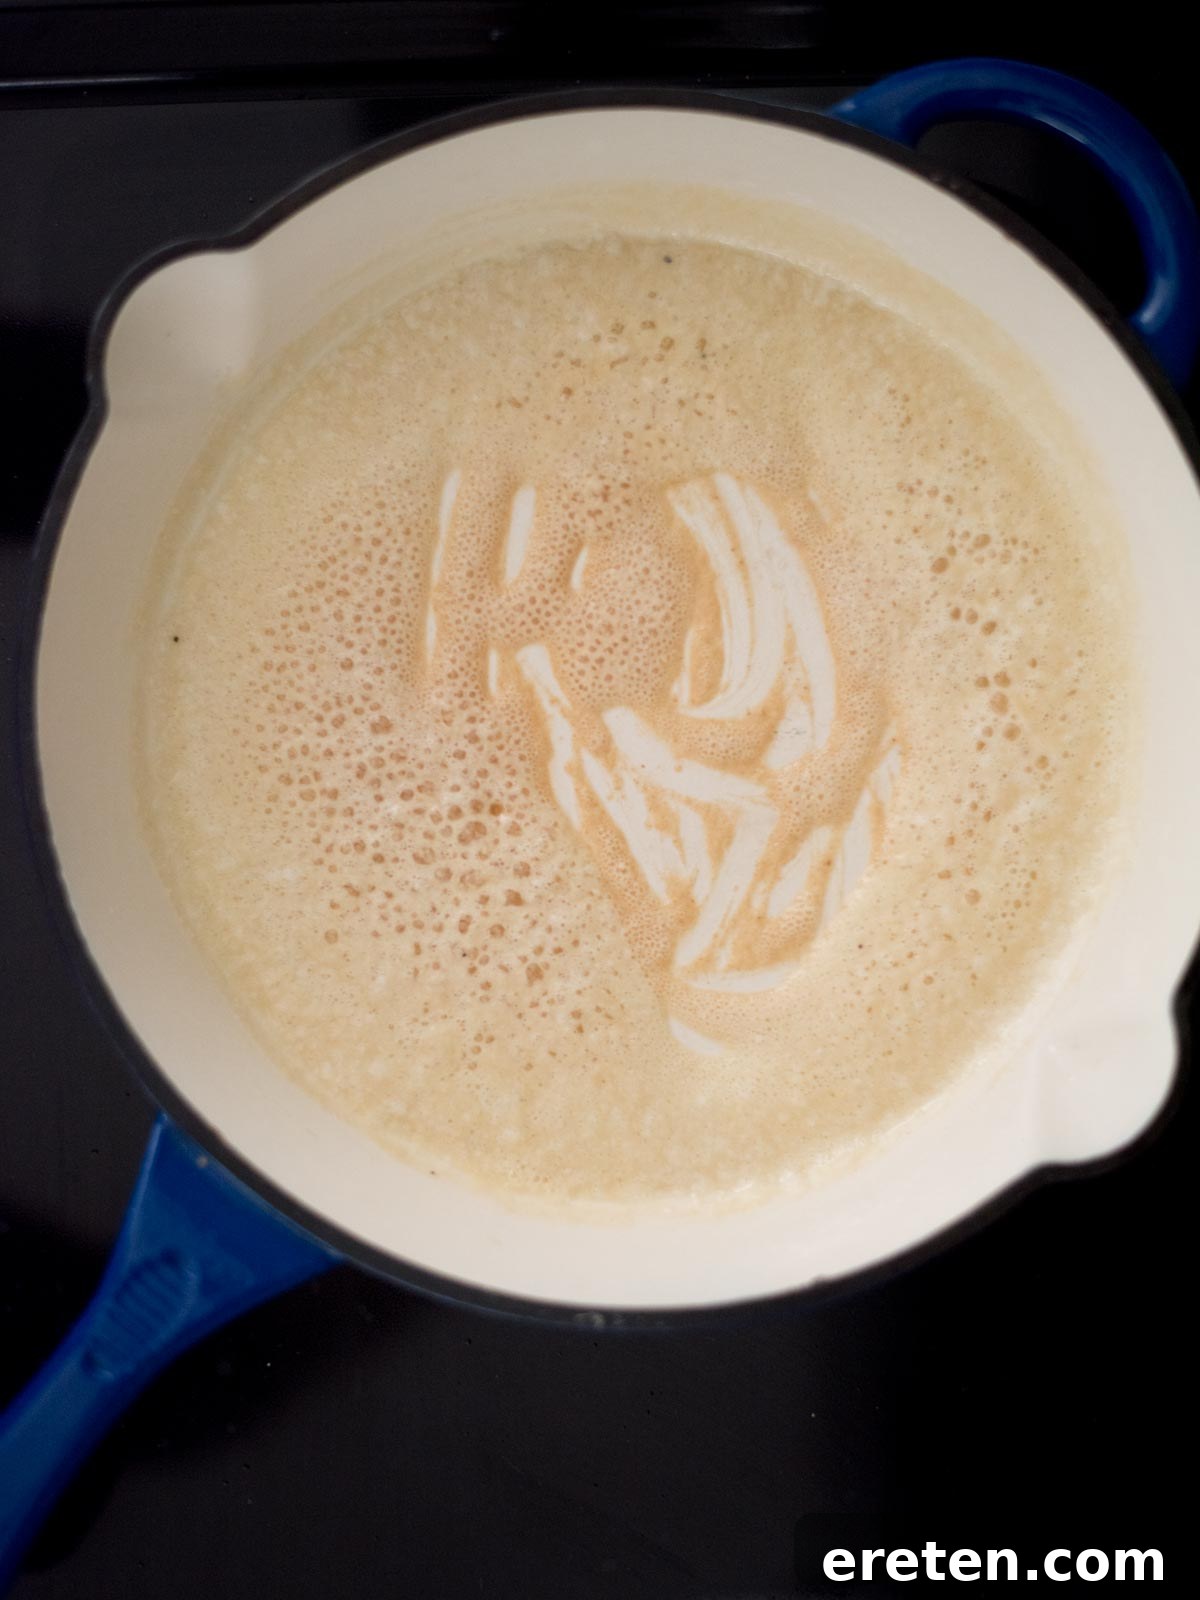
- Cook the Roux: Continue to cook this flour mixture for approximately 3 minutes, whisking occasionally. This crucial step not only cooks out the raw flour taste, which can otherwise give your gravy an unpleasant raw, starchy flavor, but also deepens the color and flavor of your gravy. As it cooks, the roux will gradually turn a light golden brown, becoming more aromatic.
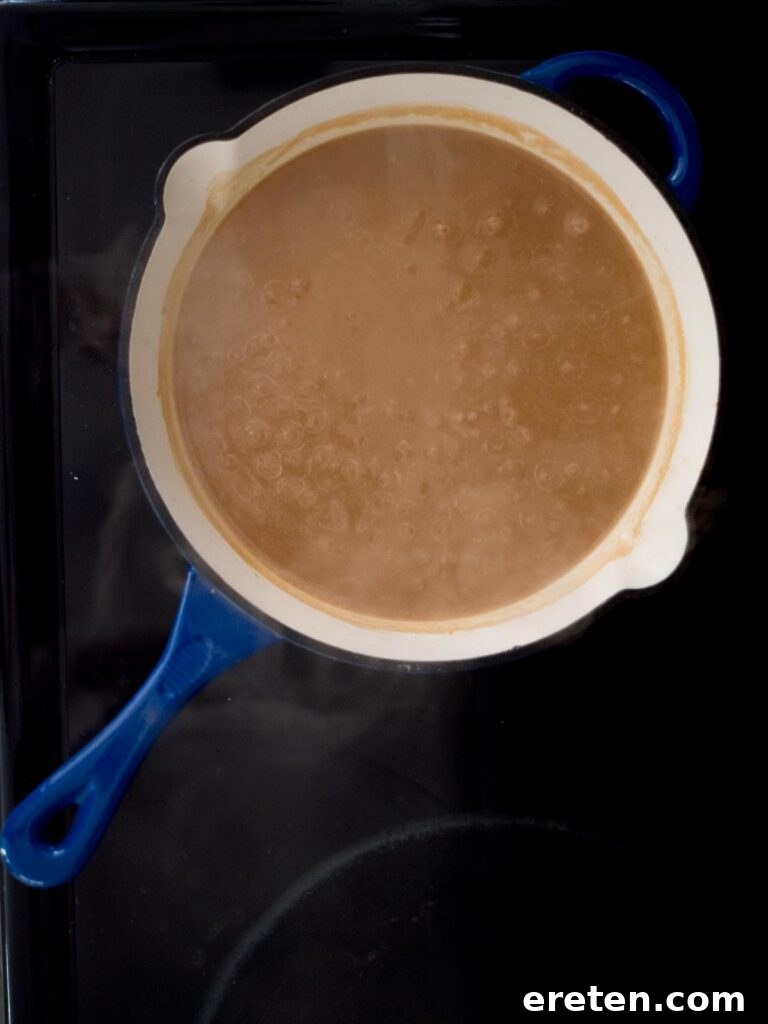
- Gradually Add Broth: This is arguably the most critical step for achieving a smooth, lump-free gravy. Begin to gradually pour in the beef broth, a cup at a time, while whisking constantly and vigorously. Pouring slowly allows the gravy to thicken incrementally, preventing it from becoming too thin too quickly or forming clumps. Continue to whisk until each addition of broth is fully incorporated and the gravy begins to thicken before adding the next portion. This gentle, steady approach ensures a velvety-smooth final product.
- Season to Perfection: Once all of the beef broth has been incorporated and the gravy has reached your desired consistency, season it generously with freshly ground black pepper. Before adding any salt, perform a taste test. The amount of salt needed will depend significantly on whether you used salted or unsalted beef broth and butter, as these already contribute sodium. Adjust the salt slowly, adding a pinch at a time and tasting after each addition, until it’s perfectly balanced to your preference.
- Serve and Enjoy: With your gravy seasoned to perfection and gloriously smooth, it’s ready to be served! Transfer it to an elegant gravy boat and drizzle it generously over your favorite dishes. These Crispy Fried Pork Chops with Gravy are an absolute delight and one of my top recommendations for pairing with this delicious brown gravy, offering a truly comforting meal.

Beef Gravy Recipe Substitutions & Flavor Enhancements
While this basic brown gravy recipe is delicious on its own, it also serves as a fantastic canvas for deeper and more complex flavors. Don’t hesitate to personalize your gravy with these wonderful additions:
- Sautéed Onions: For a savory depth and subtle sweetness, add finely diced onions to the skillet along with the butter. Sauté them until they are soft and translucent, about 5-7 minutes, before introducing the flour for your roux. The aromatic quality of the cooked onions will infuse your gravy with a rich, foundational flavor that is absolutely delicious and adds another layer of complexity.
- Mushrooms: Transform your brown gravy into a delectable mushroom gravy – a perfect accompaniment for hearty meat dishes like beef stroganoff, a classic pot roast, or tender beef tips. Simply sauté sliced mushrooms with the butter until they are tender and have released their moisture before adding the flour. The earthy, umami notes of the mushrooms add a gourmet touch and a wonderfully complex flavor profile.
- Garlic Powder and Onion Powder: For an extra layer of savory flavor without the texture of fresh ingredients, sprinkle in a teaspoon or two of both garlic powder and onion powder along with the flour when you’re making your roux. These pantry staples effortlessly boost the aromatic profile of your gravy, creating a more robust and well-rounded taste.
- Worcestershire Sauce: A dash, typically 1-2 teaspoons, of Worcestershire sauce is a true secret ingredient that can elevate your gravy to new heights. Its complex, umami-rich, slightly tangy, and savory flavor adds an incredible depth that will have everyone wondering what makes your gravy so exceptionally good. Add it during the simmering stage, tasting as you go to achieve the perfect balance.
- Sausage: To create a hearty homemade sausage gravy, ideal for breakfast or brunch, cook your favorite breakfast sausage in the skillet first. Break it up with a spoon as it cooks until browned and crumbled. If your sausage releases a good amount of grease, you can often omit the butter entirely, using the rendered sausage fat to form the roux with the flour. This makes for a wonderfully rich and flavorful gravy that’s perfect over fluffy biscuits.
Top Tip for Perfect Gravy Consistency
When incorporating the beef broth, resist the urge to pour it in all at once. The key to a smooth, thick, and lump-free gravy is to add the liquid slowly and gradually, while whisking constantly. This technique allows the roux to absorb the liquid steadily and thicken progressively, preventing it from becoming too thin too quickly or forming unsightly clumps. By maintaining a thicker consistency throughout the process, you’re essentially just thinning it out slowly to your desired perfect pourable texture, giving you maximum control over the final result.
Crafting Gluten-Free Beef Gravy
For those with gluten sensitivities or dietary restrictions, enjoying delicious homemade brown gravy is still entirely possible. The primary modification involves substituting the all-purpose flour. Firstly, ensure you use a certified gluten-free beef broth or stock. Then, for the thickening agent, opt for a high-quality gluten-free flour blend. Many excellent blends are available that perform beautifully in gravies, mimicking the texture and thickening power of traditional flour.
I highly recommend specific brands for their consistent results: Cup4Cup Gluten-Free Flour Blend is renowned for its excellent texture and flavor, often praised as a true 1:1 substitute for all-purpose flour in recipes. If that’s not readily available, Bob’s Red Mill Gluten-Free All-Purpose Baking Flour is another reliable option that delivers good thickening. Alternatively, King Arthur Gluten-Free Measure for Measure Flour is also a fantastic choice, known for its ability to create smooth sauces. When using gluten-free flour, you might notice a slightly different texture, but the flavor will remain just as delightful, offering a safe and savory option for everyone.
Expert Tips and Tricks for Flawless Homemade Brown Gravy
While gravy can sometimes get a reputation for being temperamental, with a few key strategies, it truly doesn’t have to be! Staying focused and applying these expert tips will ensure a perfect, silky-smooth gravy every single time:
- Undivided Attention: Gravy-making is not the time for multitasking. Keep your full attention on the skillet, especially during the roux creation and liquid addition phases. Distractions can easily lead to burnt flour, lumps, or an inconsistent texture. A few minutes of dedicated focus will yield fantastic results.
- The Slow Pour Method is Key: As emphasized before, adding the broth slowly and gradually is paramount. This allows the roux to absorb the liquid steadily and thicken progressively. If you rush, the sudden temperature change can cause the starch in the flour to seize up, resulting in lumps or an inconsistent, thin texture. Think of it as gently coaxing the gravy to its perfect consistency, one slow pour at a time.
- Room Temperature Broth: For the smoothest results and to prevent any seizing, try to bring your beef broth to room temperature before adding it to the hot roux. Introducing cold liquid to a hot roux can shock the mixture, potentially causing it to clump. Room temperature broth integrates more seamlessly, ensuring a velvety, uniform finish. If you forget, gently warm the broth slightly before adding.
- Continuous Whisking: From the moment the flour hits the butter until the last bit of broth is added, keep that whisk moving! Constant, vigorous whisking is your best friend in preventing lumps, ensuring the roux cooks evenly, and achieving that desirable smooth texture as the gravy thickens. Don’t be shy with your whisk!
- Fixing Lumps: If, despite your best efforts, you end up with a few small lumps, don’t despair! You have a couple of easy options. You can continue whisking vigorously over low heat to try and dissolve them. For more stubborn lumps, or if you want a guaranteed silky texture, you can pass the finished gravy through a fine-mesh sieve or strainer before serving. This will instantly give you a perfectly smooth gravy.
- Adjusting Consistency: If your gravy ends up too thick, simply whisk in a little more warm beef broth or water, a tablespoon at a time, until it reaches your preferred pourable consistency. If it’s too thin, you have a few choices: you can let it simmer gently for a few more minutes to reduce and thicken, or create a small cornstarch slurry (mix 1 tablespoon cornstarch with 2 tablespoons cold water until smooth) and whisk it into the simmering gravy gradually until desired thickness is achieved.
Recommended Kitchen Tools for Homemade Brown Gravy
Having the right tools can make the gravy-making process even smoother and more enjoyable, ensuring consistently excellent results:
- High-Quality Skillet or Saucepan: A sturdy skillet, ideally enameled cast iron or stainless steel, with a heavy bottom is crucial. This ensures even heat distribution, which is vital for cooking the roux perfectly without burning, and prevents scorching of the gravy as it simmers.
- Silicone Whisk: A good whisk is indispensable for preventing lumps and achieving a smooth consistency. A silicone-coated whisk is ideal as it won’t scratch non-stick surfaces, is gentle on cast iron, and is easier to clean than traditional wire whisks.
- Accurate Measuring Spoons and Cups: Precision in measuring ingredients, especially flour and butter for the roux, is crucial for consistent results in gravy making. Having clearly marked, accurate measuring tools will set you up for success every time.
Delightful Pairings: What to Serve with This Brown Gravy Recipe
The beauty of a well-made brown gravy is its incredible versatility. It complements a vast array of dishes, transforming simple meals into comforting feasts. Here are some of our favorite ways to enjoy this classic condiment, guaranteed to elevate your dining experience:
- Potatoes, Glorious Potatoes: Gravy and potatoes are a match made in culinary heaven. Creamy mashed potatoes, of course, are the quintessential pairing, soaking up every last drop of rich gravy for an ultimate comfort food experience. But don’t stop there! Consider serving it over crispy roasted potatoes, fluffy baked potatoes, tender boiled new potatoes, or even golden french fries for an indulgent treat.
- Instant Pot Turkey with Gravy: This is a personal favorite year-round, not just for Thanksgiving! You can effortlessly adapt this beef gravy recipe by substituting beef broth with chicken broth or turkey drippings to perfectly complement poultry. It adds an incredible depth of flavor and moisture to tender turkey breast, making it a star dish.
- Savory Meatballs: Brown gravy for meatballs is an absolute game-changer! Our oven-baked turkey meatballs, when generously smothered in this rich gravy and served alongside creamy mashed potatoes, create a satisfying and wholesome weeknight meal that makes everyone in the family happy and asking for seconds.
- Classic Poutine: Indulge in a taste of Canada with Poutine, a beloved comfort food featuring crispy french fries generously smothered in hot brown gravy and topped with squeaky cheese curds. It’s an unexpectedly delightful appetizer or hearty side dish that’s perfect for sharing, offering a fantastic textural and flavor contrast.
- Breakfast Brilliance: Who says gravy is only for dinner? This brown gravy works wonders at breakfast or brunch! Spoon it over savory sausage patties, or elevate your morning with our delicious Breakfast Biscuit Casserole. It’s a guaranteed crowd-pleaser whenever we have overnight guests, adding a rich, savory component to your morning spread.
- Hearty Chicken & Mushroom Stroganoff: This speedy recipe comes together in just 20 minutes and features a rich, delicious gravy built right into the dish. It’s an ideal, warming meal for chilly evenings, offering deep, comforting flavors that satisfy the soul.
- Southern Comfort Staples: A perfect brown gravy is non-negotiable for many Southern classics. It pairs exceptionally well with robust dishes like tender beef roast, flavorful beef tips, thinly sliced roast beef sandwiches, and succulent cube steak, enhancing their savory profiles and adding a luxurious mouthfeel.
- Versatile Alternative: Don’t limit yourself to just beef dishes. You can readily swap this brown gravy in place of country gravy or a white pepper gravy in beloved comfort foods such as crispy fried chicken, chicken fried steak, or even fluffy biscuits. Its rich, savory profile offers a wonderful alternative to milk-based gravies, bringing a different, yet equally comforting, flavor dimension.
Watch the video below to see just how easy it is to make this incredible Southern Brown Gravy!
If the video player doesn’t load automatically, you can click here to watch the Brown Gravy recipe video.
Storage and Reheating Tips for Homemade Beef Gravy
Proper storage is key to enjoying your delicious homemade beef gravy for days to come. Here’s how to store and reheat it effectively, ensuring it maintains its delicious flavor and smooth consistency:
Refrigeration: You can safely store leftover gravy in a food-safe, airtight container in the refrigerator for up to three days. Beyond this period, the fats and oils in the gravy may start to separate, and bacterial growth becomes a concern. To extend its safe consumption, if it has been stored for three days, bring it to a rolling boil on the stovetop for at least 3 minutes, stirring occasionally, to kill any potential bacteria. After this re-boiling, it can be safely stored in the fridge for an additional three days, ensuring optimal food safety and taste.
Freezing: Gravy freezes exceptionally well, making it perfect for meal prep or saving for future meals. Spoon it into freezer-safe bags, leaving a little headspace for expansion, or into other freezer-safe containers. Label clearly with the date and freeze for up to four months for best quality. For convenient, portioned freezing, consider using silicone freezing molds like Souper Cubes. These allow you to freeze gravy in practical sizes, from single servings to larger blocks, making thawing quick and easy. For even smaller amounts, ideal for adding a touch of flavor to other dishes, an ice cube tray or the smaller Souper Cubes are perfect. Once frozen solid overnight, pop them out and transfer them to a larger freezer-safe plastic bag for long-term, space-saving storage.
How to Reheat Beef Gravy
Reheating refrigerated gravy is simple and straightforward to restore its smooth consistency and rich flavor:
The easiest and most recommended method is to reheat it gently in a skillet or saucepan on the stovetop. Transfer the gravy to a cold skillet and place it over low to medium-low heat. Stir frequently with a whisk as it slowly warms up. This gentle heating and constant whisking help to reintegrate any separated fats and prevent lumps, bringing it back to a smooth, simmering consistency perfect for serving. Avoid high heat, which can cause it to scorch or become lumpy and break. If it appears too thick, you can whisk in a tablespoon of warm water or broth until it reaches your desired consistency.
Can You Freeze Gravy?
Absolutely, gravy is freezer-friendly and a great item to freeze for future convenience! If you’re reheating frozen gravy, first allow it to thaw overnight in the refrigerator. This slow thawing helps maintain its texture. Once thawed, transfer it to a saucepan and reheat over medium-low heat, continuously whisking. This constant whisking is crucial to prevent lumps and bring it back to its original smooth texture as it warms. If the gravy appears too thick after thawing and reheating, or if it looks slightly separated, don’t worry. Simply whisk in a small amount of water or additional beef broth, a tablespoon at a time, until it regains its desired consistency and smoothness. The whisking action helps emulsify any separated fats back into the gravy.
Beef Gravy Recipe: Frequently Asked Questions
How much gravy do you need per person?
A good rule of thumb is to estimate about ⅓ to ½ cup of gravy per person. This allows for a generous serving without being excessive for most dishes. If you are serving a meal where gravy is a central component, like mashed potatoes, leaning towards the ½ cup mark is advisable. If you are concerned about running out, it’s always better to err on the side of serving a little lighter initially, as guests can always ask for more, and you can easily stretch the remaining gravy with a bit of extra broth if needed.
What’s brown gravy made of?
Classic brown gravy typically consists of a roux – a cooked mixture of fat (most commonly butter or meat drippings) and flour – combined with a flavorful liquid, most often beef broth or pan drippings from roasted meats. It’s then meticulously seasoned with salt and pepper to enhance and balance all the savory components. For enhanced flavor and texture, additional ingredients such as sautéed garlic, onions, mushrooms, or a dash of Worcestershire sauce can be incorporated, adding layers of delicious complexity.
What’s the difference between brown gravy and beef gravy?
In most culinary contexts, the terms “brown gravy” and “beef gravy” are used interchangeably, as the majority of brown gravies are indeed made using a beef base, whether it’s beef broth or drippings from a roasted beef dish. This gives it its characteristic robust flavor and dark color. However, it’s important to note that “brown gravy” can technically be made from other meats as well. If the drippings from pork, chicken, or turkey are sufficiently browned, they can be used to create a brown gravy, despite not being specifically “beef” gravy. The defining characteristic is the rich, dark brown color derived from the browned roux and/or the concentrated meat liquids.
Why is it called brown gravy?
The name “brown gravy” directly refers to its characteristic brown color, which is a result of the ingredients and cooking process. This color is typically achieved through the browning of the roux (the flour and fat mixture cooked until golden or darker) and the use of dark liquids like beef broth or concentrated pan drippings from roasted meats. While beef is the most common base, brown gravy can also be made from other meats like pork, chicken, or turkey, provided their drippings produce that signature brown hue. It’s distinct from “white gravy” (also known as “country gravy” or “sawmill gravy”), which is made with milk or cream as its primary liquid and results in a pale, creamy color, often served with fried chicken or biscuits.
More Delicious Recipes Featuring Gravy You’ll Love
If you’ve fallen in love with the versatility and rich flavor of this easy homemade brown gravy, you’ll be thrilled to explore these other gravy-centric recipes. They showcase just how much a good gravy can elevate a meal, from comforting classics to quick weeknight dinners:
- Crispy Fried Pork Chops with Gravy: A true Southern classic, these perfectly fried pork chops are made even better and more comforting with a generous pour of savory, creamy gravy. It’s a meal that truly satisfies.
- One Pot Chicken & Mushroom Stroganoff: An incredibly easy and comforting meal that comes together in a single pot. This dish features a rich, creamy sauce that’s essentially a built-in gravy, brimming with tender chicken and earthy mushrooms.
- Instant Pot Turkey Breast with Gravy: Achieve wonderfully tender, juicy turkey breast made effortlessly in your Instant Pot, perfectly complemented by a flavorful, homemade gravy. Ideal for holidays or a special weeknight meal.
- Homemade Sausage Gravy: A beloved breakfast staple, this creamy, hearty sausage gravy is perfect over warm, fluffy biscuits for a true taste of Southern comfort. It’s rich, savory, and wonderfully satisfying.
Southern Brown Gravy
By: kara
Cook Time: 10 mins
Total Time: 10 mins
Servings: 16 servings
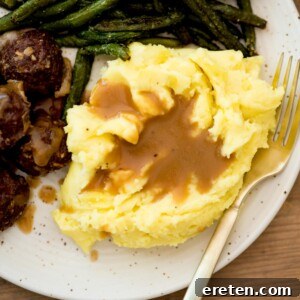
Homemade Southern Brown Gravy is easier than you’d think! Made with beef broth, butter, and flour, this three-ingredient recipe is the perfect topping for so many recipes. It’s the perfect way to make brown gravy without drippings.
Ingredients
- 32 ounces beef broth (or beef stock) – I use unsalted for better salt control
- 4 tablespoons butter – I use unsalted and add salt as needed
- 4 tablespoons all purpose flour
- 1 teaspoon coarse ground black pepper (or more to taste)
- coarse kosher salt (to taste)
Instructions
- Heat a large skillet over medium-high heat.
- Add the butter and let it melt completely.
- Once the butter is melted, add in the all-purpose flour and whisk until smooth, creating a roux. Ensure you cook out the raw flour taste.
- Allow the flour mixture to cook for about 3 minutes, whisking occasionally to keep it smooth and slightly browned.
- Gradually add in the beef broth, whisking constantly and slowly. Pouring it in a steady, thin stream will allow it to thicken uniformly. I prefer to add in about 1 cup at a time.
- Once all of the beef broth has been added and the gravy has reached desired consistency, season with black pepper. Taste test carefully before adding any salt, as the amount will be determined by whether you used salted beef broth and/or salted butter.
- Once your gravy is seasoned to perfection, serve it in a gravy boat over your favorite dish!
Video
A video demonstration for making brown gravy.
You can click here to watch the Brown Gravy recipe video.
Notes
With this gravy, it’s paramount to pour the beef broth in slowly as you whisk continuously so that it stays thick. If you accidentally pour it in too quickly and cause the gravy to get too thin, you can add a cornstarch slurry to thicken it back up or allow it to simmer for a bit. Mix 1 tablespoon of cornstarch with 2 tablespoons of cold water until smooth and gently add it while whisking to the gravy to thicken it. Only use a cornstarch slurry if you caused it to thin out too much.
Note: This recipe was updated in November 2025. I adjusted the butter and flour slightly so that it’s even easier and foolproof every single time.
Nutrition Information
Serving: 0.25 cup, Calories: 36kcal, Carbohydrates: 2g, Protein: 1g, Fat: 3g, Saturated Fat: 2g, Polyunsaturated Fat: 0.1g, Monounsaturated Fat: 1g, Trans Fat: 0.1g, Cholesterol: 8mg, Sodium: 104mg, Potassium: 118mg, Fiber: 0.1g, Sugar: 0.01g, Vitamin A: 88IU, Calcium: 2mg, Iron: 0.1mg
Nutrition information is automatically calculated and should only be used as an approximation.
Additional Info
Course: Dinner, Main Course, Main Dish, Main Dishes
Cuisine: American
Like this? Leave a comment below!