

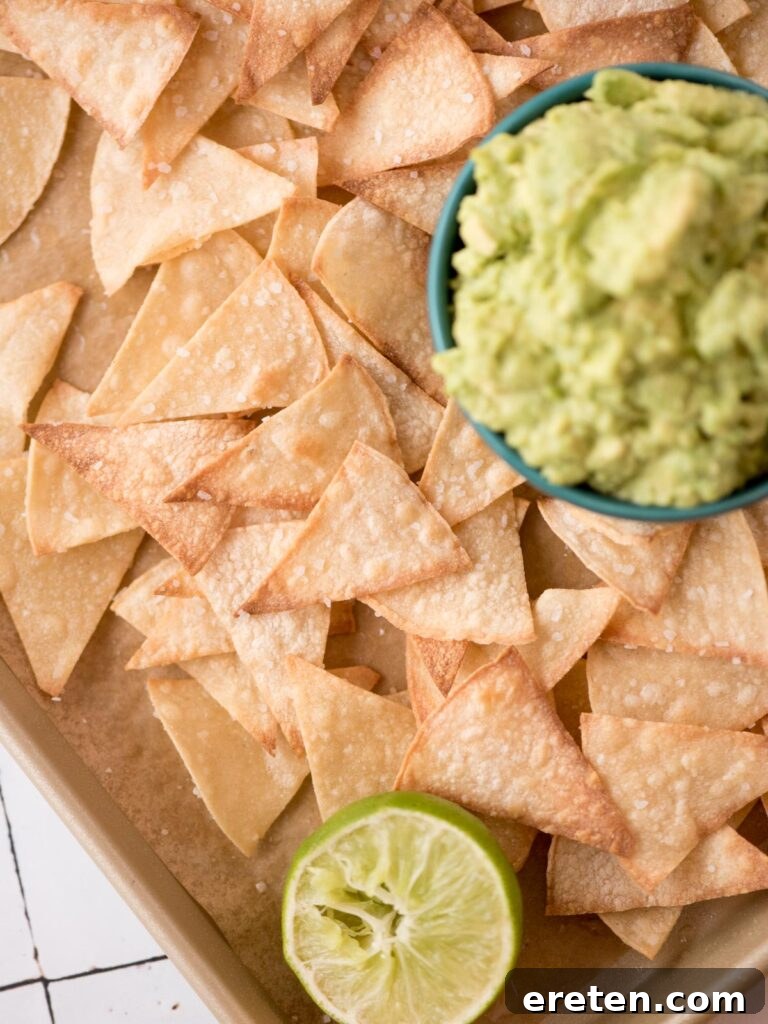
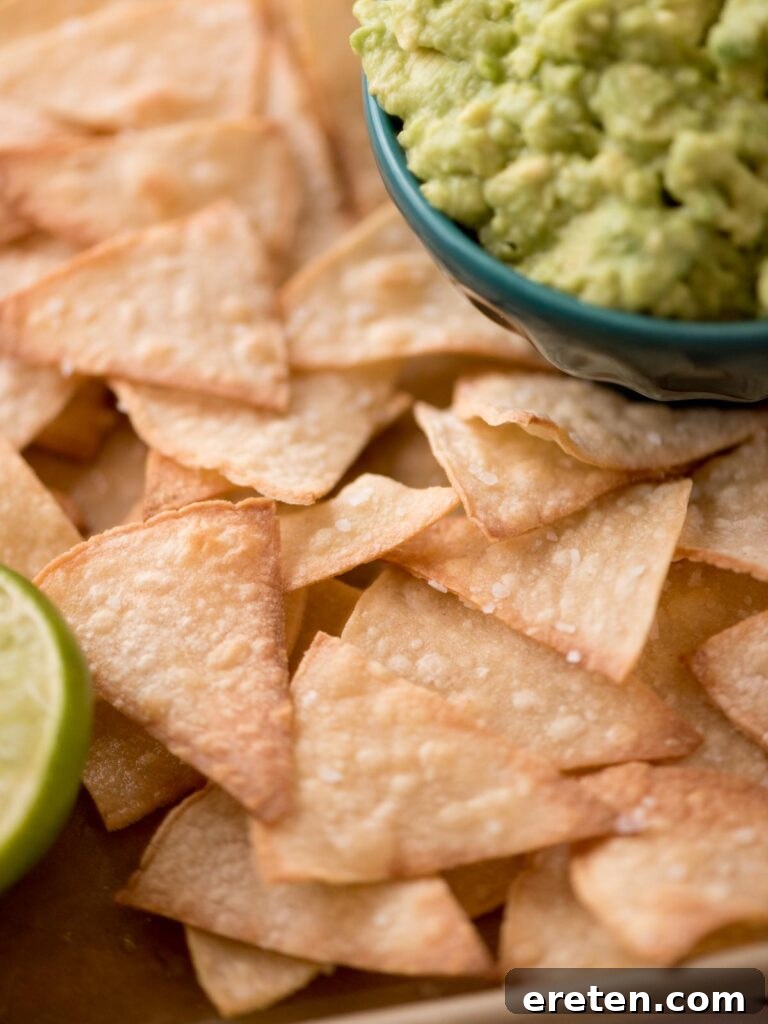
Transform your snack game with unbelievably crunchy homemade tortilla chips, baked perfectly in the oven to achieve that irresistible crispy texture typically found in deep-fried versions. Forget store-bought bags; this easy-to-follow recipe brings the authentic taste and satisfying crunch of your favorite Mexican restaurant chips right to your kitchen. Get ready to elevate your taco nights, appetizer spreads, and everyday snacking with these simple yet sensational oven-baked tortilla chips.
This post may contain affiliate links. This means if you decide to purchase through my link, I may earn a very small commission at no additional cost to you.
The Ultimate Baked Tortilla Chips Recipe
Homemade tortilla chips are more than just a snack; they’re an experience. Imagine serving a warm, perfectly seasoned batch of crispy chips that you made yourself. This isn’t just an upgrade for your taco night; it’s a game-changer for any gathering, a delightful addition to appetizer spreads, and the ideal companion for an afternoon pick-me-up. Once you discover how incredibly simple it is to craft your own oven-baked tortilla chips, you’ll find yourself reaching for corn tortillas instead of packaged chips every time. The fresh flavor and superior crunch are simply unmatched.
While I appreciate the convenience of store-bought appetizers for party planning, I always make it a point to prepare at least one dish from scratch. There’s something uniquely rewarding about offering guests something homemade, and these chips consistently steal the show. I recently served a batch with avocado corn salsa at a get-together, and the rave reviews instantly reminded me that this beloved recipe deserved to be shared. These perfectly seasoned, homemade baked tortilla chips are a fantastic DIY dish to bring to a potluck, serve at your next party, or simply enjoy as a satisfyingly crunchy snack.
Why You’ll Love This Homemade Tortilla Chips Recipe
You might be surprised at how effortlessly delicious homemade tortilla chips can be. Here are just a few reasons why this baked tortilla chip recipe will quickly become a favorite:
- Effortlessly Simple: Forget the mess and fuss of deep frying. These chips are baked in the oven, requiring minimal effort and no special equipment beyond a baking sheet.
- Budget-Friendly Goodness: Made with just three core ingredients – corn tortillas, oil, and salt – these chips are incredibly economical. You can make a large batch for a fraction of the cost of store-bought equivalents.
- Smart Way to Use Leftovers: Have a pack of corn tortillas nearing its expiration date? This recipe is the perfect solution, transforming them into a delicious and versatile snack, minimizing food waste.
- Infinitely Customizable: While classic sea salt is perfect, the possibilities for seasoning are endless. Experiment with various spices to create unique flavor profiles that perfectly match your mood or meal.
- The Perfect Dipper: Whether it’s a vibrant homemade salsa, creamy guacamole, or rich queso, these crispy tortilla chips are the ideal vessel for all your favorite dips.
- Healthier Alternative: By baking instead of frying, you get all the crunch without the excess oil, making these a slightly lighter and guilt-free snack option.
Video content originally appeared here.
Essential Ingredients for Your Own Homemade Tortilla Chips
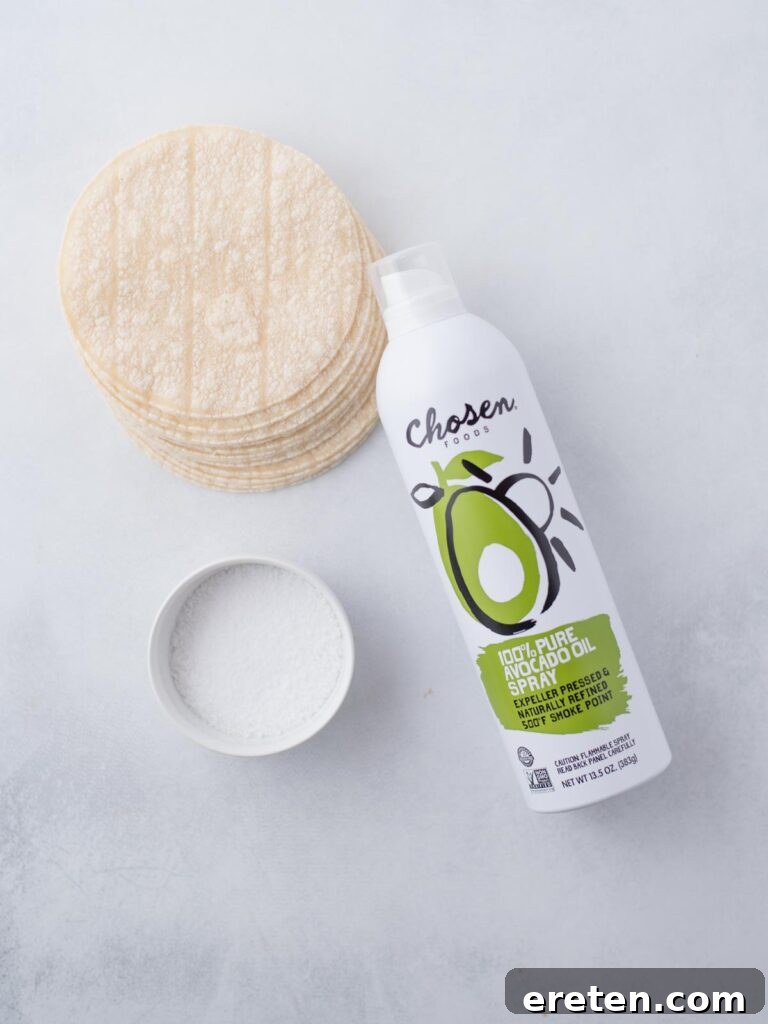
Crafting the perfect batch of homemade tortilla chips requires just a few key components. Here’s what to look for on your next grocery run:
- Corn Tortillas: This is the foundation of your chips. You can use either yellow or white corn tortillas, but the thinner they are, the crispier your chips will become. Look for a brand known for its pliable, thin tortillas. It’s crucial to stick with corn tortillas, as flour tortillas do not crisp up in the same way and will result in a chewier, less satisfying chip texture.
- Avocado Oil Spray: This is my top recommendation for achieving perfectly crisped chips with an even coating. Avocado oil has a high smoke point and a neutral flavor, ensuring your chips taste like corn and seasoning, not oil. If you don’t have spray, you can brush regular avocado oil on, though it takes a bit more time.
- Coarse Kosher or Sea Salt: Salt is absolutely vital for a flavorful tortilla chip. Coarse salt adheres well to the tortillas and provides bursts of salinity, enhancing the overall taste. Fine salt tends to dissolve too quickly or clump.
Pro Tip: While some might be tempted to use flour tortillas for convenience, I strongly advise against it. Flour tortillas behave differently when baked; they tend to become hard and cracker-like rather than light and crispy, making them unsuitable for authentic-tasting tortilla chips.
Creative Seasoning Ideas for Your Tortilla Chips
While coarse sea salt or kosher salt offers a classic, undeniable deliciousness for your homemade tortilla chips, don’t stop there! The beauty of making your own chips lies in the ability to customize them with an array of exciting seasonings. Transform your chips from simple salty snacks into flavor bombs tailored to your cravings. Here are some fantastic seasoning ideas to get you started:
- Taco Seasoning: A blend of chili powder, cumin, paprika, and oregano will instantly transport your chips to taco heaven. Perfect for serving with nachos or a taco salad.
- Garlic Salt or Garlic Powder: For a savory kick, a dusting of garlic salt or garlic powder adds a wonderful aromatic depth. Combine with a pinch of onion powder for an even more complex flavor.
- Tajín Chili Lime Seasoning: This vibrant Mexican seasoning offers a tangy, spicy, and slightly salty profile. It’s fantastic for a refreshing, zesty chip.
- Chili Powder: If you love a smoky, mild heat, a sprinkle of chili powder (or a mix of different chili powders like ancho or chipotle) is a great choice.
- Fajita Seasoning: Similar to taco seasoning but often with a slightly different spice blend, it brings a restaurant-quality flavor.
- Cayenne Pepper: For those who crave an extra fiery kick, a light dusting of cayenne pepper will do the trick. Start small and add more to taste!
- Fresh Lime Juice: A squeeze of fresh lime juice immediately after baking adds a bright, tangy zest that complements the corn flavor beautifully. You can also sprinkle lime zest for a similar effect.
- Cajun Seasoning: For a bold, zesty, and spicy flavor profile, Cajun seasoning can add a unique twist to your homemade chips.
- Smoked Paprika: Adds a lovely smoky aroma and a hint of sweetness, pairing wonderfully with various dips.
- Everything Bagel Seasoning: A trendy option for a savory, oniony, garlicky, and sesame seed-infused crunch.
Important Note on Seasoning: If you opt for a seasoning blend that already contains salt (like many taco or Cajun seasonings), be sure to reduce the amount of additional coarse salt you sprinkle on. Always season to taste, as it’s easier to add more salt than to remove it. For the most even distribution of seasonings, I highly recommend using a seasoning shaker. This prevents clumping and ensures every chip gets a consistent flavor.
Selecting the Best Oil for Perfectly Baked Tortilla Chips
The choice of oil plays a crucial role in achieving that desirable crispy texture and preventing your homemade tortilla chips from becoming greasy. Using a spray oil is particularly advantageous as it allows for an incredibly even and thin coating across each tortilla, which is key for uniform crisping. While you can certainly brush oil onto the tortillas with a pastry brush, it tends to be a more time-consuming process and can sometimes lead to uneven coverage.
When it comes to the type of oil, avocado oil receives my highest recommendation. Its light, neutral flavor ensures that the natural taste of the corn tortilla and your chosen seasonings shine through without any interference. Furthermore, avocado oil has a very high smoke point, making it ideal for the high temperatures required to bake these chips to a golden crisp without burning or producing off-flavors.
However, if avocado oil isn’t readily available, other options can yield good results:
- Olive Oil Cooking Spray: A light olive oil spray can also work well. While it has a slightly lower smoke point than avocado oil, it’s generally sufficient for oven baking at 450°F and offers a subtle, pleasant flavor.
- Canola Oil or Vegetable Oil: These are affordable and readily available options that also have neutral flavors and decent smoke points. They will certainly get the job done for crispy chips.
What you should generally avoid are flavorful oils like coconut oil, extra virgin olive oil (which has a lower smoke point and stronger flavor), or sesame oil, unless you specifically desire their distinct tastes to be infused into your chips. These can often overpower the delicate flavor of the corn. For ultimate control and to save money in the long run, consider investing in your own reusable oil spray bottle that you can fill with your favorite high-quality cooking oil.
Step-by-Step Guide: How to Make Tortilla Chips
Ready to transform humble corn tortillas into glorious, golden, and crispy homemade tortilla chips? This process is incredibly straightforward and yields fantastic results every time. Let’s walk through each step to ensure your chips are nothing short of perfect:
- Preheat Your Oven: Begin by preheating your oven to a blazing 450°F (232°C). A high temperature is essential for quickly crisping the tortillas without drying them out or making them tough. This ensures that desirable light and airy crunch.
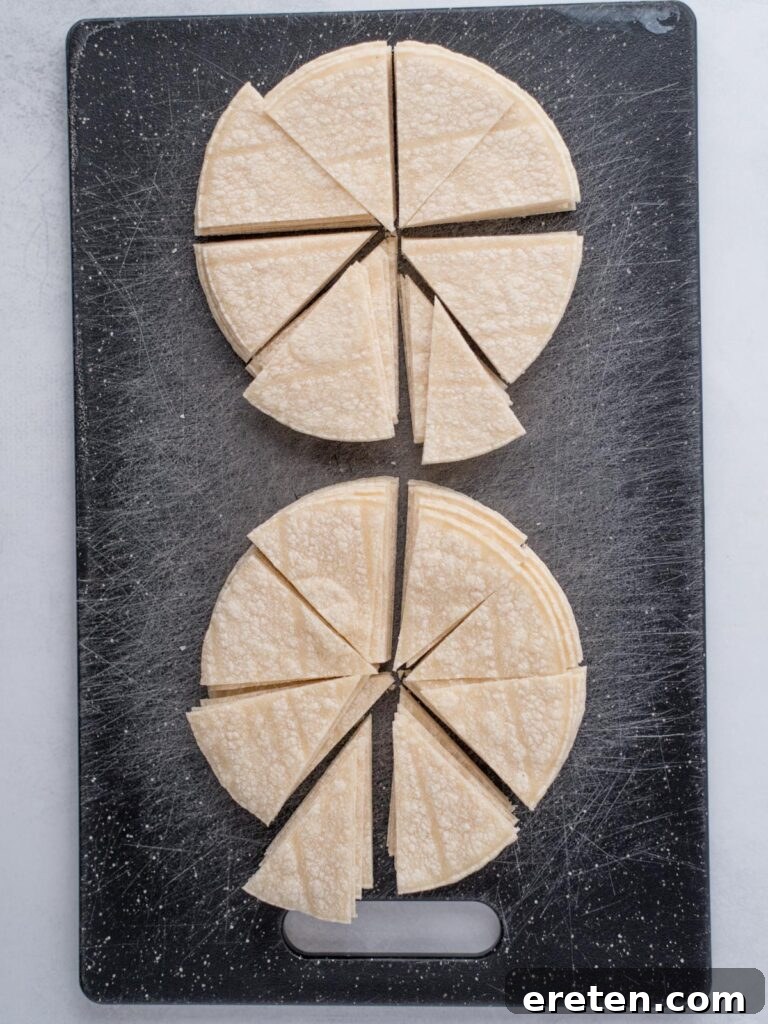
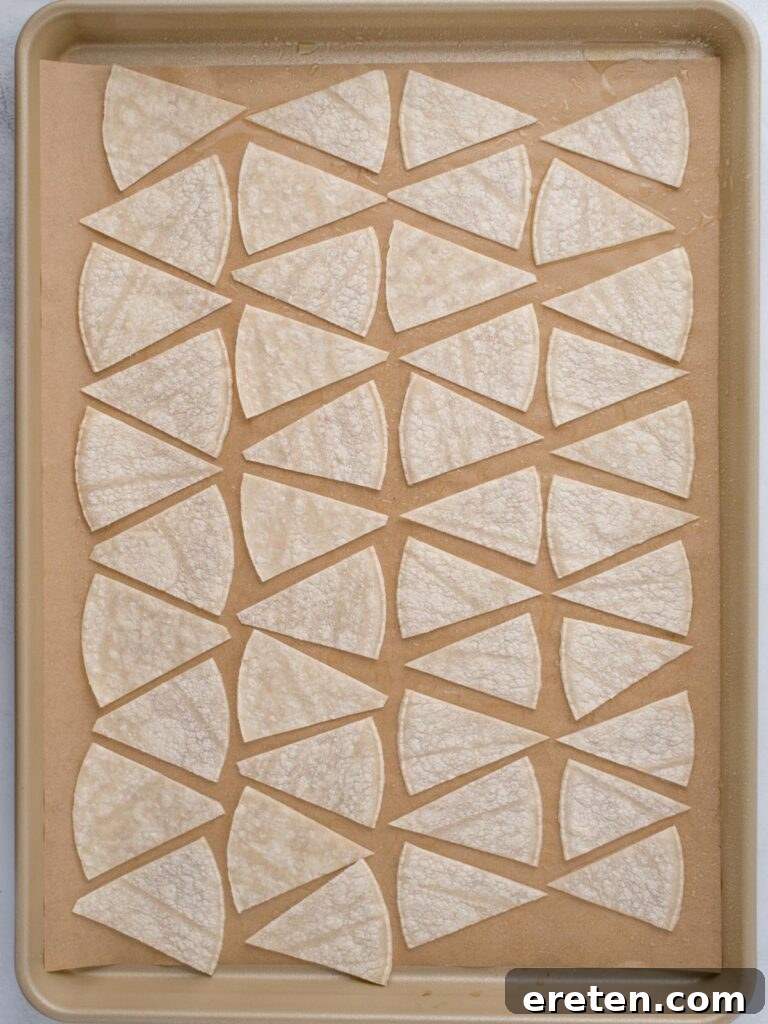
- Prepare Your Tortillas: Take each corn tortilla and cut it into 8 uniform triangles. You have a few options for cutting: a sharp chef’s knife, sturdy kitchen shears, or even a pizza cutter. My preferred method is to first cut the tortilla in half, then cut each half into quarters, and finally, cut each quarter in half to achieve eight even triangles. Feel free to experiment with different shapes! Squares or strips (which are fantastic for taco salads) can also be made with a knife, or you can even use a cookie cutter for fun circular chips.
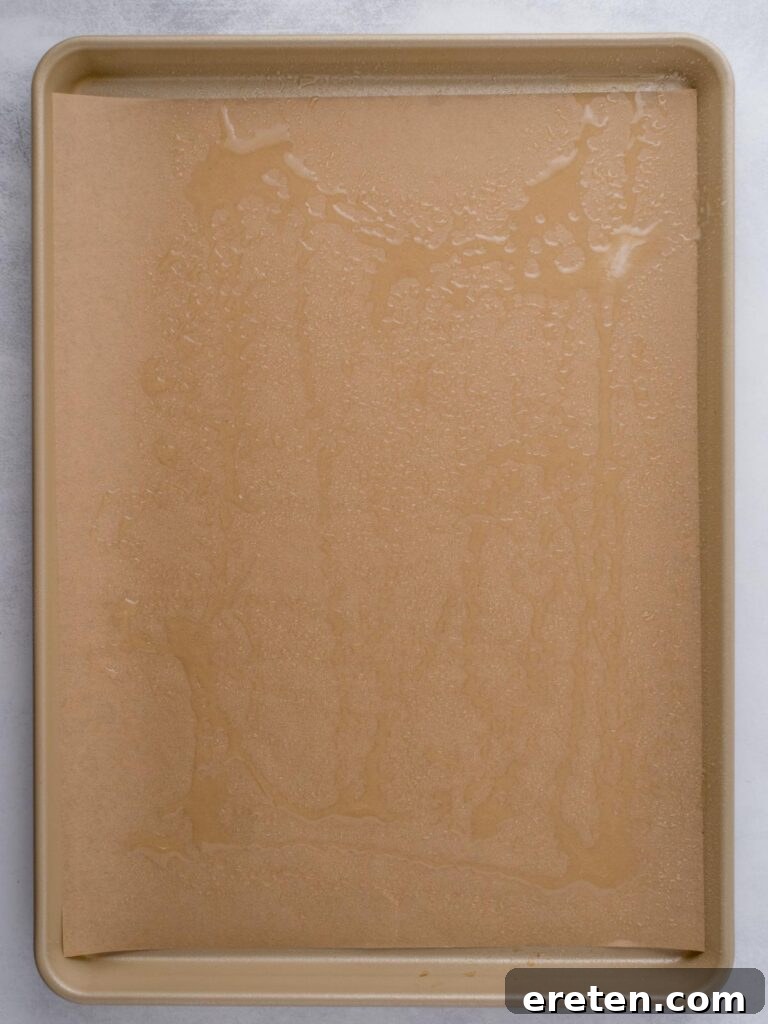
- Line and Oil Your Baking Sheet: Line a large baking sheet with parchment paper. This prevents sticking and makes cleanup a breeze. Then, lightly spray the parchment paper with your avocado oil. This clever trick ensures the bottom sides of your tortillas are perfectly oiled without the need for additional spraying and flipping before baking.
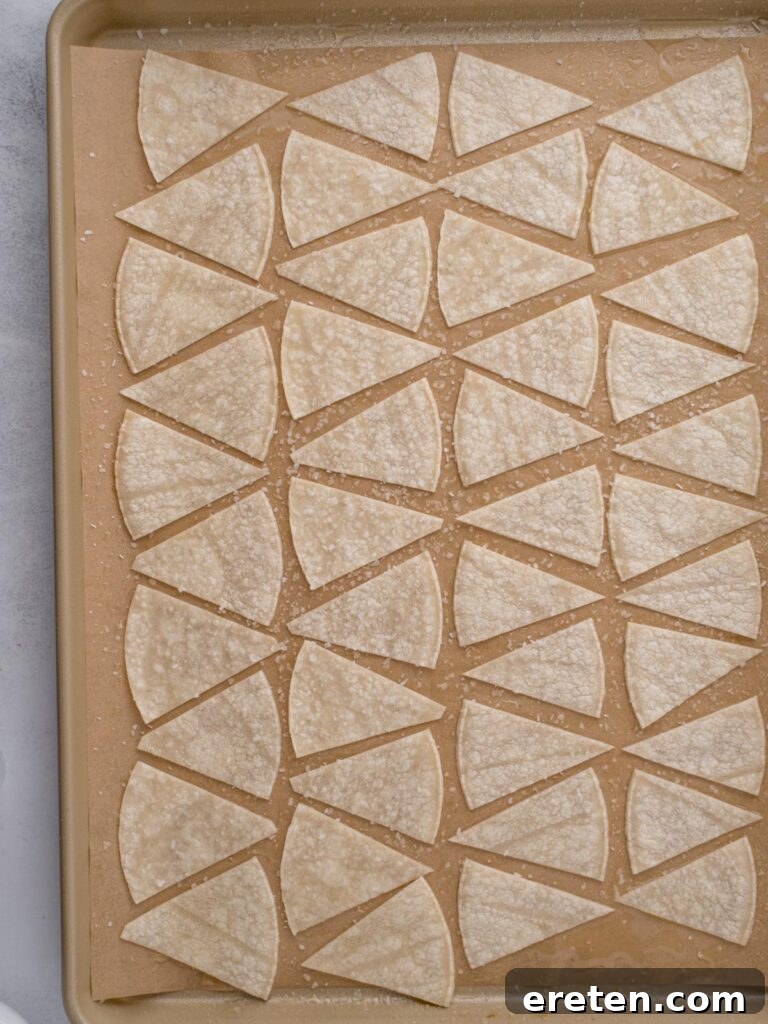
- Arrange the Tortilla Triangles: Carefully arrange the cut corn tortilla triangles in a single layer on the prepared parchment paper. It’s crucial that they do not overlap. Overlapping chips will steam instead of crisp, resulting in unevenly cooked and chewy results. If you have many tortillas, work in batches to ensure optimal crispiness.
- Oil and Season the Tops: Lightly spray the tops of the arranged tortilla pieces with avocado oil spray. This provides another layer of crispiness and helps the seasonings adhere. Immediately after spraying, sprinkle generously with coarse salt and any other seasonings you’ve chosen. Ensure an even distribution for maximum flavor.
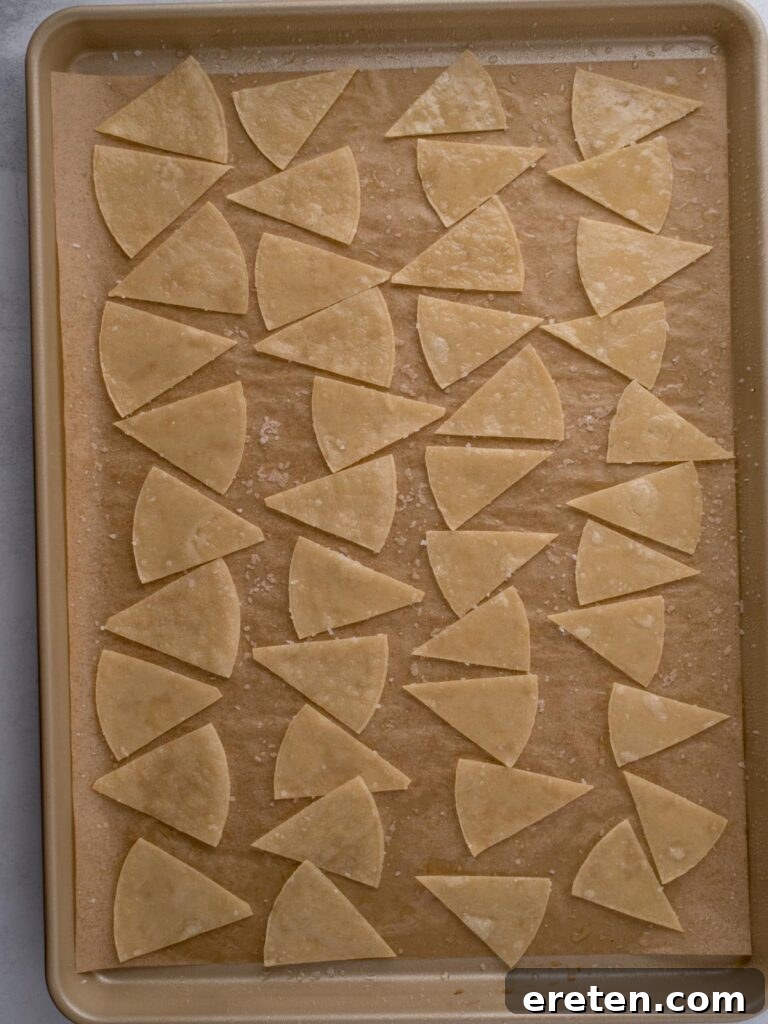
- First Bake: Transfer the baking sheet to your preheated oven and bake for exactly 4 minutes. This initial bake starts the crisping process.
- Flip and Second Bake: After 4 minutes, carefully remove the baking sheet from the oven. Using tongs, quickly flip each tortilla chip to ensure even browning and crisping on both sides. Return them to the oven and bake for an additional 2-3 minutes. This final stage is crucial, so keep a very close eye on them; tortilla chips can go from perfectly golden to burnt in a matter of seconds!
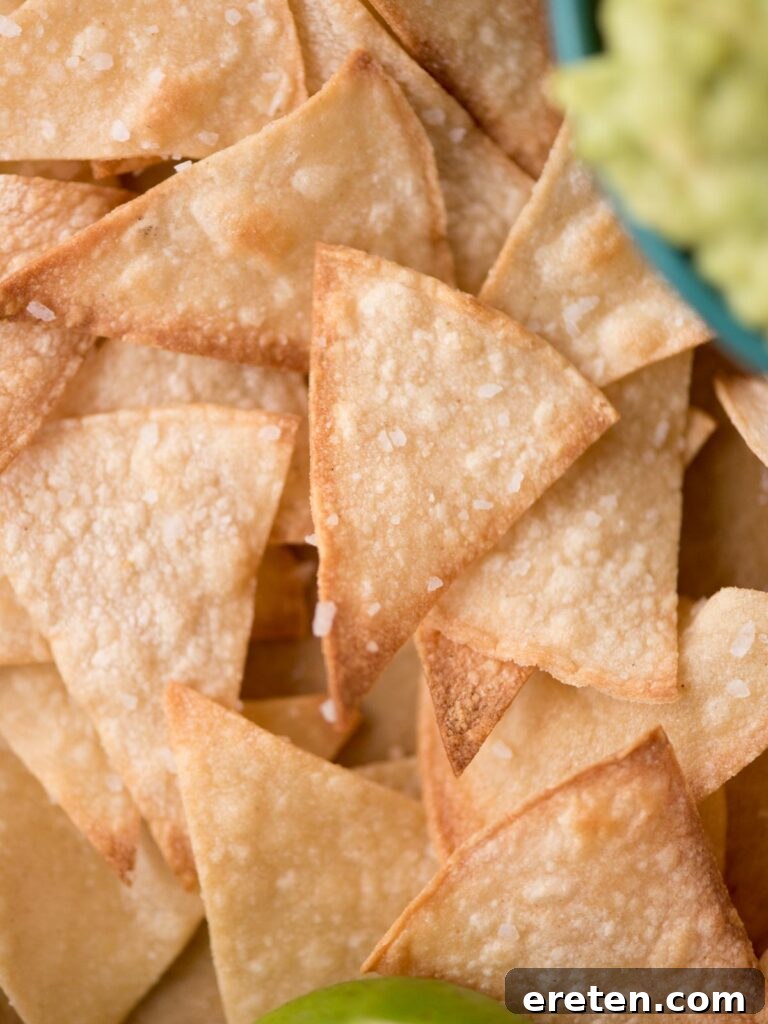
- Cool Completely: Remove the chips from the oven as soon as they achieve a light golden-brown hue and look firm. Transfer them to a wire cooling rack if possible, or leave them on the baking sheet to cool completely at room temperature. This cooling period is vital because the chips will continue to crisp up as they cool down. If you eat them warm, they might still be slightly chewy; patience will reward you with ultimate crunch! The hot oil needs to cool and solidify for maximum crispness.
- Enjoy Your Delicious Creation: Once fully cooled and gloriously crunchy, your homemade tortilla chips are ready to be devoured! Pair them with your favorite dips or use them as a crunchy accompaniment to your meals.
Expert Tips & Tricks for the Best Homemade Tortilla Chips
Achieving consistently crispy homemade tortilla chips is simple when you follow a few key guidelines. Here are some invaluable tips and tricks to ensure every batch is a resounding success:
- Choose Thin Corn Tortillas: This is arguably the most critical factor for a truly crispy baked chip. Thinner tortillas will dehydrate and crisp up much more effectively than thick ones. Avoid using flour tortillas altogether, as their gluten content and different composition mean they simply won’t achieve the same light, airy crunch.
- Single Layer is Non-Negotiable: Always arrange your tortilla pieces in a single layer on the baking sheet. If they overlap, steam will be trapped, preventing them from browning and crisping evenly. This is why working in batches is often necessary for larger quantities.
- Oil Application Strategy: While spraying oil after cutting is convenient, you can also lightly spray or brush your tortillas with oil *before* cutting them. This ensures every surface is coated. The trade-off is that handling oiled, cut pieces can be a bit messier, but it’s an option if you prefer.
- Vigilant Baking: Oven temperatures can vary, and tortilla chips bake quickly. Towards the end of the baking time (especially after flipping), remain attentive. They can transition from perfectly golden to unfortunately burnt in seconds. Trust your eyes more than the clock in the last couple of minutes.
- Patience is Key for Crunch: When you first pull the chips from the oven, they might still feel slightly pliable or a little chewy. This is completely normal! The magic happens during the cooling process. As the hot oil cools and solidifies, the chips will firm up and become wonderfully crunchy. Be patient and allow them to cool completely before judging their texture.
- Absorb Excess Oil: If you find your chips have a bit more oil than you prefer after baking, you can place them on a few layers of paper towels once they’ve cooled slightly. The paper towels will absorb any lingering excess oil, resulting in a lighter chip.
- Don’t Overcrowd the Oven: If you’re baking multiple trays, try to keep them on different racks and rotate them halfway through. Overcrowding the oven can reduce air circulation and impact crispiness.
Recommended Products to Enhance Your Homemade Tortilla Chips
While you don’t need a lot of fancy equipment to make fantastic tortilla chips, a few tools can make the process even smoother and more enjoyable. Here are some products that are helpful:
- High-Quality Knife Set or a Pizza Cutter (for precise tortilla slicing)
- Durable Baking Sheet (essential for even baking)
- Parchment Paper (for non-stick baking and easy cleanup)
- Avocado Oil Spray (for consistent, even coating)
- Seasoning Shaker (for even seasoning distribution)
- Wire Cooling Rack (for optimal crisping after baking)
How to Re-Warm and Re-Crisp Tortilla Chips
Even the best homemade tortilla chips can lose a bit of their initial crispness over time, especially if exposed to humidity. But don’t despair! Re-warming them is a simple process that will bring back their satisfying crunch. To recrisp your chips, simply spread them in a single layer on a baking sheet and place them in a 350°F (175°C) oven for about 5 minutes. Keep a close eye on them, as they can burn quickly. They’ll emerge warm, aromatic, and perfectly crispy, just like they were freshly baked.
Storing Your Homemade Tortilla Chips for Lasting Freshness
Proper storage is essential to maintain the incredible crunch and flavor of your homemade tortilla chips. The most important rule? Let them cool completely before storing. If you package them while they are still warm, the trapped heat will create condensation, leading to soggy, unappetizing chips – and nobody wants that! No bueno!
Once your chips are thoroughly cooled to room temperature, you can store them in a gallon-sized ziptop bag or a large, airtight container. To maximize freshness and prevent them from going stale, squeeze out as much air as possible from the bag before sealing. Stored correctly at room temperature, your homemade tortilla chips will retain their crispiness and delicious flavor for about one week.
Maximizing Your Corn Tortillas: Beyond Chips
Making homemade tortilla chips in the oven is a fantastic and delicious way to use up any leftover corn tortillas you might have. Whether you have yellow corn tortillas or white corn tortillas, they both work perfectly for this recipe. However, the versatility of corn tortillas extends far beyond chips!
You can also use them to make soft tacos, enchiladas, or even cut them into strips and fry them for homemade crunchy taco shells or tortilla strips for soups. Having a pack of corn tortillas on hand is a great staple for any kitchen, offering endless possibilities for quick and tasty meals and snacks.
Sign up for more recipes and tips!
The Perfect Dips to Pair with Your Crispy Tortilla Chips
Tortilla chips and dips are an iconic duo, practically made for each other! (Does talking about dips make anyone else sing, “When I dip, you dip, we dip?”) Your homemade tortilla chips deserve the best companions, and there’s a whole world of delicious dips to explore. While salsa, guacamole, and queso form the ultimate classic trio, these versatile dippers work wonderfully with so many other kinds of delectable concoctions, making them perfect for any occasion:
- Bacon Ranch Dip: Creamy, savory, and packed with flavor, this dip is always a crowd-pleaser and pairs beautifully with the salty crunch of the chips.
- Cranberry Jalapeño Dip: For a festive and unique twist, this sweet and spicy dip offers a refreshing contrast.
- Smoked Queso: Elevate your cheese dip game with the rich, smoky flavors of a homemade smoked queso.
- Jalapeño Artichoke Dip: A creamy, cheesy, and slightly spicy dip that’s perfect for sharing.
- Green Chile Queso Dip: A milder, yet incredibly flavorful cheese dip with a subtle kick from green chilies.
- Pizza Dip: All the beloved flavors of pizza layered into a warm, gooey dip – a fun and unexpected pairing.
- Bean Dip: A classic, hearty option that’s incredibly satisfying and easy to whip up.
- Spinach and Artichoke Dip: Creamy, rich, and always a hit at parties.
- Hummus: While traditionally served with pita, the crunch of tortilla chips provides an excellent textural contrast to smooth hummus.
- Buffalo Chicken Dip: For game day or any gathering, the spicy, creamy flavors are irresistible with crisp chips.
Creative Ways to Enjoy Your Homemade Tortilla Chips
So you’ve mastered the art of making crispy homemade tortilla chips, and now you have a glorious bounty. But what if you’re out of dips, or simply want to explore new ways to enjoy them beyond scooping? Never fear! Your delicious tortilla chips are incredibly versatile and can enhance a multitude of dishes. Here are some of my favorite creative ways to enjoy them:
- Craft the Ultimate Nachos: This is a no-brainer for leftover chips! Pile them high with your favorite toppings – seasoned ground beef or chicken, melty cheese, jalapeños, olives, tomatoes, sour cream, and salsa. These sheet pan nachos are always a hit, especially when served “all the way.”
- Add a Crunchy Topping: Crumble your chips roughly over a warm bowl of soup like a hearty taco soup or a comforting casserole like walking taco casserole. The added texture and flavor are a delightful surprise. They also work wonderfully crumbled over a vibrant green salad for an extra dimension.
- Serve Them as a Perfect Side: Instead of traditional bread or rice, offer a generous portion of homemade chips alongside your main dishes. They’re excellent companions to burrito bowls, sizzling fajitas, or even simple grilled chicken.
- Boost Your Breakfast: Yes, chips for breakfast! Consider making breakfast nachos by layering chips with scrambled eggs, cheese, bacon, and your favorite breakfast toppings.
- Stuffed Peppers or Burgers: Use crushed chips as a breading for stuffed bell peppers or sprinkle crumbles into the mixture for a Southwest burger for added texture and flavor.
- Chilaquiles: This classic Mexican dish transforms stale tortillas (or in this case, perfectly good chips!) into a hearty breakfast or brunch by simmering them in salsa and topping with cheese, eggs, and cream.
Frequently Asked Questions About Homemade Tortilla Chips
Yes, you absolutely can freeze homemade tortilla chips to extend their shelf life. Ensure they have fully cooled to room temperature before placing them in a freezer-safe, airtight bag or container. When you’re ready to enjoy them, thaw the chips at room temperature for an hour or two, then warm them on a baking sheet in a 350°F (175°C) oven for about 5 minutes to restore their crispness.
For our baked tortilla chips recipe, they cook very quickly! The total baking time in a 450°F (232°C) oven is approximately 6-7 minutes. This includes an initial bake for 4 minutes, followed by a flip and an additional 2-3 minutes. It’s crucial to keep a very close eye on them during the second half of baking, as they can burn rapidly due to the high temperature.
Making your own tortilla chips is almost always more cost-effective than buying them. With a single pack of 16 corn tortillas, you can easily produce over 125 homemade tortilla chips. This quantity is typically comparable to or even exceeds what you’d find in a large “party size” bag of store-bought chips, but at a significantly lower price point, especially if you catch tortillas on sale.
Yes, homemade tortilla chips are generally plant-based and vegan-friendly, provided they are made from corn tortillas and cooked with a plant-based oil. Corn tortillas themselves are typically made from masa (corn flour), water, and lime, which are all plant-derived. When baked with oils like avocado oil, olive oil, canola oil, or vegetable oil, they remain completely vegan.
Yes, when made with traditional corn tortillas, tortilla chips are naturally gluten-free. This is because corn is a gluten-free grain. Always double-check the ingredient list of your corn tortillas to ensure no wheat-based ingredients or cross-contamination has occurred during processing if gluten sensitivity is a concern. Avoid flour tortillas if you need a gluten-free option.
Store-bought tortilla chips, when kept sealed at room temperature, usually maintain their freshness for about 1-2 weeks after opening. Your homemade tortilla chips, if stored correctly in an airtight container at room temperature (and fully cooled before storage), will stay delightfully crispy and flavorful for approximately 1 week. The key is to minimize air exposure to prevent staleness.
Troubleshooting: Why Are My Homemade Tortilla Chips Chewy?
There’s nothing more disappointing than anticipating a crunchy chip and biting into a chewy one instead. If your homemade tortilla chips aren’t as crispy as you’d like, there are usually two common culprits:
- Not Cooled Completely: This is the most frequent reason for chewiness. Chips come out of the oven hot and might still feel a bit soft. They will continue to crisp up significantly as they cool down to room temperature. The oil on the chips needs to cool and set completely to achieve maximum crunch. Be patient! Allow them to cool on a wire rack for at least 15-20 minutes.
- Not Fully Baked: If, even after cooling, your chips are still chewy, they likely weren’t baked long enough. They need to be golden brown and feel firm when removed from the oven. Next time, cook them for an additional minute or two during the second baking phase, keeping a very watchful eye to prevent burning. Uneven oil distribution or overcrowding the baking sheet can also contribute to under-baked sections. Ensure a single layer and even oil coating.
More Delicious Appetizer Recipes to Try
If you loved making these homemade tortilla chips, you might be ready to explore other fantastic appetizer recipes that are perfect for parties, snacks, or kickstarting any meal. Here are some more favorites:
- Crispy Air Fryer Popcorn Shrimp
- Flavorful Air Fryer Twice Baked Potatoes
- Zesty Seasoned Oyster Crackers
If you make this recipe and love it, we would love a 5 ⭐️⭐️⭐️⭐️⭐️ rating! It helps us continue to provide free recipes.
Baked Tortilla Chips
10 mins
6 mins
128 chips
Pin
Ingredients
- 16 thin corn tortillas
- avocado oil spray
- coarse kosher or sea salt
Instructions
-
Preheat the oven to 450°F (232°C).
-
Cut each corn tortilla into 8 triangles.
-
Line a baking sheet with parchment paper and spray the parchment paper with avocado oil. This ensures the bottom sides of the tortillas have oil without having to spray and flip.
-
Lay the corn tortillas on the parchment paper in one layer, making sure they do not overlap. Work in batches if necessary.
-
Spray the top of the tortillas with avocado oil spray.
-
Sprinkle the tortillas with coarse salt and any desired seasonings.
-
Bake them in the oven for 4 minutes.
-
Remove them from the oven, carefully flip them, and then bake for an additional 2-3 minutes, watching closely to prevent burning.
-
Remove them from the oven and allow them to cool completely before eating. They will get crunchier as they cool.
Video
Video content originally appeared here.
Notes
- Make sure they’re in a single layer on the baking sheet for even crisping.
- You can also spray them with oil before cutting them. It’s a bit messier but works well for full coverage.
- They will get crunchier as they cool. Fresh out of baking, they will be a little bit chewy. Patience is key!
- Pay close attention to the chips nearing the end of the baking time because they will burn easily due to the high oven temperature.
Nutrition
Nutrition information is automatically calculated, so should only be used as an approximation.