
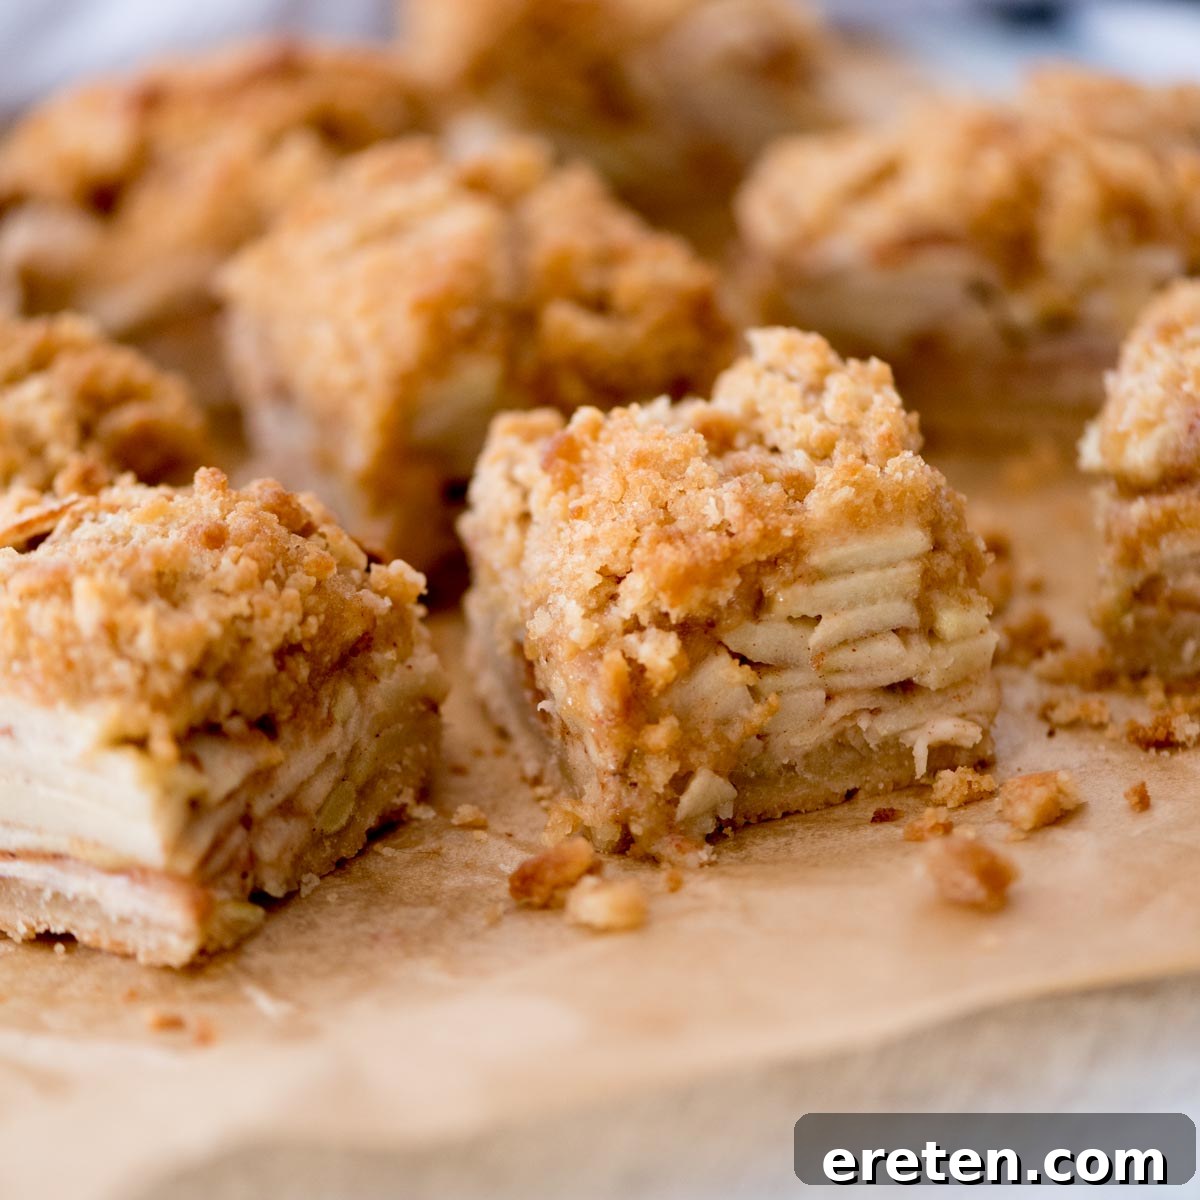
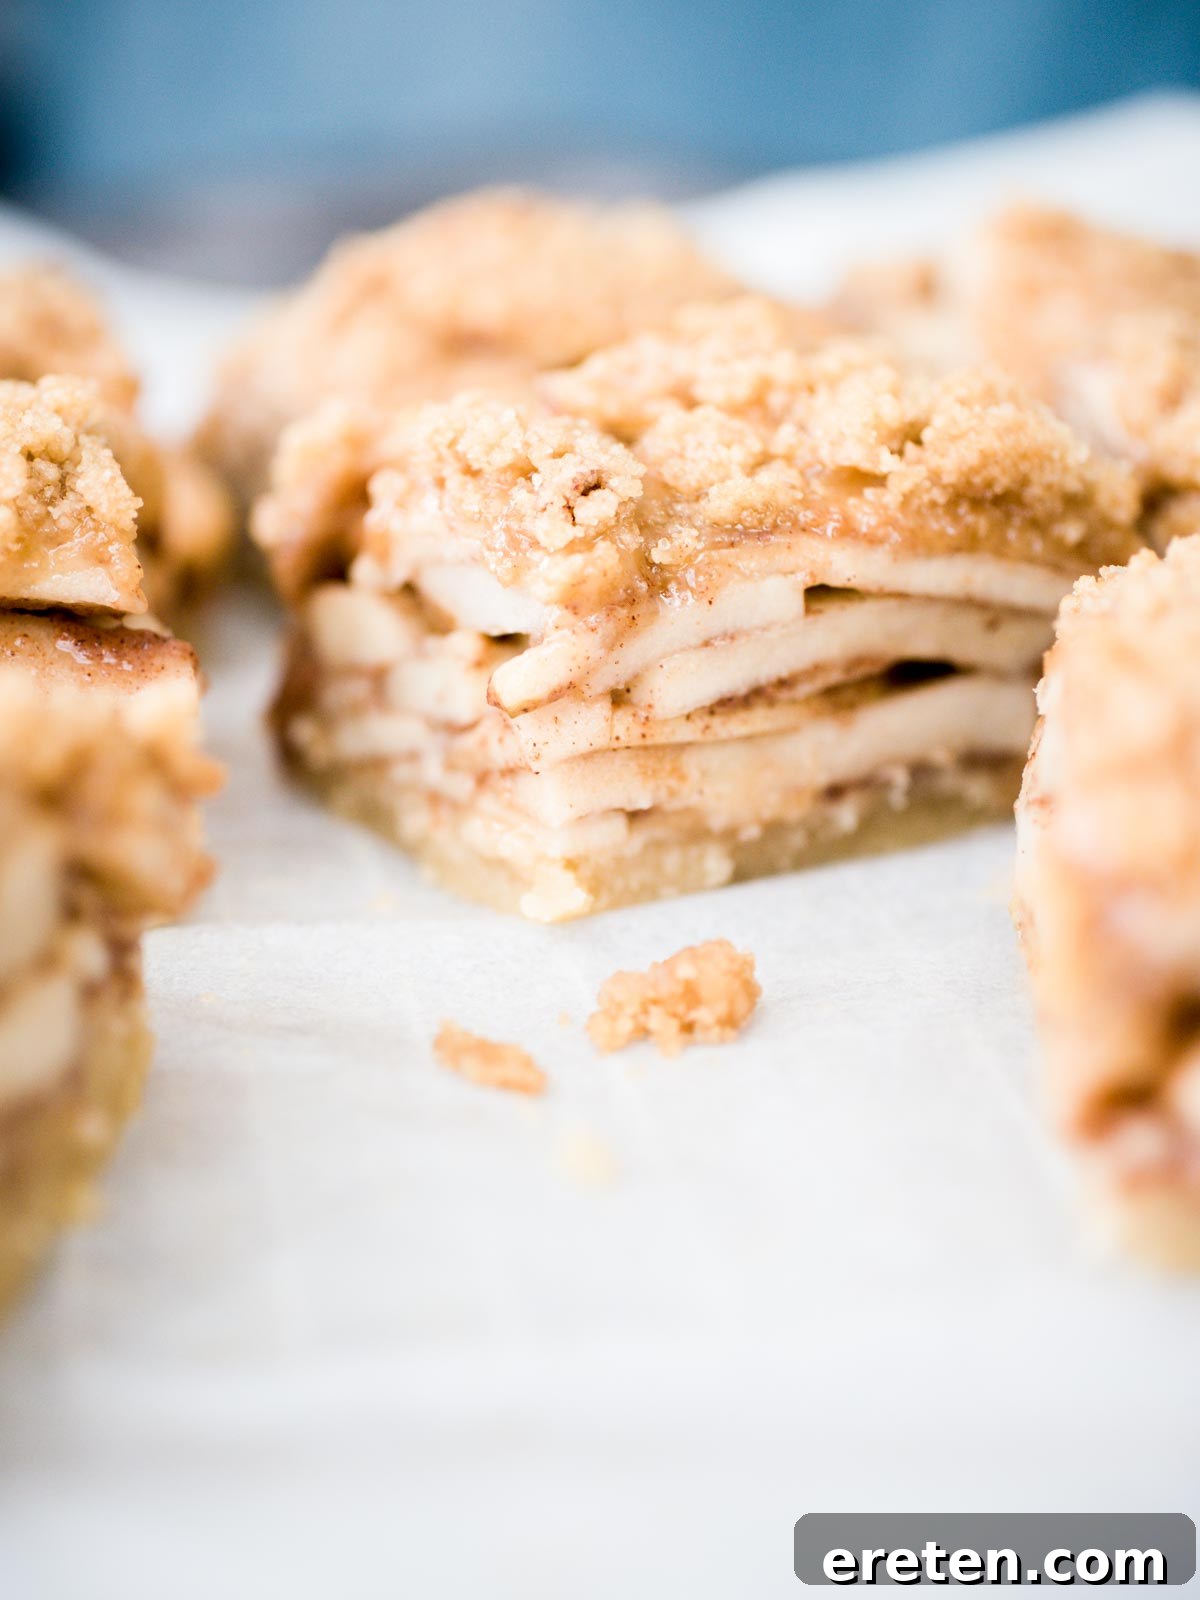
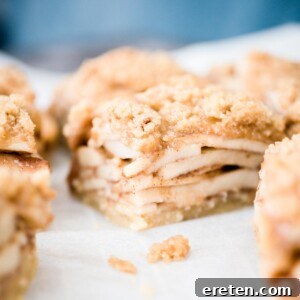
There’s nothing quite like the comforting aroma of warm apple pie wafting from the kitchen. These incredible Dutch Apple Pie Bars capture all the beloved flavors and textures of a classic apple pie – the tender, cinnamon-spiced apples, the rich, buttery crust, and the irresistible crumbly topping – but in a wonderfully convenient, easy-to-make bar form. What truly elevates this recipe is its generous filling, boasting five irresistible layers of perfectly cooked apples, making it an exceptionally indulgent and satisfying dessert. Prepare to be delighted, because once you try this recipe, you’ll agree it’s the only one you’ll ever need for exceptional apple pie bars.
This recipe holds a very special place in my heart, deeply rooted in family tradition. Growing up in Texas, apple pie was a staple at every fall gathering and holiday feast, a cherished recipe passed down through generations. While I adore the nostalgic taste of those homemade pies, I wanted to create a modern twist – something with all that familiar, cozy flavor, but in a format that was easier to prepare, share, and serve. The goal was to simplify the process without compromising on taste or texture, making it accessible for any home baker.
These apple pie shortbread bars are my delicious answer. They offer all the satisfying goodness of a slice of pie, but in a handheld dessert that eliminates the fuss of rolling out a delicate pie crust or meticulously serving individual slices. Each bite is a symphony of flavors: perfectly balanced sweetness, warm cinnamon spice, and rich, buttery notes from the shortbread base and crumb topping. Whether you’re heading to a holiday party, planning a potluck, or simply craving a cozy family treat at home, these apple pie bars deliver ultimate comfort with minimal effort. They are designed for convenience, allowing you to enjoy the full experience of homemade apple pie without the traditional complexities.
Why You’ll Love This Easy Apple Pie Bars Recipe
This recipe isn’t just another apple dessert; it’s a game-changer for anyone who loves the taste of apple pie but prefers a simpler approach. Here’s why these Dutch Apple Pie Bars will become a cherished part of your baking repertoire:
- Effortlessly Easy to Make: Say goodbye to the challenges of traditional pie crusts! This recipe features a simple, press-in shortbread base that comes together quickly and bakes beautifully. No rolling pins, no intricate crimping – just mix, press, and bake. This makes it perfect for bakers of all skill levels, even those new to the kitchen.
- No Special Tools Required: You won’t need any fancy gadgets or professional baking equipment for these bars. A standard baking dish, a mixing bowl, and a whisk or fork are essentially all you need. This simplicity ensures that anyone can whip up a batch without investing in specialized tools, making homemade dessert accessible.
- Perfectly Portable and Easy to Share: Unlike a delicate pie that can be tricky to transport and serve, these bars are designed for convenience. They’re incredibly easy to cut into neat squares, making them ideal for holiday gatherings, school events, office potlucks, or simply sharing with friends and neighbors. You can enjoy them neatly with a fork or as a delightful handheld treat on the go.
- Irresistible Flavor Profile: These bars boast a rich, multi-layered flavor experience. The sweet-tart apples are perfectly complemented by warm spices, a buttery shortbread crust, and a crispy, sweet crumb topping. It’s a delightful combination that appeals to everyone, evoking the nostalgic taste of classic homemade apple pie.
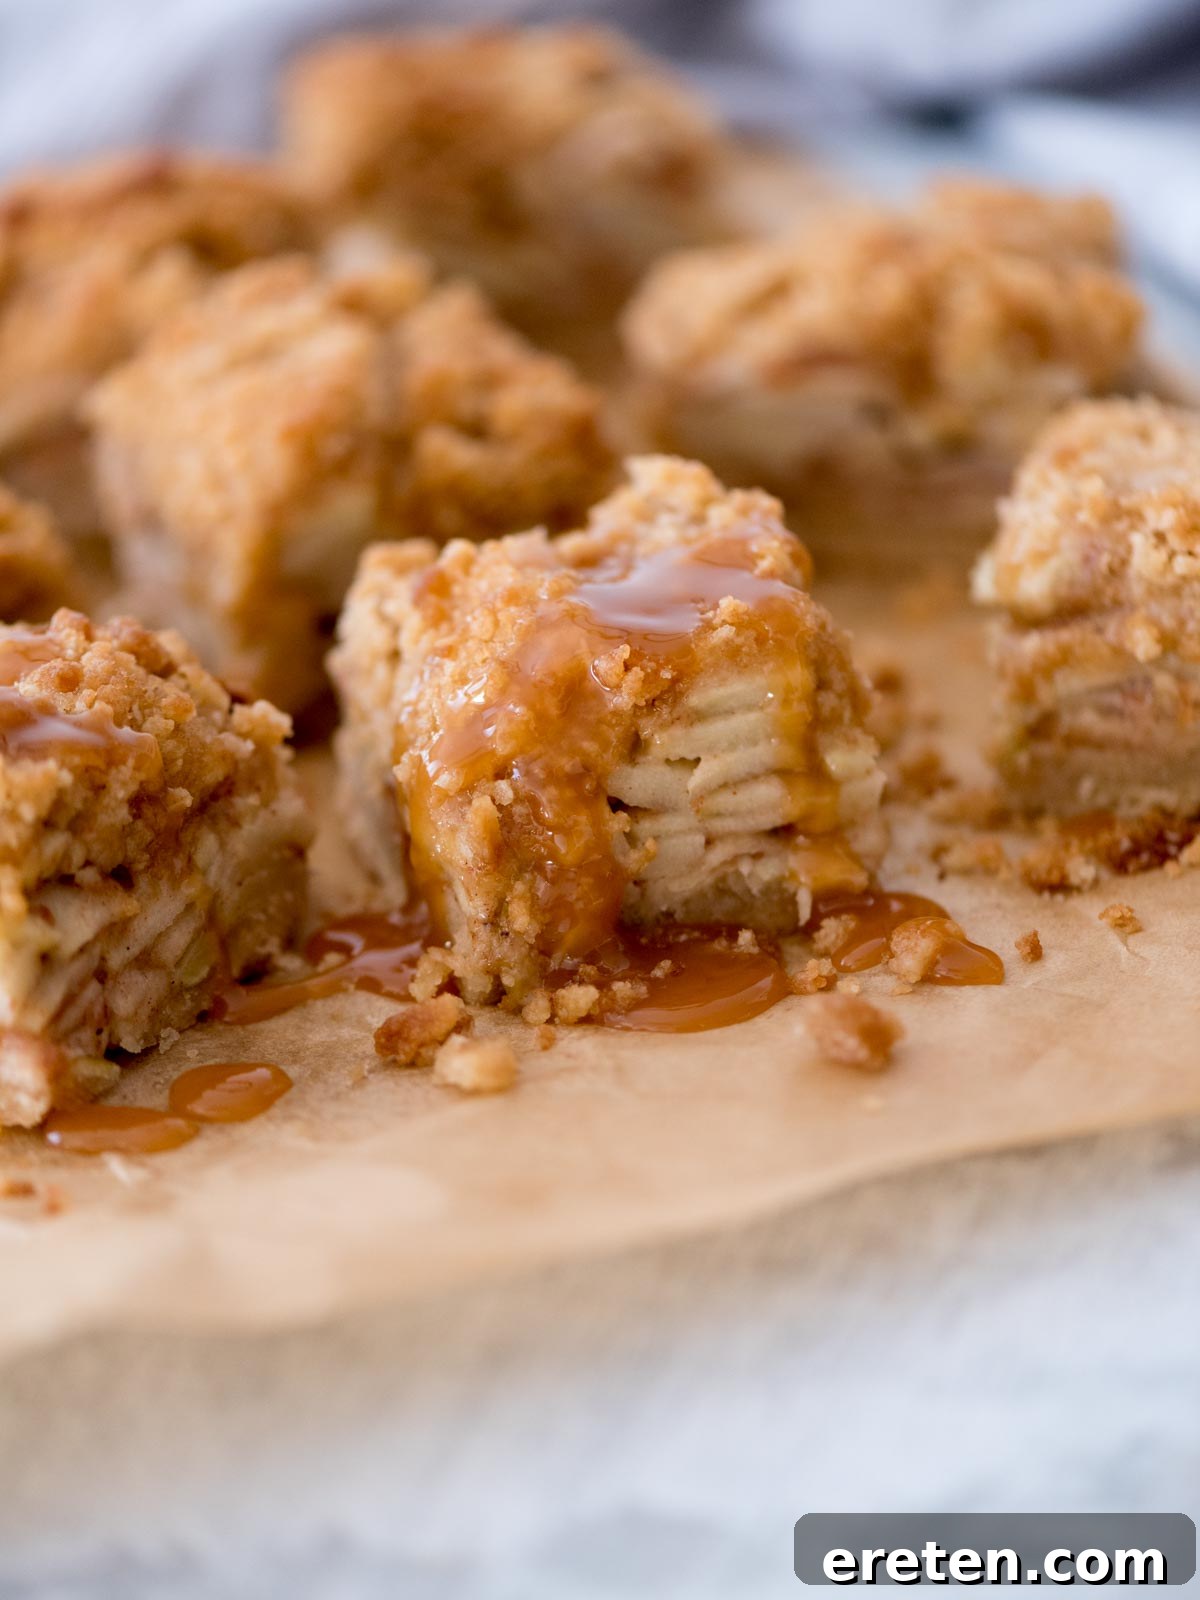
- Crowd-Pleasing Versatility: Whether served warm with a scoop of vanilla ice cream, or at room temperature with a drizzle of caramel, these bars are always a hit. Their robust flavor and satisfying texture make them suitable for any occasion, from casual weeknight desserts to elegant holiday spreads.
Essential Ingredients for Dutch Apple Pie Bars
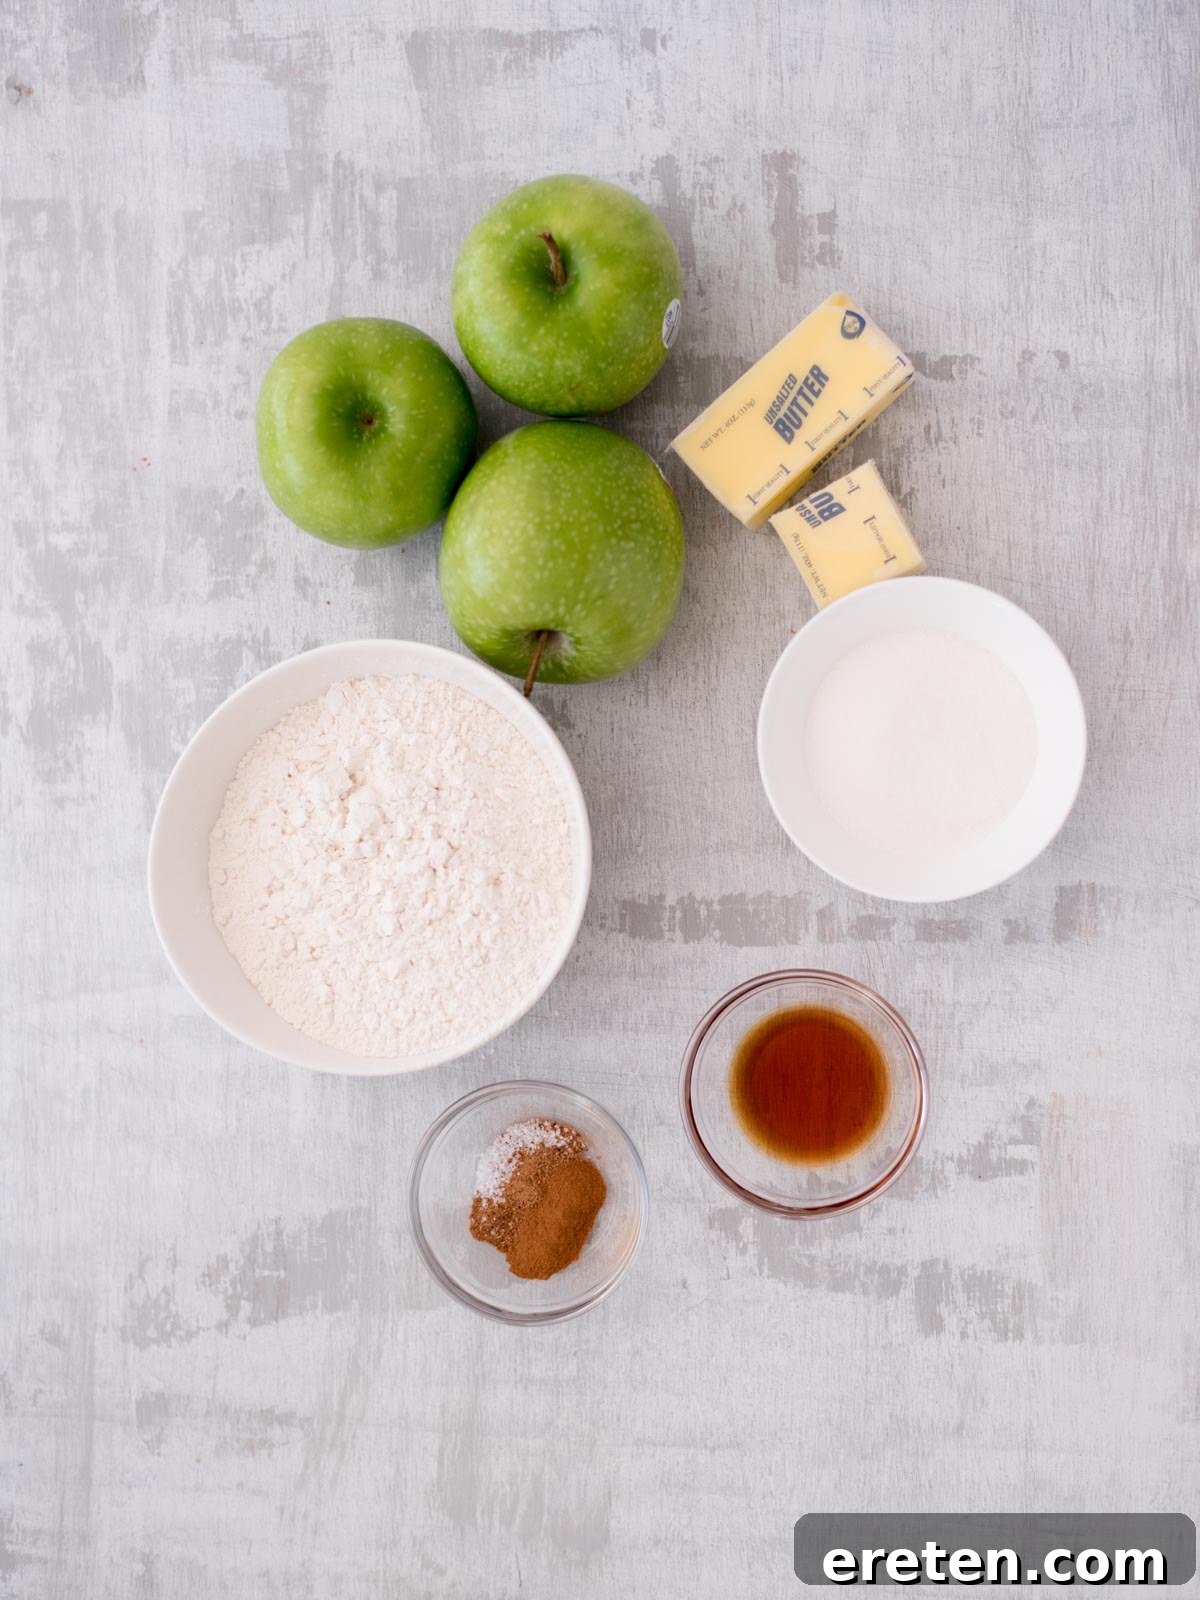
Creating the perfect apple pie bars with crumb topping starts with selecting high-quality ingredients. Each component plays a crucial role in achieving that balanced flavor and delightful texture:
- Granny Smith Apples: I highly recommend sticking with Granny Smith apples for this recipe. Their distinct tartness provides a fantastic contrast to the sweetness of the sugars and spices in the filling. This balance prevents the bars from being overly sweet and ensures a vibrant, fresh apple flavor. You’ll need about three large apples, peeled and thinly sliced.
- Unsalted Butter: Unsalted butter is the best choice here because it gives you complete control over the salt content in the recipe. Since a pinch of salt is added separately, using unsalted butter allows for precise flavor adjustments, ensuring the perfect savory-sweet balance in both the crust and the crumb topping. Ensure it’s at room temperature for creaming.
- Granulated Sugar: You’ll use granulated white sugar to provide sweetness and structure in both the shortbread crust and the apple filling. Its fine texture helps it dissolve evenly, creating a smooth and balanced flavor.
- Brown Sugar: Whether you choose light or dark brown sugar, both work wonderfully in this recipe. Brown sugar adds a deeper, molasses-rich sweetness and contributes to the signature moistness and caramel notes in the crumb topping. It also enhances the overall warmth and coziness of the dessert.
- All-Purpose Flour: This is the backbone of both the shortbread crust and the crumb topping. All-purpose flour provides the necessary structure and tender texture. Make sure to measure it accurately to ensure the right consistency for your dough and topping.
- Vanilla Extract: Your favorite vanilla extract will elevate the flavors, adding a comforting, aromatic warmth that complements the apples and spices beautifully. Use a good quality extract for the best results.
- Ground Cinnamon and Ground Nutmeg: These two spices are truly what make these apple pie bars exceptional. Cinnamon brings its classic warm, sweet heat, while nutmeg adds a subtle, earthy depth that rounds out the spice profile. Together, they create the quintessential apple pie aroma and taste.
- Salt: A pinch of coarse kosher salt or sea salt is essential. Salt balances the sweetness, enhances the other flavors, and prevents the dessert from tasting flat. It brings out the best in all the ingredients.
Step-by-Step Guide: How to Make Apple Pie Bars with Fresh Apples
Making these loaded apple pie squares with a delightful crumb topping is a much simpler process than you might imagine. It all comes together in three main parts: the buttery shortbread crust, the spiced apple filling, and the crispy streusel topping. Let’s dive in!
1. Crafting the Perfect Shortbread Crust
First, preheat your oven to 300°F (150°C). This lower temperature allows the crust to set without browning too quickly.
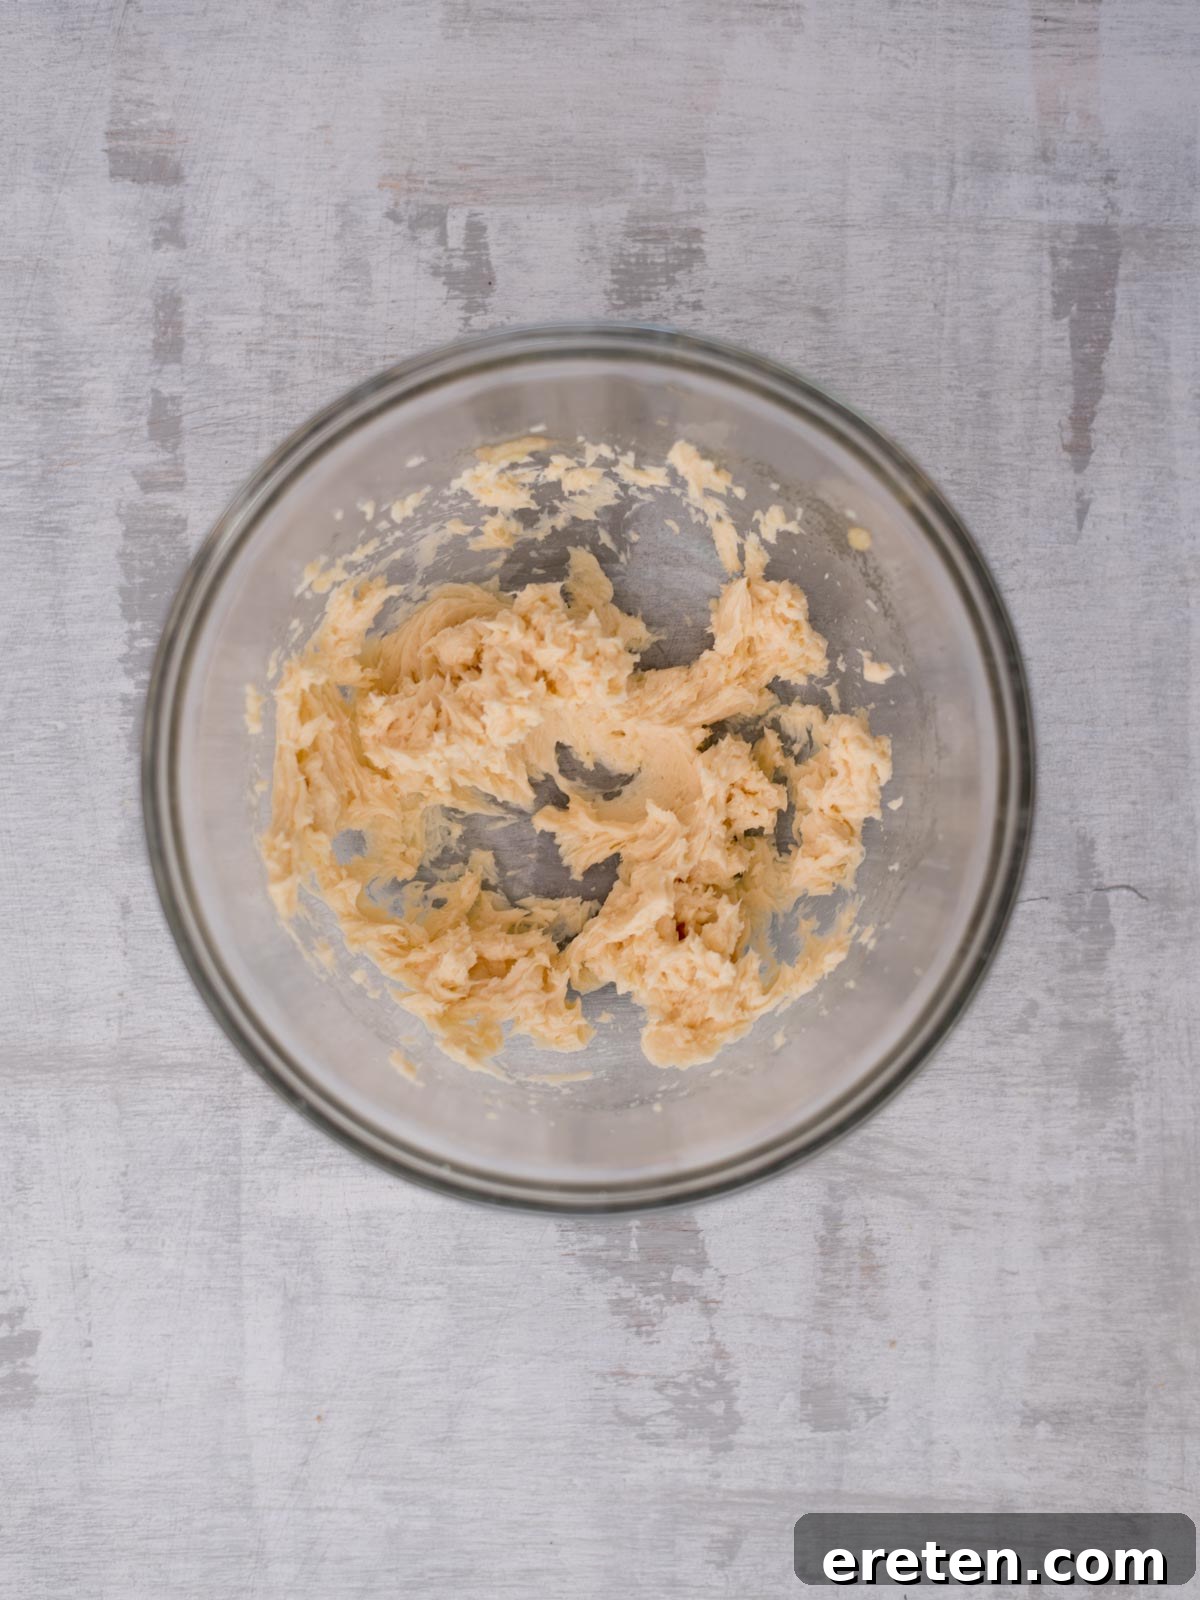
In a spacious mixing bowl, combine ½ cup of room temperature unsalted butter, ¼ cup of granulated sugar, a teaspoon of vanilla extract, and a small pinch of salt. Using an electric mixer (or a whisk and some elbow grease), beat these ingredients together for about 3 minutes. You’re looking for a light, fluffy, and well-creamed texture – this aeration is key to a tender shortbread.
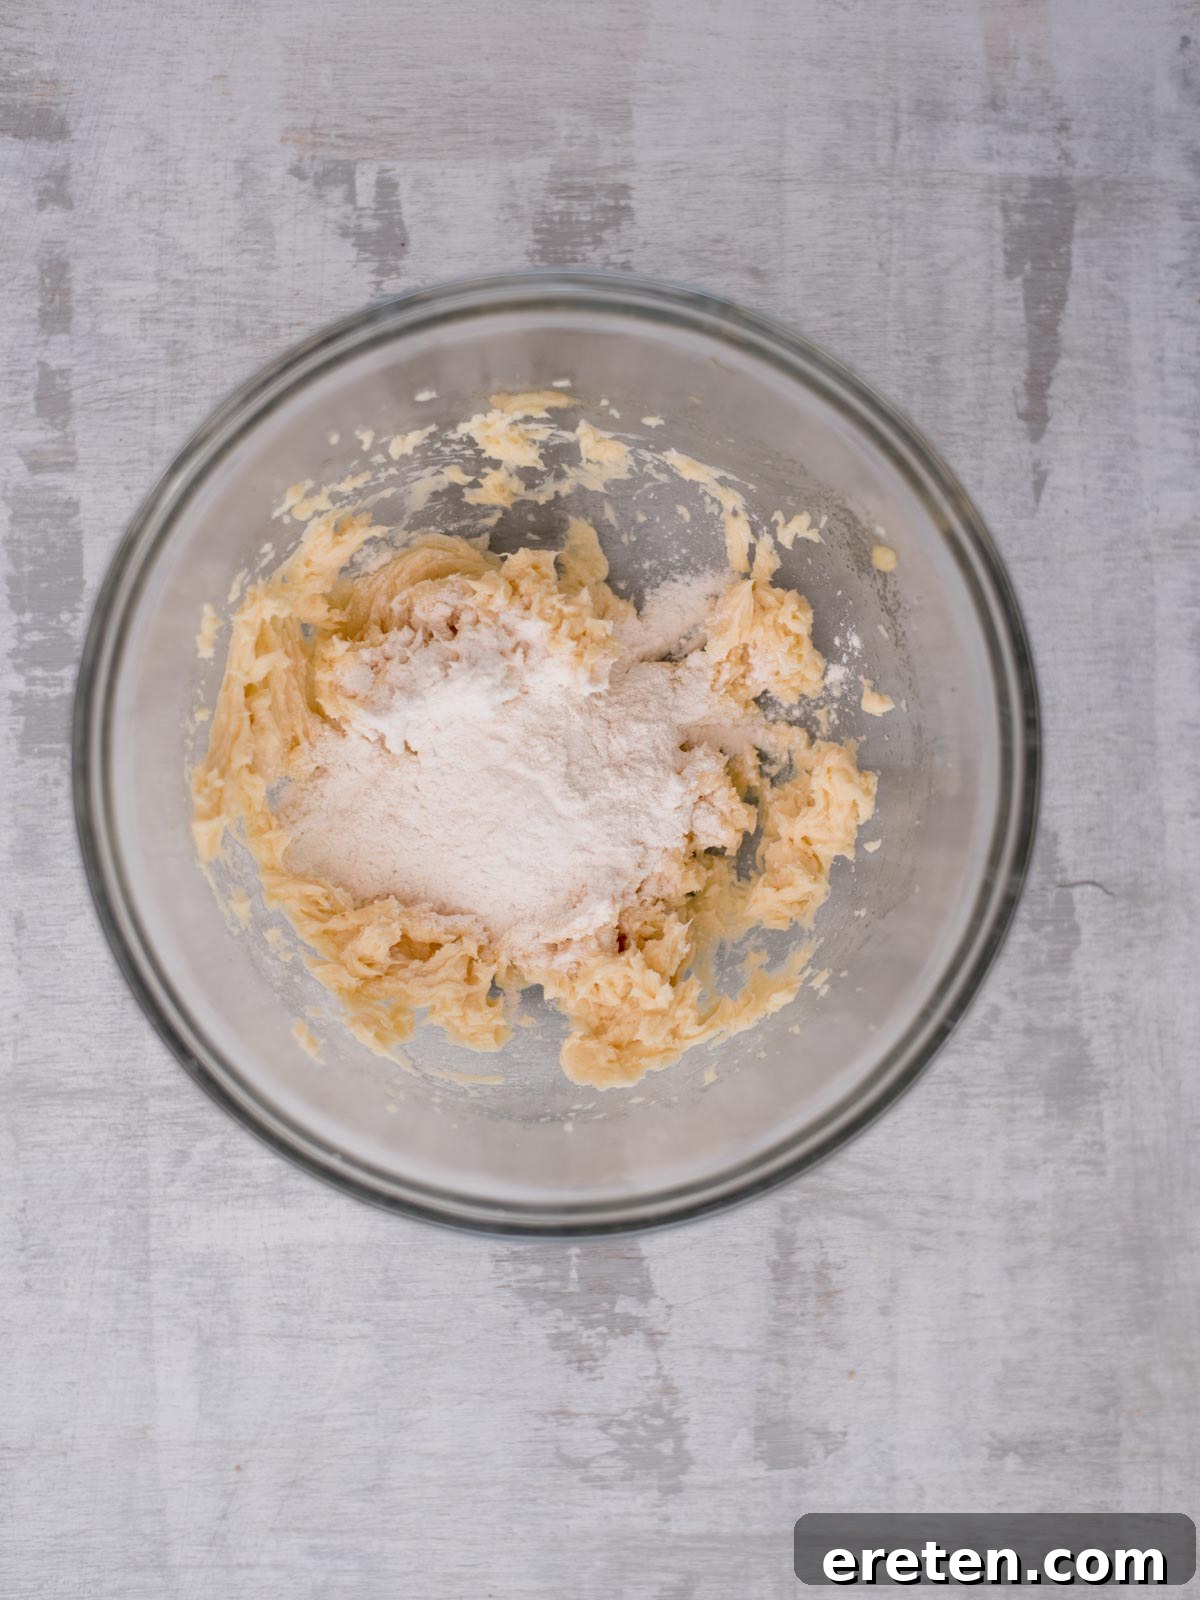
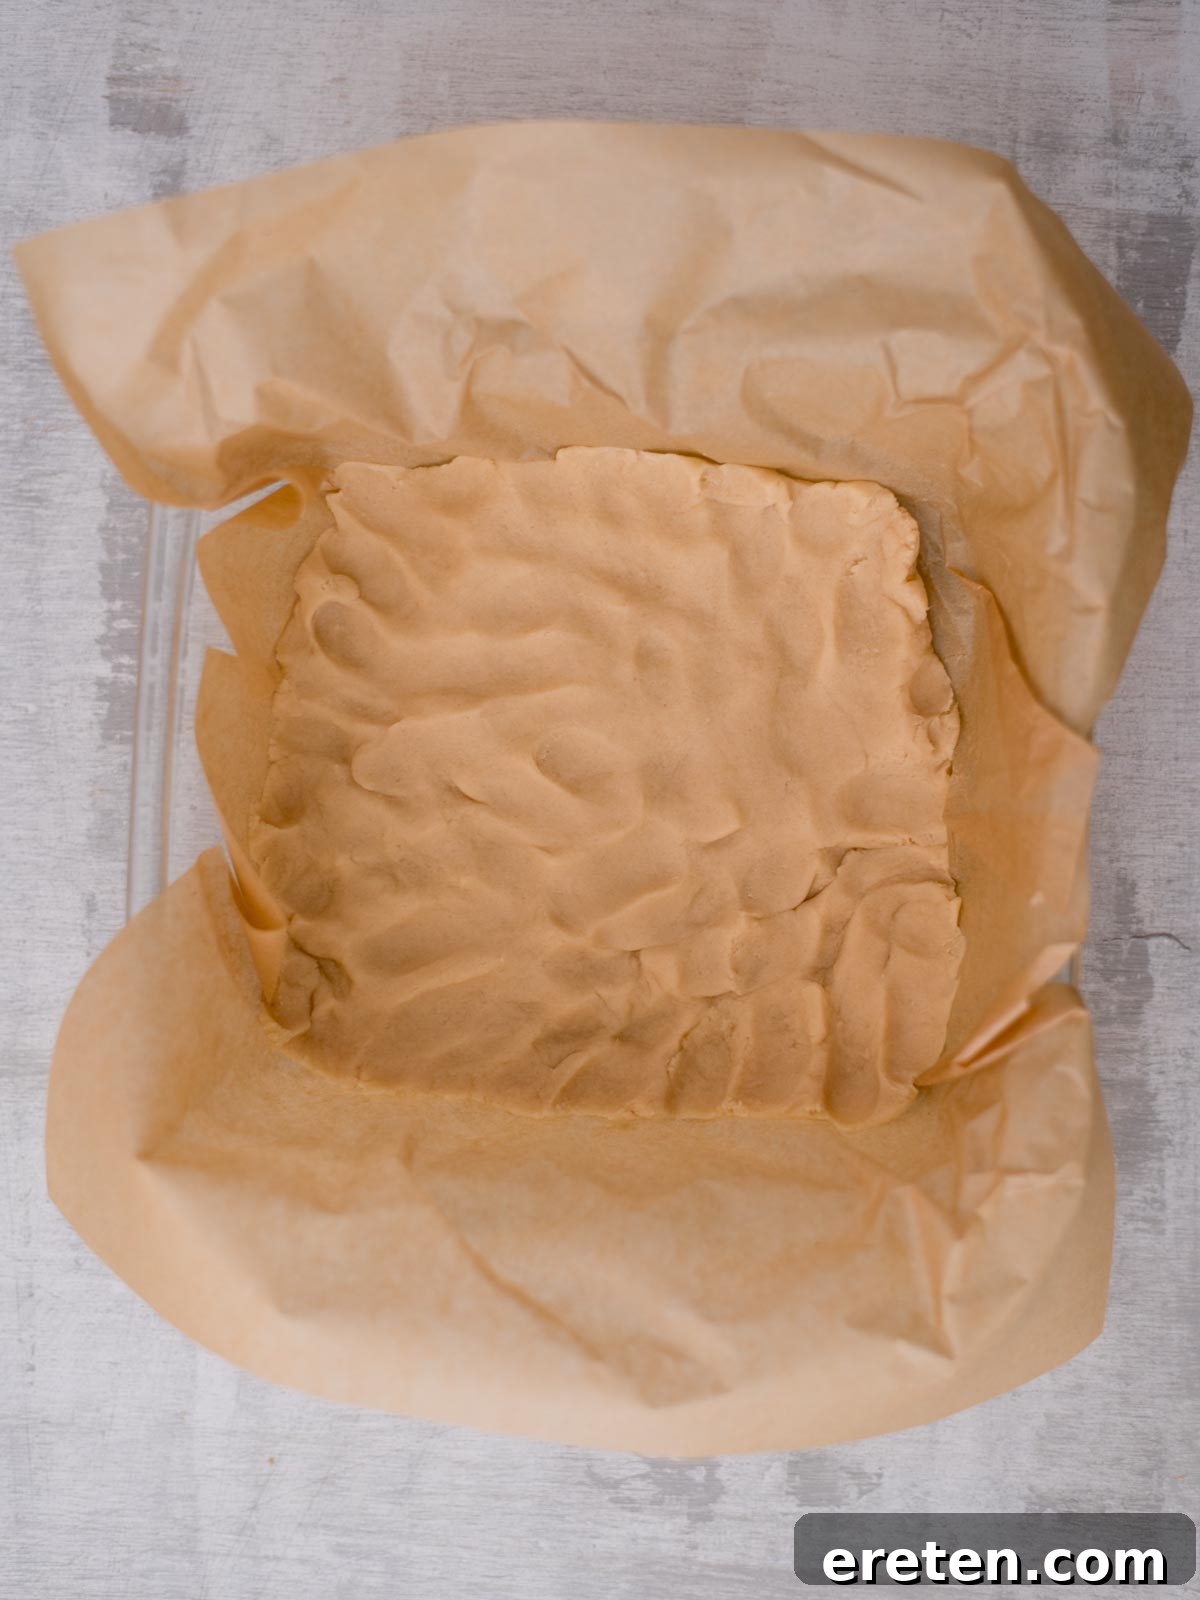
Next, gradually add 1 cup of all-purpose flour to the wet mixture, about ¼ cup at a time. Mix on low speed until the flour is just incorporated and everything is evenly blended. Overmixing at this stage can lead to a tough crust, so stop as soon as it comes together into a soft dough. Press this dough evenly into a 9×9 or 8×8-inch glass baking dish that’s been lined with parchment paper, leaving an overhang on the sides for easy removal later. A quick tip for an even crust: use the back of a spoon, a flat-bottomed glass, or your fingers to gently smooth and press the dough across the bottom of the pan. Bake this crust for 12 minutes, just until it’s set and lightly golden at the edges. This partial bake prevents a soggy bottom later.
2. Preparing the Spiced Apple Filling
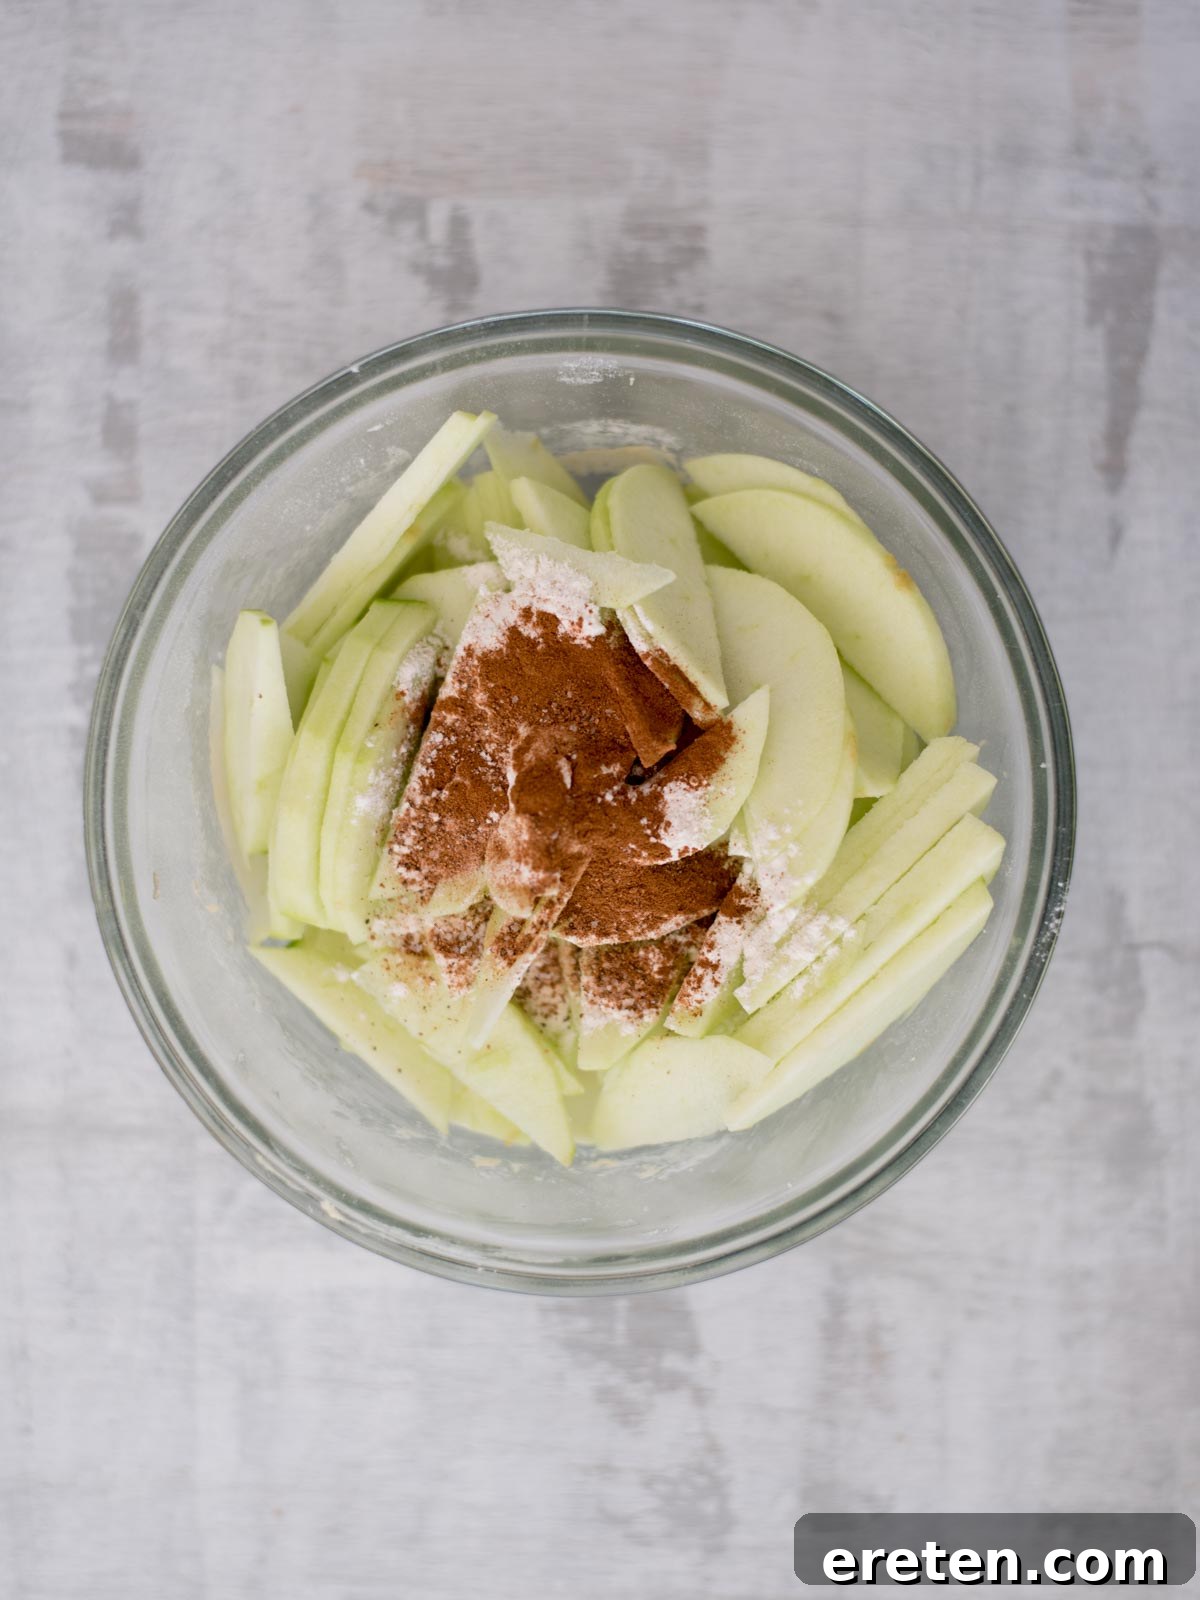
While your crust is in the oven, it’s apple time! In a separate large bowl, combine your thinly sliced Granny Smith apples with 2 tablespoons of all-purpose flour, 2 tablespoons of granulated sugar, 1 teaspoon of ground cinnamon, and ¼ teaspoon of ground nutmeg. Toss everything together thoroughly until every single apple slice is well-coated. This coating step is crucial for two reasons: the flour helps to thicken the apple juices as they bake, preventing a watery filling, and the spices infuse every piece with that incredible, warm apple pie flavor. Don’t skip this step; it truly makes a difference in the final texture and taste of your homemade apple bars. Once coated, set the apples aside until you’re ready for layering.
3. Making the Crumbly Topping (Streusel)
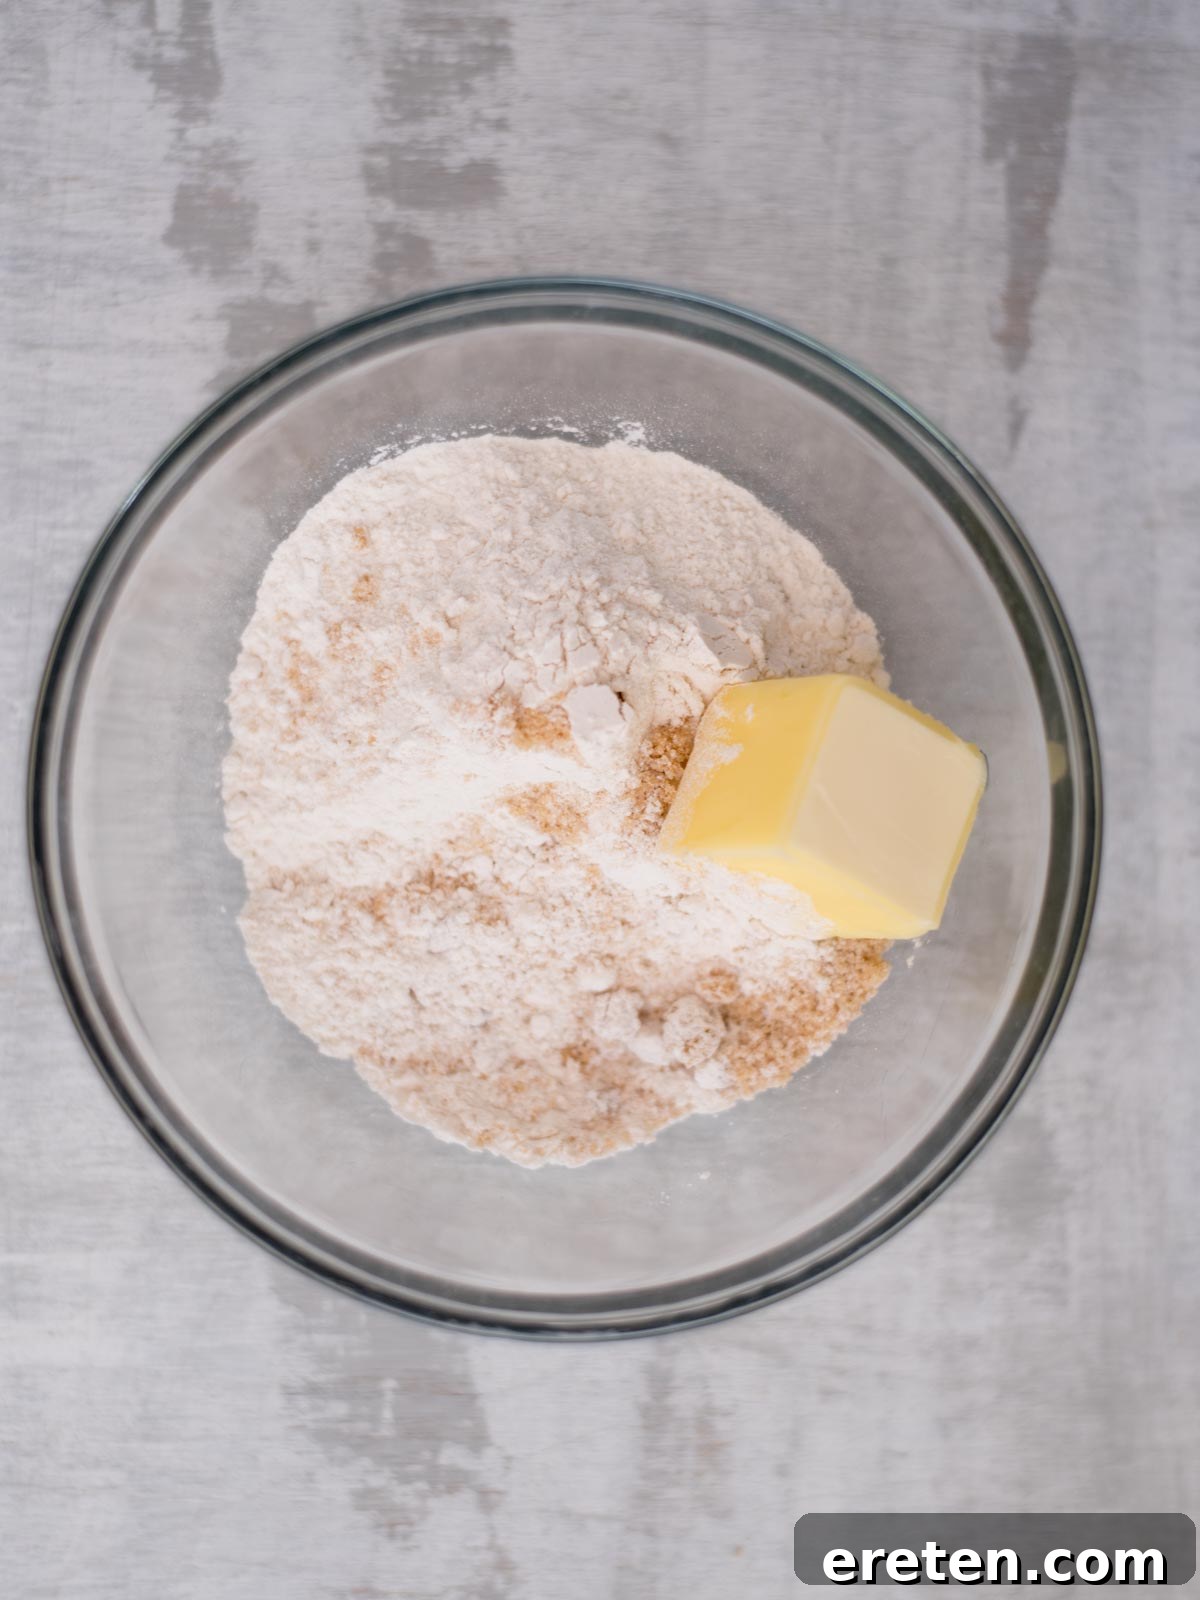
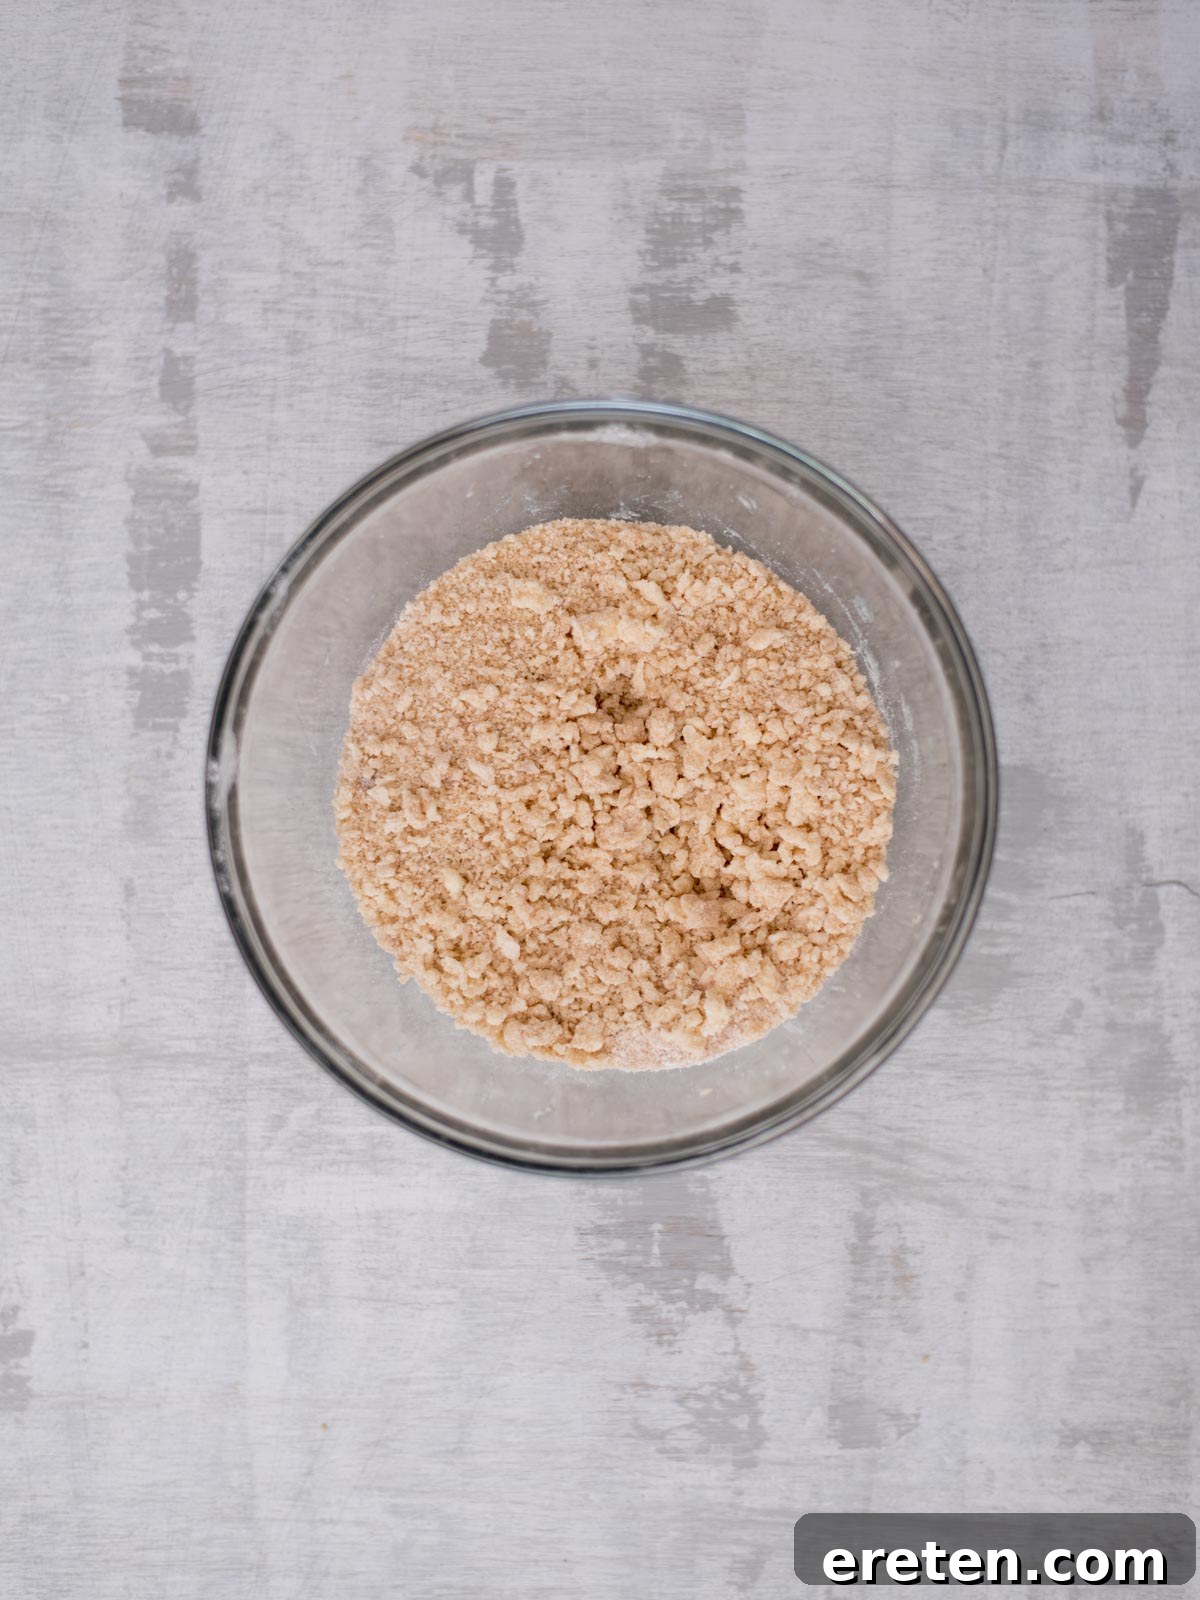
Now for the essential crumbly goodness! In another clean bowl, whisk together ½ cup of all-purpose flour and ¾ cup of brown sugar. Add the remaining ¼ cup of unsalted butter (which should also be at room temperature, or slightly chilled if it’s a very warm kitchen). Grab a sturdy whisk, a fork, or a pastry cutter if you have one. Cut the butter into the dry ingredients. Work quickly until the mixture resembles coarse, chunky sand or small peas. You want some varying sizes of crumbs here, as this creates that wonderfully crispy, crumbly texture on top of your bars as they bake.
4. Assembling and Baking Your Apple Pie Bars
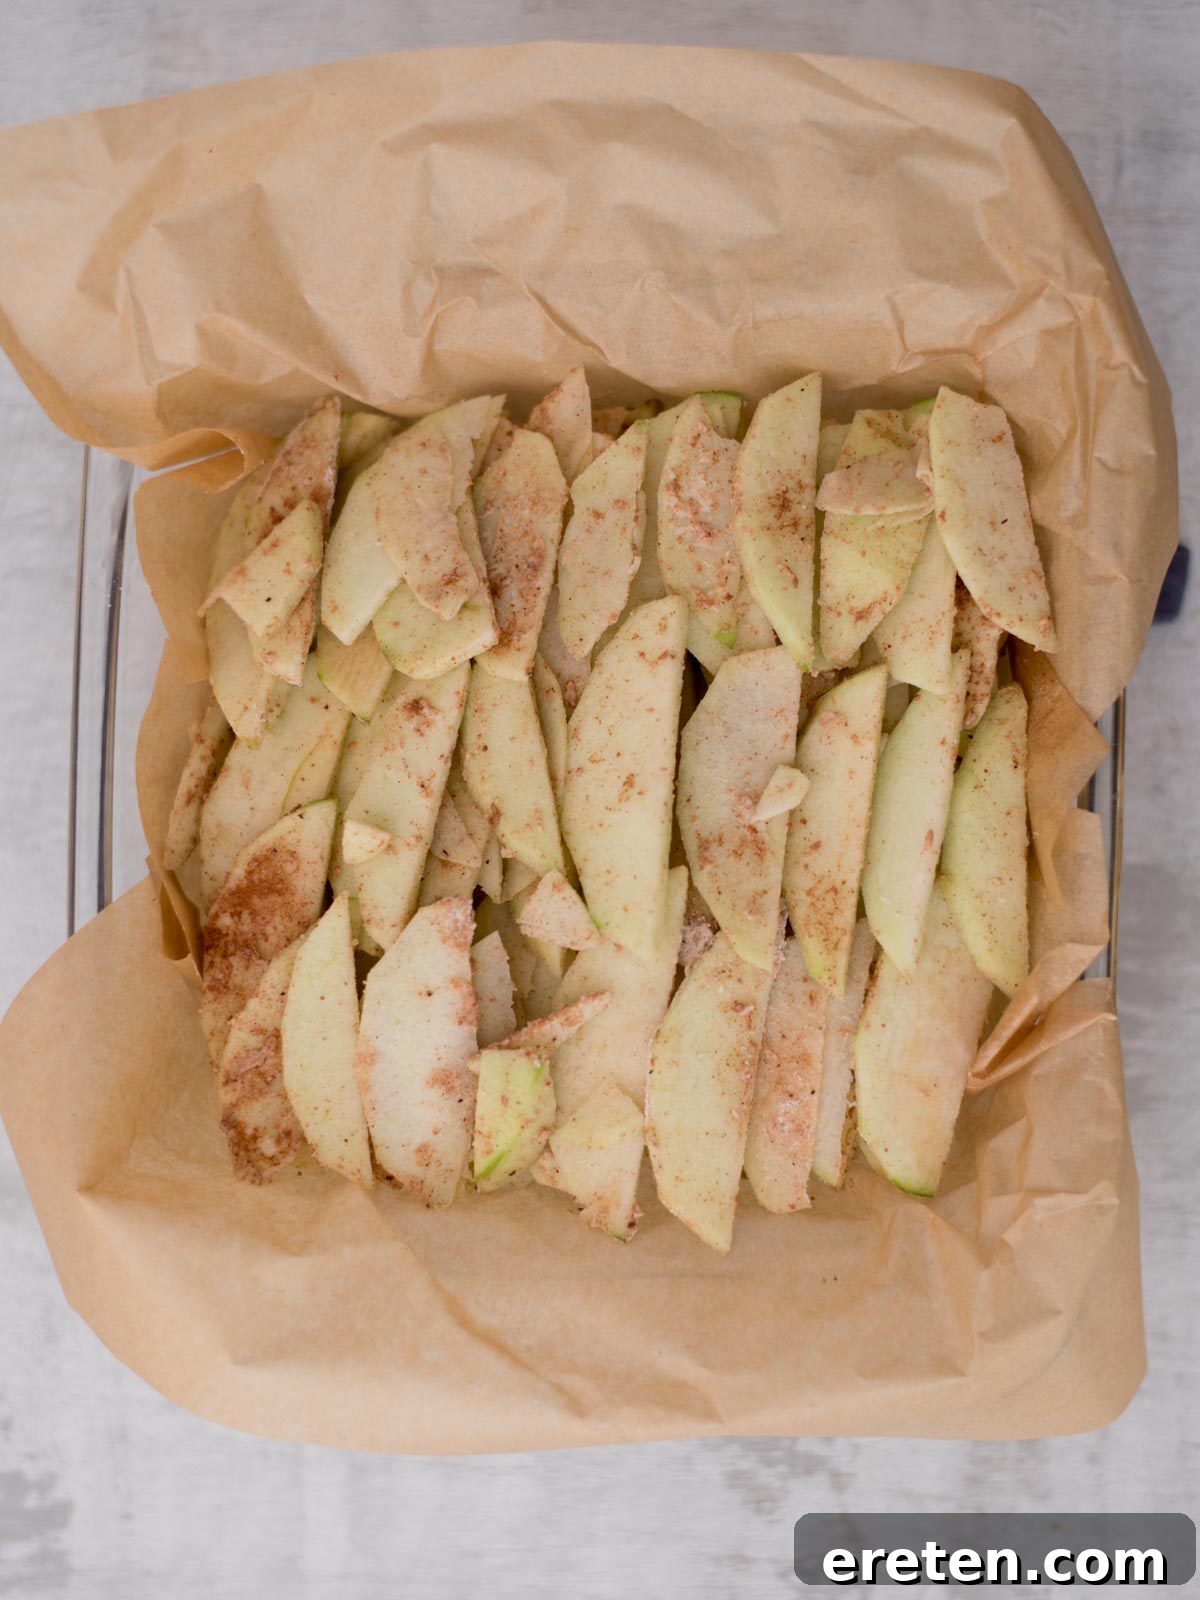
By now, your shortbread crust should be out of the oven and slightly cooled. Carefully spread your spiced apple mixture evenly over the baked crust. This is where the “loaded” magic happens – aim for about five even layers of apples if possible. This generous layering ensures that every single bite of your bar is packed with tender, flavorful apple. Once your apples are layered to perfection, sprinkle the prepared crumb topping evenly over the entire surface. Don’t be shy here; a thick layer of streusel creates that delightful golden crunch that contrasts beautifully with the soft apples and crust.
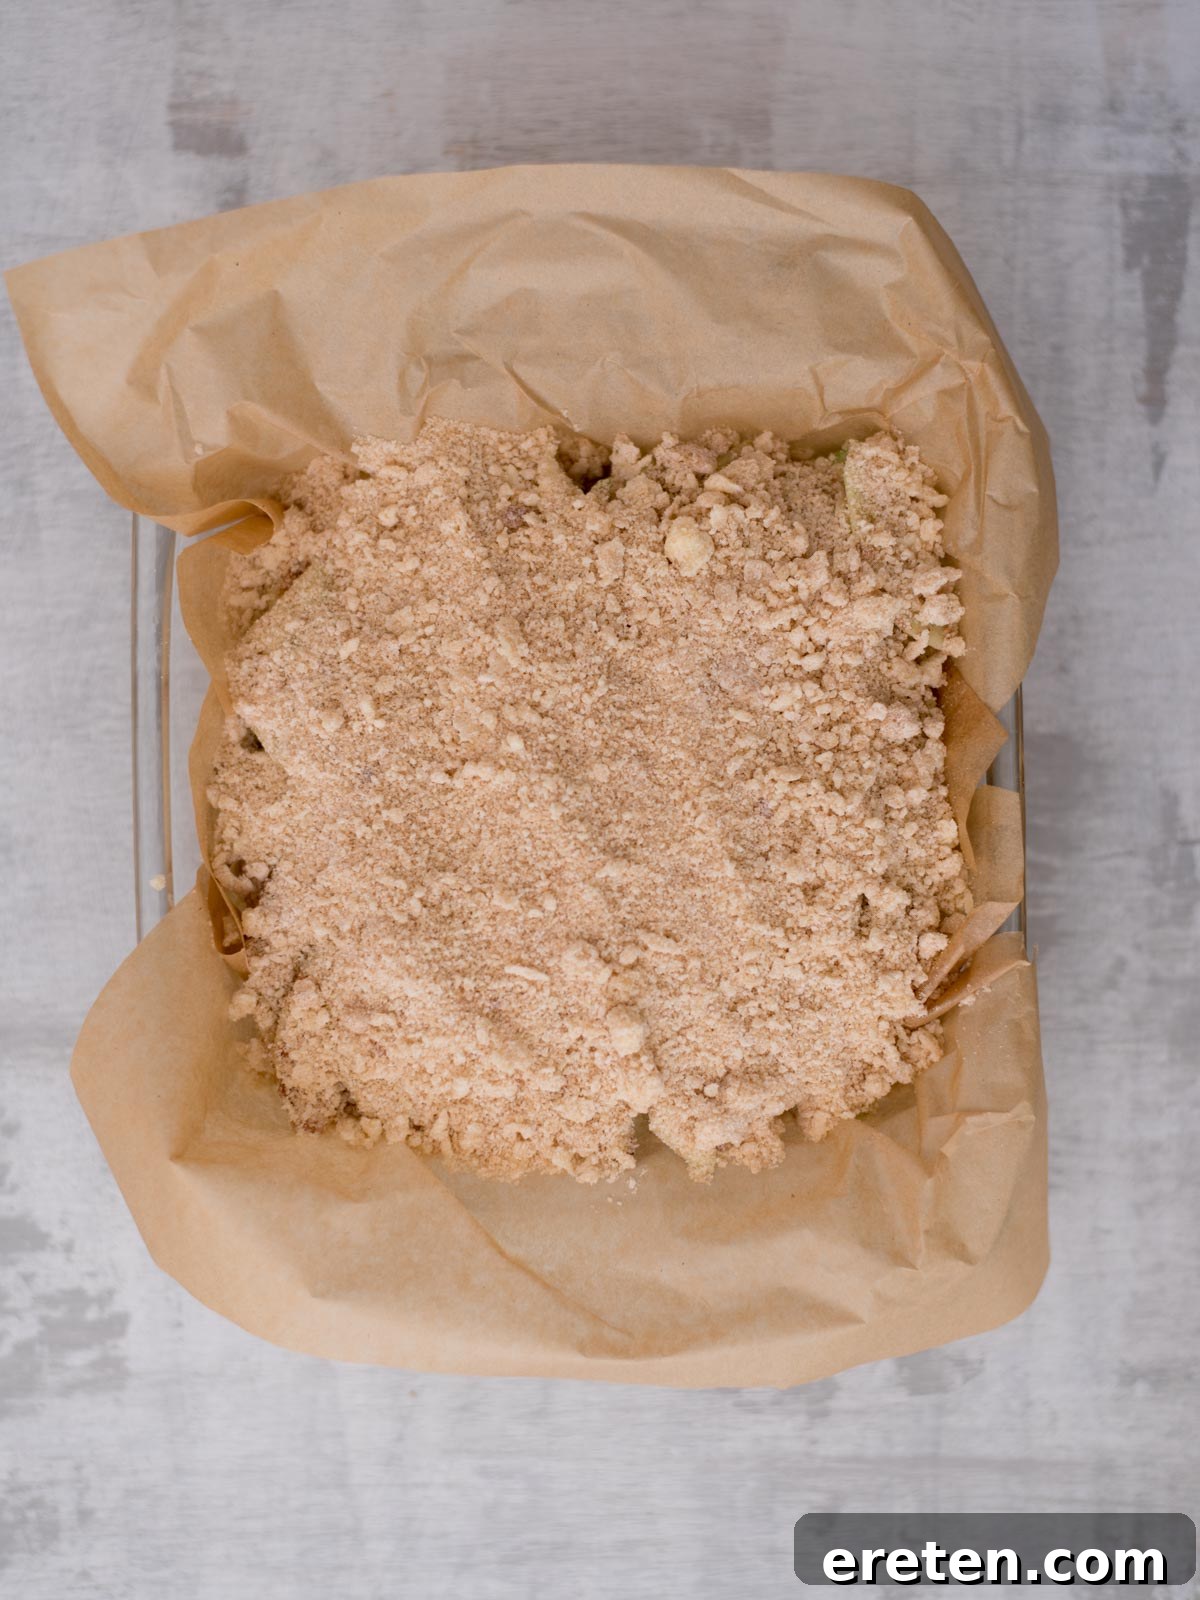
Now, increase your oven temperature to 350°F (175°C) and return the baking dish to the oven. Bake for approximately 25 minutes. Your kitchen will soon be filled with the most incredible aroma as the apples soften, the crumb topping turns a beautiful golden brown, and all the layers meld together in sweet harmony. Keep a watchful eye on the topping during the last few minutes to ensure it doesn’t get too dark; you want it perfectly golden and crisp.
Once baked, here comes the hardest part: resisting the urge to dig in immediately! It’s absolutely crucial to let the bars cool completely in the pan – this usually takes about 30-45 minutes, or even longer for best results. This extended cooling period allows the apple filling to set properly, preventing the bars from falling apart when sliced. The juices need time to thicken and cool, ensuring neat, clean cuts and stable layers. When fully cooled, use the parchment paper overhang to lift the entire slab of bars out of the dish. Transfer to a cutting board, slice into individual squares, and finally, enjoy your homemade masterpiece. These Dutch apple pie bars are fantastic on their own, but for an extra special treat, serve them warm with a scoop of vanilla bean ice cream or a generous drizzle of homemade caramel sauce. They’re truly the ultimate fall dessert.
Expert Tips and Tricks for the Best Apple Pie Bars
Achieving bakery-quality apple pie bars at home is simple with these additional tips:
- Patience with Cooling: As mentioned, this is probably the most critical tip. The apples release a lot of juice when baking, and this juice needs time to cool and thicken. If you cut into the bars too soon, they will be too soft and fall apart. Allowing them to cool for a minimum of 30-45 minutes (and ideally longer, or even completely at room temperature) will ensure they hold their beautiful shape, making for perfect squares.
- Elevate with Caramel: Easily transform these into decadent salted caramel apple pie bars! Once the bars have cooled (or just before serving), generously drizzle them with your favorite caramel sauce and sprinkle a tiny pinch of flaky sea salt over the top. The combination of sweet, tart, and salty is absolutely divine.
- Mix Up Your Apples: While Granny Smith apples offer a great tart balance, feel free to experiment with a mix of apples. Combining Granny Smiths with a sweeter, firmer variety like Honeycrisp, Fuji, or Braeburn can add more complexity and depth of flavor to your filling. Ensure whatever variety you choose is suitable for baking and won’t turn mushy.
- Perfect Crumb Topping: For an extra crunchy crumb topping, ensure your butter is cold when you cut it into the flour and sugar mixture. This creates more distinct, crisp crumbs. You can also add a tablespoon of chopped pecans or walnuts to the streusel mixture for a nutty twist.
- Don’t Overcrowd the Apples: While we aim for five loaded layers, ensure your apple slices are relatively thin. This helps them cook through evenly and prevents the bars from being too tall or unstable. A mandoline slicer can achieve perfectly uniform thin slices.
- Make-Ahead Magic: These bars are excellent for making ahead. The flavors actually deepen and meld beautifully overnight, making them an ideal dessert for parties or holidays. Simply bake, cool completely, and store until ready to serve.
Frequently Asked Questions About Apple Pie Bars
Should apple pie bars be refrigerated?
For optimal freshness and to ensure food safety, any leftover apple pie bars should be stored in an airtight container in the refrigerator. This will keep them fresh and delicious for up to 3-4 days.
Can apple pie bars be frozen?
Absolutely! Apple pie bars freeze exceptionally well. Once they have completely cooled, cut them into individual squares. Wrap each bar tightly in plastic wrap, then place them in an airtight freezer-safe container or a heavy-duty freezer bag. They can be stored in the freezer for up to 6 months. To enjoy, simply take them out individually and reheat them gently in the microwave or oven until warmed through.
Other Delicious Apple Recipes You Might Like
If you’re a fan of these Dutch Apple Pie Bars and love the comforting taste of apples, you’ll certainly enjoy these other fantastic apple-inspired creations:
- Apple Pie Overnight Oats: A healthy and convenient way to enjoy the flavors of apple pie for breakfast.
- Caramel Apple Cheesecake Dip: A creamy, sweet, and tangy dip that’s perfect for parties and dipping fresh apple slices.
- Apple Cinnamon Cupcakes: Moist and flavorful cupcakes bursting with apple and cinnamon goodness, topped with a delightful frosting.
- Apple Cinnamon Oatmeal Cookies: Chewy, spiced oatmeal cookies studded with bits of apple, a perfect comfort treat.
- Apple Pull Apart Bread: A fun and shareable bread infused with apple pie flavors, great for breakfast or dessert.
If you bake this delightful recipe and find yourself loving every bite, we would be incredibly grateful for a 5-star rating! Your feedback helps us continue to share free and delicious recipes with our community.
Apple Pie Bars Recipe
sweetlysplendid.com
20 mins
37 mins
57 mins
12 servings
Ingredients
- 3 large granny smith apples peeled and sliced (thin)
- 3/4 cup unsalted butter room temp
- 1/4 + 2 tbsp sugar
- 3/4 cup brown sugar
- 1 1/2 cup + 2 tbsp all purpose flour
- 1 tsp vanilla extract
- 1 tsp ground cinnamon
- 1/4 tsp ground nutmeg
- pinch of salt
Instructions
-
Preheat the oven to 300°F (150°C). Line a 9×9 or 8×8-inch glass baking dish with parchment paper, leaving an overhang on the sides.
-
In a mixing bowl, cream together 1/2 cup room temperature unsalted butter, 1/4 cup granulated sugar, 1 tsp vanilla extract, and a pinch of salt for about 3 minutes, until fully combined, light, and fluffy.
-
Gradually add 1 cup of all-purpose flour, 1/4 cup at a time, mixing until just combined. Do not overmix.
-
Press the dough evenly into the prepared parchment-lined baking dish. Use the back of a spoon or your fingers to smooth it out.
-
Bake the crust for 12 minutes, just until set.
-
While the crust bakes, combine the peeled and thinly sliced apples, 2 tbsp all-purpose flour, 2 tbsp granulated sugar, 1 tsp ground cinnamon, and 1/4 tsp ground nutmeg in a bowl.
-
Mix until the apples are fully coated in the spice and flour mixture. Set aside.
-
For the crumb topping, mix 1/2 cup all-purpose flour and 3/4 cup brown sugar in a separate bowl.
-
Add the remaining 1/4 cup of unsalted butter (room temperature).
-
Using a whisk, fork, or pastry cutter, cut the butter into the flour and sugar mixture until it resembles coarse, chunky sand or small peas. Set aside.
-
Take the spiced apples and layer them evenly over the baked crust, aiming for about 5 even layers if possible.
-
Once all the apples are layered, cover them generously with the prepared crumb topping.
-
Increase your oven temperature to 350°F (175°C) and bake for 25 minutes, or until the crumb topping is golden brown and the apples are tender. Keep an eye on the topping to prevent over-browning.
-
Allow the bars to cool completely in the pan for at least 30-45 minutes (or longer) before removing and cutting. This is essential for the bars to set and hold their shape. Enjoy your homemade Dutch Apple Pie Bars!
Notes
- Apple Variety: For the best flavor, use a mix of sweet and tart apples like Granny Smith and Honeycrisp. This adds depth and balance to the filling.
- Cutting the Butter: If your butter is too soft for the crumb topping, pop it in the fridge for a few minutes before cutting it into the flour mixture. Cold butter creates a flakier, crispier streusel.
- Layering the Apples: Aim for five even layers of apples to get that “loaded” texture and flavor in every bite. Thin slices work best for even cooking.
- Make-Ahead Tip: These bars taste even better the next day as the flavors meld together. They’re perfect for prepping ahead for a gathering or holiday!
- Serving Suggestion: Serve warm or at room temperature. A scoop of vanilla ice cream or a drizzle of caramel sauce makes them extra special.
- Storage: Store leftover bars in an airtight container in the fridge for up to 3 days. Let them come to room temperature before serving for the best texture.
Nutrition
Calories: 257kcal,
Carbohydrates: 37g,
Protein: 2g,
Fat: 12g,
Saturated Fat: 7g,
Polyunsaturated Fat: 1g,
Monounsaturated Fat: 3g,
Trans Fat: 0.5g,
Cholesterol: 31mg,
Sodium: 6mg,
Potassium: 100mg,
Fiber: 2g,
Sugar: 23g,
Vitamin A: 385IU,
Vitamin C: 3mg,
Calcium: 22mg,
Iron: 1mg
Nutrition information is automatically calculated, so should only be used as an approximation.
Additional Info
Dessert
American