
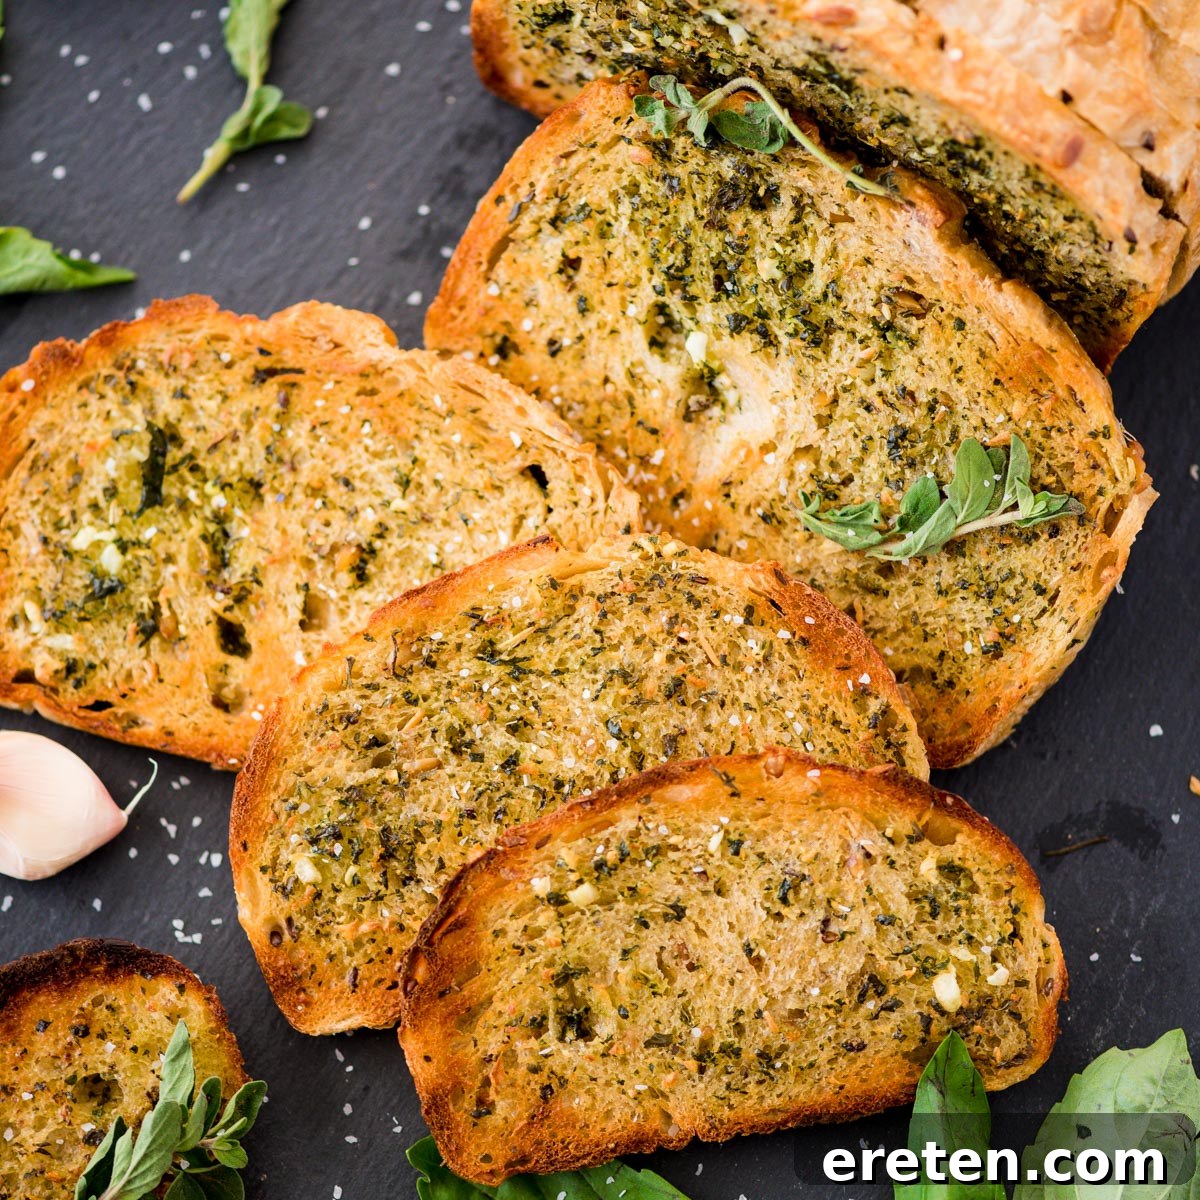
Transform any bread you have into an irresistible culinary delight with this incredibly simple and delicious shortcut method for homemade garlic bread. Forget the specific requirements of specialty loaves; this recipe proves that your standard sliced bread, a fresh bakery loaf, or even your beloved homemade sourdough can achieve that coveted garlic-packed flavor, a wonderfully soft center, and perfectly crispy edges that everyone adores.
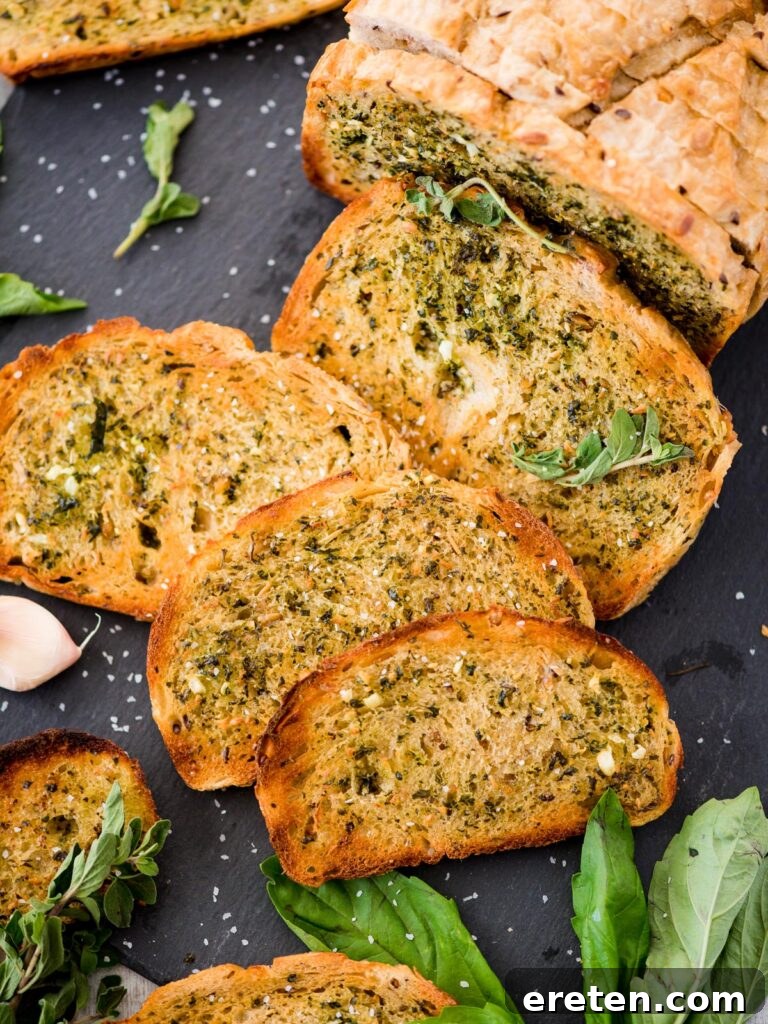
Unlocking the Secret to Effortless Garlic Bread: No French Loaf Required!
Here’s a culinary truth that will liberate your kitchen: you absolutely do not need a traditional French baguette to make incredible garlic bread. I’ve personally experimented with nearly every type of bread imaginable from my local grocery store shelves, and I can confidently assure you that this method is not only reliable and easy to follow but also consistently delivers spectacular results. You can trust this recipe to produce perfectly toasted, buttery, and aromatic garlic bread every single time, turning an ordinary meal into an extraordinary experience.
This foolproof technique ensures that whether you grab a loaf from the supermarket or use up what’s already in your pantry, you’ll achieve that ideal balance of crispy texture and rich, savory flavor. It’s the ultimate hack for busy weeknights or impromptu gatherings when you crave that comforting side dish without the fuss.
Why This Easy Garlic Bread Recipe Will Become Your New Go-To
Beyond its simplicity, this recipe shines in its versatility and incredible flavor profile. The rich, herbaceous garlic butter permeates the bread, creating a symphony of tastes and textures. The exterior crisps beautifully in the oven, providing a satisfying crunch, while the interior remains wonderfully soft and tender, ideal for soaking up delicious sauces and gravies. This isn’t just a side dish; it’s a vehicle for flavor, elevating any meal it accompanies.
In true Southern fashion, this bread is a must-have for sopping up hearty sauces and gravies. Imagine dipping a warm, garlicky slice into the slow-cooked goodness of a Crockpot Beef Ragu or pairing it with creamy Mashed Potatoes drenched in a rich Brown Gravy. It adds that coveted homemade touch with minimal effort, making every bite feel like a warm embrace. Get ready for this to become your ultimate, quick, and easy garlic bread solution.
The Beauty of “Any Bread” in Garlic Bread Making
One of the most remarkable aspects of this recipe is its adaptability to various types of bread. While classic garlic bread often calls for specific loaves, this method excels at transforming whatever you have on hand. Let’s explore some popular options and why they work:
- Standard Sliced White or Wheat Bread: Don’t underestimate the humble sandwich loaf! Its soft texture readily absorbs the garlic butter, and its thinner slices toast up quickly to a delightful crisp. It’s perfect for a lighter, everyday garlic toast.
- Artisan Loaves (Sourdough, Ciabatta, Rosemary Bread): These breads offer a more robust flavor and chewier texture. Sourdough’s tangy notes complement the garlic beautifully, while a rosemary loaf adds an extra layer of herbaceousness. Slice them thicker for a substantial, rustic garlic bread.
- Italian or French Bread (Non-Baguette): While we said no French bread is *needed*, a wider Italian or French loaf certainly works wonders. Its slightly denser crumb and thicker crust provide a great base for a classic garlic bread experience.
- Texas Toast: If you love a thick, fluffy, and extra-absorbent slice, Texas toast is an excellent choice. It creates a wonderfully soft interior that soaks up every drop of butter.
- Hot Dog/Hamburger Buns (Split): For a fun, casual twist or when you’re truly in a pinch, split buns can be transformed into individual garlic bread servings, great for kids!
The key is that the flavorful garlic butter spread is so potent and delicious, it elevates any bread to gourmet status.
Homemade Garlic Bread Ingredients: Simple & Flavorful
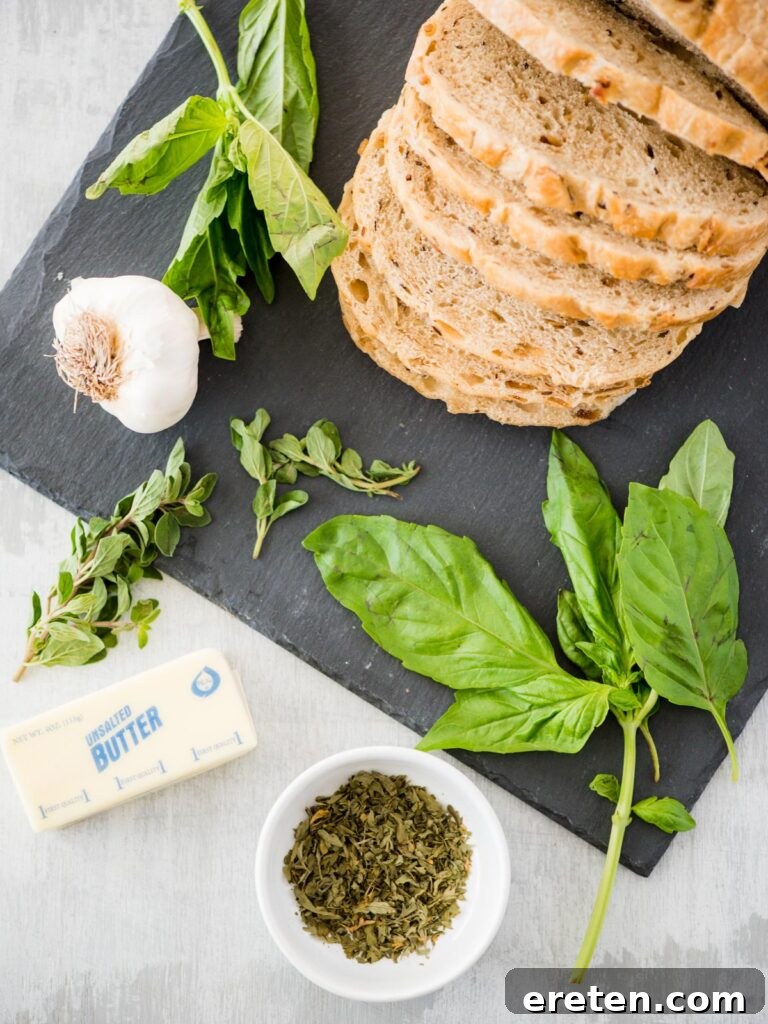
Creating this magical garlic bread requires just a handful of fresh ingredients, many of which you likely already have. The combination of fresh herbs with rich butter and pungent garlic is what makes this recipe truly stand out. Here’s what you’ll need:
- Bread: Your choice! Any loaf or sliced bread you prefer.
- Butter: Softened, unsalted is recommended so you can control the salt content.
- Fresh Garlic: The star of the show! Minced for maximum flavor infusion.
- Fresh Oregano: Adds an earthy, slightly peppery note.
- Fresh Basil: Brings a sweet, aromatic freshness that brightens the flavor.
- Dried Parsley: Provides a subtle, clean herbaceous background and vibrant color.
- Ground Black Pepper: A hint of spice to round out the flavors.
- Kosher Salt: Enhances all the other ingredients and provides essential seasoning.
Crafting the Perfect Garlic Butter Spread
The secret to exceptional garlic bread lies in a well-prepared garlic butter spread. This recipe uses a food processor to ensure a perfectly smooth and evenly distributed blend of flavors. Here’s a detailed guide to making it:
- Preheat Your Oven: Start by preheating your oven to 400°F (200°C). This ensures the oven is ready when your bread is prepared, leading to consistent toasting.
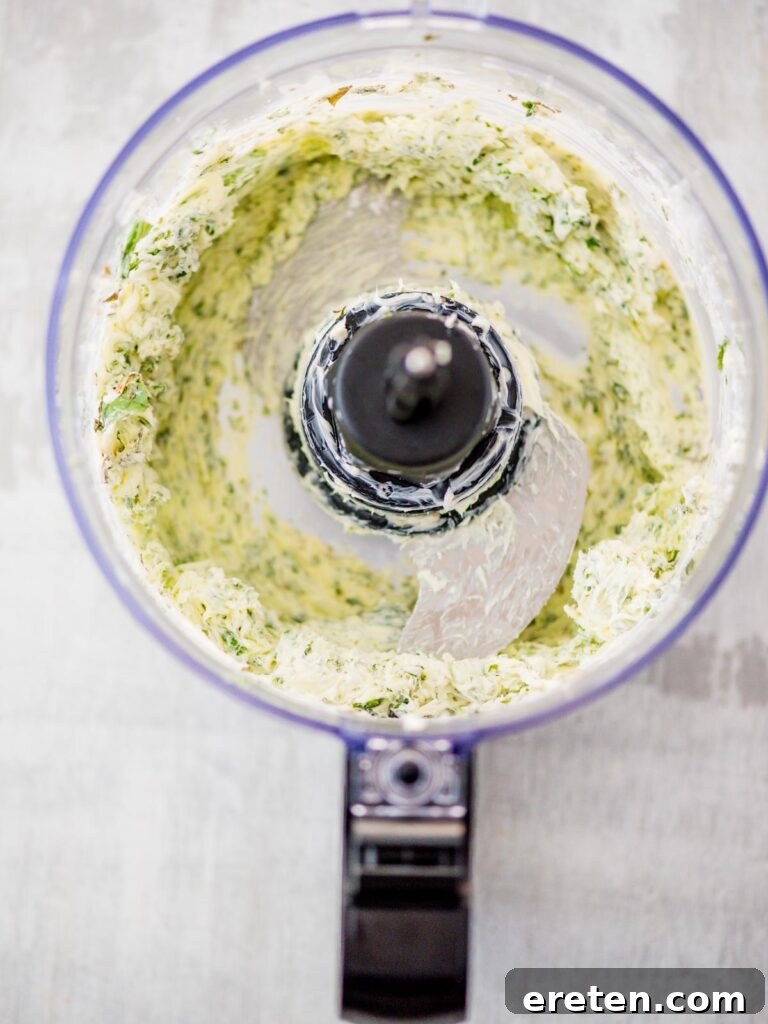
- Combine Ingredients in a Food Processor: In the bowl of your food processor, add the softened butter, minced fresh garlic, fresh oregano, fresh basil, dried parsley, ground black pepper, and kosher salt. Ensure the butter is truly softened (room temperature) for the best blending results. If it’s too cold, it won’t combine smoothly.
- Pulse Until Smooth and Creamy: Secure the lid and pulse the ingredients until they are thoroughly combined and form a smooth, creamy, vibrant green spread. Scrape down the sides of the bowl as needed to ensure all ingredients are incorporated. This step is crucial for distributing the garlic and herbs evenly, guaranteeing every bite of bread is packed with flavor.
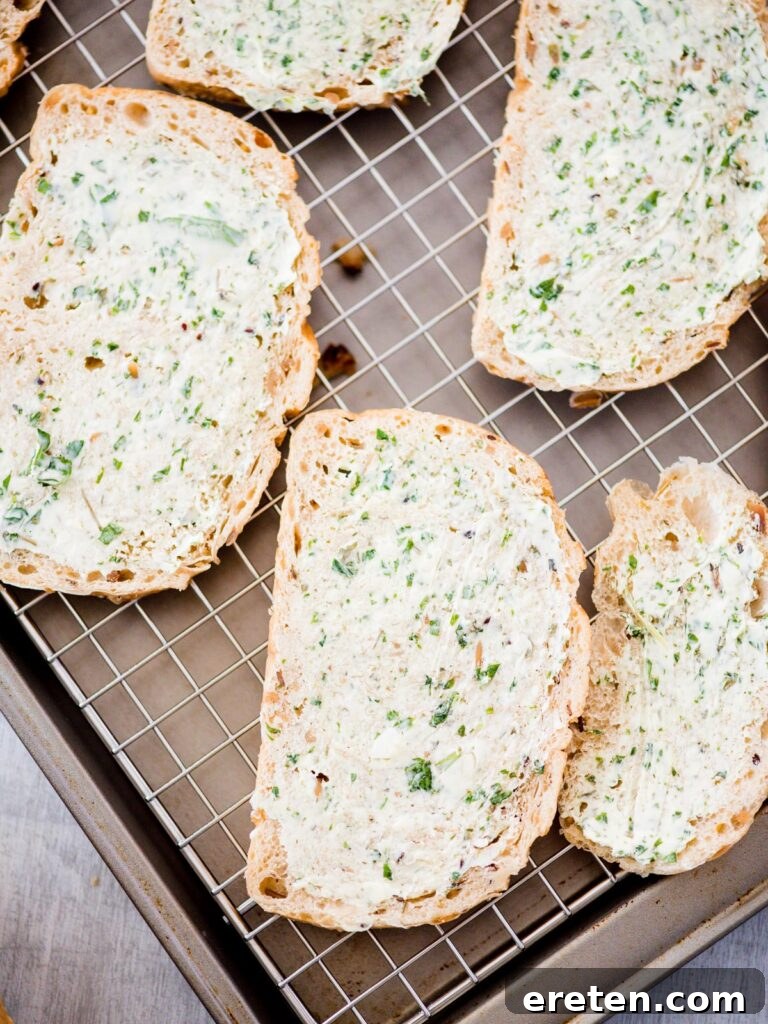
- Generously Spread the Butter: Take your chosen slices of bread (or a halved loaf if using something like French bread) and evenly spread the homemade garlic butter mixture from edge to edge. Don’t be shy, but also don’t apply it excessively thick, as this can prevent proper toasting. A generous, even layer is what you’re aiming for.
- Toast to Golden Perfection: Arrange the buttered bread slices in a single layer on a baking sheet. Place the baking sheet in your preheated oven and toast for approximately 6 minutes, or until the edges begin to turn golden brown and crispy. Keep a close eye on it, as oven temperatures can vary.
- Optional Broiler Finish for Extra Crispness: If you prefer an even crispier, more deeply browned garlic bread, you can carefully transfer the baking sheet to the broiler for an additional minute. This step requires extreme vigilance! Bread can go from perfectly toasted to burned in a matter of seconds under the broiler, so do not walk away.
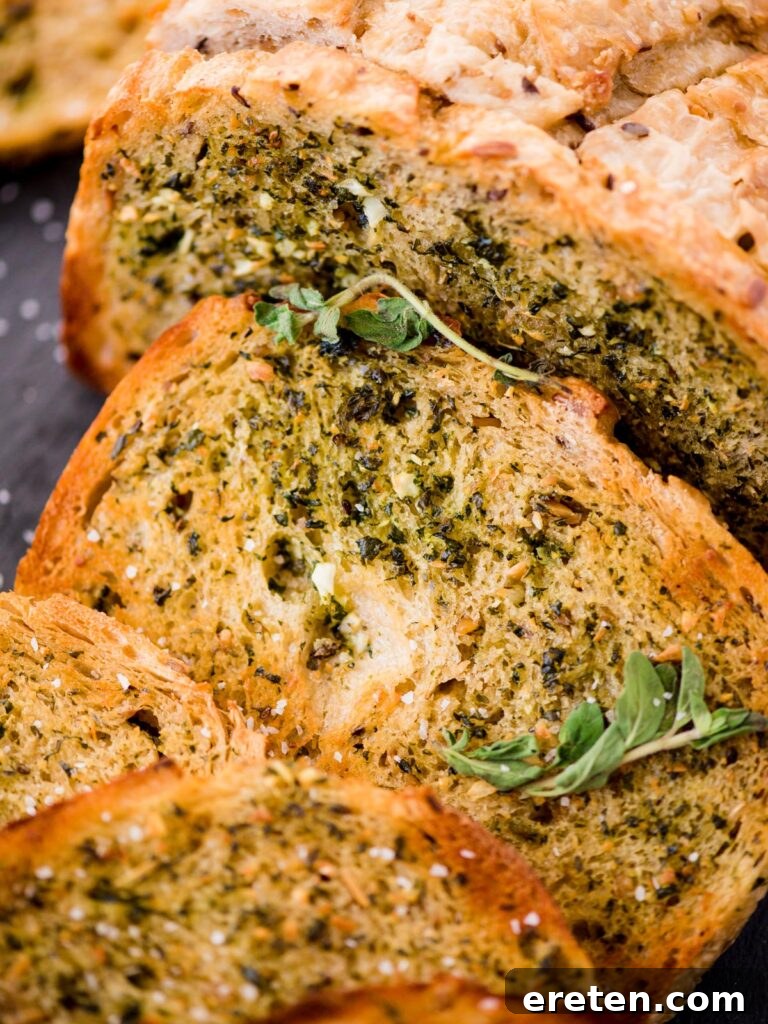
- Serve and Savor: Once removed from the oven, let the garlic bread cool for just a moment. For an extra touch of gourmet, sprinkle a little coarse kosher salt or a pinch of fresh chopped parsley over the warm slices right out of the oven. Serve immediately with your favorite main dish and enjoy the incredible aroma and taste!

Expert Tips for the Best Homemade Garlic Toast
Achieving garlic bread perfection is easy with these insider tips and tricks:
- Mastering the Broiler: The broiler is your friend for achieving a deep golden-brown and extra-crispy crust, but use it with extreme caution. After the initial baking, place the bread under the broiler for just 30-60 seconds. Watch it continuously – it can burn quickly!
- Embrace Flavorful Bread: While any bread works, choosing a loaf with inherent flavor can elevate your garlic bread. Try a loaf of rosemary focaccia or an olive oil artisan bread from your local bakery for an extra layer of complexity.
- Butter Thickness is Key: Don’t apply the butter spread too thickly. A moderate, even layer is best. Too much butter can make the bread greasy and prevent it from toasting properly, resulting in a soggy texture rather than crispy.
- Room Temperature Butter: Ensure your butter is truly softened to room temperature. This is essential for achieving a smooth, well-combined garlic spread in the food processor. Cold butter will result in chunks and an uneven spread.
- Fresh Herbs Make a Difference: While dried herbs can be used in a pinch, fresh oregano and basil provide a much brighter, more vibrant flavor that really shines through in the final product.
- Finishing Touch: A sprinkle of freshly grated Parmesan cheese or a dash of red pepper flakes immediately after removing from the oven can add an extra layer of flavor and appeal.
Thoughtful Alterations for Every Palate and Preference
This versatile garlic bread recipe can be easily customized to suit different tastes and dietary needs:
Alterations for Picky Eaters
Making food enjoyable for everyone is key. Here’s how to adjust for those who might be a bit particular:
- Choose Their Favorite Bread: The foundation of success with picky eaters is using a bread they already love. If plain white sliced bread with the crusts cut off is their preference, go with that. Familiarity fosters acceptance!
- Swap Fresh Garlic for Garlic Powder: The pungent, intense flavor of fresh garlic isn’t for everyone. A completely acceptable substitution is to use garlic powder. Start with about 1 teaspoon of garlic powder for every 3 cloves of fresh garlic and adjust to taste. This offers a milder, more universally appealing garlic flavor.
- Omit Certain Herbs: If specific fresh herbs are a sticking point, feel free to reduce or omit them. Dried parsley is often well-tolerated and adds a nice visual element.
Alterations to Lower Calories or WW Points
Enjoying delicious food while managing dietary goals is entirely possible with a few simple tweaks:
- Opt for Lower-Calorie/Point Bread: Many grocery stores offer excellent bread options that are lower in calories or Weight Watchers points, often in the 35-45 calorie range per slice. Using these can significantly reduce the overall calorie count. Alternatively, consider making “two-ingredient dough” (Greek yogurt and self-rising flour) for a homemade, lower-point base.
- Replace Butter with a Substitute: While butter provides unparalleled flavor and texture, a high-quality butter substitute can be used to reduce fat and calories. Be mindful of the taste and melting properties of your chosen substitute, as some may alter the final texture and flavor profile. Lightly brushing with olive oil is another option, though it will change the flavor considerably.
- Control Portion Sizes: Even with small adjustments, managing portion sizes is one of the most effective ways to adhere to dietary goals.
Storage and Reheating Best Practices for Homemade Garlic Bread
To enjoy your delicious garlic bread for longer, proper storage and reheating are essential:
- At Room Temperature: The best way to store freshly baked garlic bread for short-term consumption (1-2 days) is at room temperature. Place it in an airtight container or a resealable bag to prevent it from drying out. Avoid refrigerating, as it can cause the bread to become stale more quickly.
- Freezing for Extended Life: For longer storage, freezing is an excellent option. Wrap individual slices or a whole loaf tightly in aluminum foil, then place in a freezer-safe bag or container. It can be frozen for up to 2-3 months.
- Reheating from Frozen: To reheat from frozen, you can bake it directly from the freezer. Remove the foil and place the bread on a baking sheet in a preheated oven at 350°F (175°C) for about 10-15 minutes, or until warmed through and crispy.
- Reheating from Room Temperature: To revive room temperature garlic bread, simply pop it back into a 350°F (175°C) oven for 5-7 minutes, or until it regains its crispness and warmth. The broiler can also be used for a quick crisp-up, but remember to watch it carefully!
Perfect Pairings: How to Serve Homemade Garlic Bread
Homemade garlic bread is a fantastic accompaniment to a wide variety of dishes, especially those with rich sauces or hearty broths. It’s truly at its best when it can soak up every last drop of flavor. Some of my favorite recipes to serve with this versatile side include:
- Creamy Garlic Shrimp with White Sauce: The perfect vehicle for that luxurious sauce.
- Cajun Shrimp Alfredo: A spicy and creamy delight that begs for a side of garlic bread.
- Pasta Fagioli: Ideal for dipping into this comforting Italian soup.
- Basil Garlic Alfredo: Double the garlic, double the deliciousness!
- Instant Pot Ground Beef and Pasta: A hearty family meal made even better with warm garlic bread.
- Any Hearty Soup or Stew: Think minestrone, tomato soup, beef stew, or lentil soup.
- Italian Main Courses: Lasagna, spaghetti and meatballs, chicken parmesan, or any pasta dish with a robust sauce.
- Grilled Meats: Steak, chicken, or pork chops benefit from the savory, garlicky complement.
Homemade Garlic Bread with Sliced Bread FAQs
The “best” bread is truly whichever bread you enjoy the most! This recipe is incredibly adaptable. While classic choices like a wider French loaf or Italian bread work wonderfully, you can also use your everyday standard sliced bread. For an extra boost of flavor, I personally love picking up a rosemary-infused loaf from the bakery section of my local grocery store. Its aromatic notes perfectly complement the garlic butter. Sourdough also makes for an amazing, tangy garlic bread.
Absolutely! In fact, this recipe is specifically designed to work brilliantly with regular sliced bread, making it incredibly convenient. The softer texture of sliced bread readily absorbs the garlicky butter, and it toasts up beautifully, giving you a perfect balance of soft interior and crispy edges.
Yes, you can certainly make garlic bread with olive oil instead of butter, though it will result in a different flavor profile and texture. For a successful olive oil version, be sure to brush the oil lightly and evenly over the bread. Too much oil can make the bread soggy rather than crispy. You might want to use a high-quality extra virgin olive oil for the best flavor, and still combine it with minced garlic, herbs, salt, and pepper.
Yes, absolutely! Preparing the garlic butter spread in advance is a fantastic time-saver. You can make the spread and store it in an airtight container in the refrigerator for up to a week. When you’re ready to make garlic bread, just let it come to room temperature for about 15-20 minutes to soften slightly before spreading it on your bread.
For extra crispy garlic bread, there are a few tricks. First, don’t spread the butter too thickly; a thin, even layer promotes crisping. Second, ensure your oven is fully preheated to 400°F (200°C). Finally, for the ultimate crunch, after the initial baking time, place the bread under the broiler for 30-60 seconds. Watch it very closely, as it can go from golden to burnt in a blink!
You May Also Enjoy These Garlic-Infused Delights
- Super Simple Garlic Knots
- Garlic Lemon Butter Shrimp with Orzo
- Roasted Garlic and Basil Alfredo
More Favorites from Sweetly Splendid
- Chicken Salad with Grapes and Walnuts
- Loaded Baked Potato Soup (Crock Pot)
- General Tso’s Chicken Recipe
- Meals with Chicken
- Air Fryer Meals
- Best Hard Boiled Egg
- Beef Stew (Stove Top)
- Ricotta Pasta
- Banana Pudding with Sweetened Condensed Milk
- Vegetable Soup with Ground Beef
- Seasoned Oyster Crackers
- Crispy Air Fryer Chicken Wings
- Recipe for Chile Relleno Casserole
- Meals that Freeze Well
- Best Dessert Recipes
Easy Garlic Bread with Sliced Bread
Kara – Sweetly Splendid
2
6
12
servings
Garlic Bread – This buttery, garlicky bread can be made with whatever bread you have on hand at home. Whether it’s your standard sliced bread, a yummy loaf you picked up from the bakery section, or even your homemade sourdough, this spread works!
Ingredients
-
Bread
use your favorite loaf -
1/2
cup
butter
softened (I use unsalted and add my own salt) -
3
cloves
fresh garlic
minced -
1
tablespoon
fresh oregano -
1
tablespoon
fresh basil -
1
tablespoon
dried parsley -
1/2
tsp
fresh ground black pepper -
1
tsp
kosher salt
Instructions
-
Preheat oven to 400°F (200°C).
-
Add all ingredients (except bread) to a food processor.
-
Pulse until smooth and well combined.
-
Spread the butter evenly over your slices of bread (or half loaf if using french bread).
-
Place on a baking sheet and toast for 6 minutes, or until beginning to brown. If you desire further browning, you can pop them under the broiler for an additional minute, but exercise extreme caution as bread burns very quickly!
-
Remove from the oven and enjoy immediately with your favorite dish. For an extra touch, I like to sprinkle mine with a little coarse kosher salt right out of the oven.
Nutrition
Serving:
1
/12th of loaf
,
Calories:
130
kcal
,
Carbohydrates:
13
g
,
Protein:
2
g
,
Fat:
8
g
,
Saturated Fat:
5
g
,
Polyunsaturated Fat:
2
g
,
Trans Fat:
0
g
,
Cholesterol:
20
mg
,
Sodium:
184
mg
,
Fiber:
0
g
,
Sugar:
2
g
Nutrition information is automatically calculated, so should only be used as an approximation.
Additional Info
Bread
Italian