

Welcome to the ultimate guide for crafting the most delightful and incredibly easy Condensed Milk Cookies! If you’re searching for a simple yet satisfying cookie recipe that stands out from the crowd, especially for those who prefer non-chocolate treats, your quest ends here. These irresistible cookies require only six staple ingredients, are entirely egg-free, and promise a soft, chewy texture that melts in your mouth. They’re not just a joy to eat but also a fantastic project to involve your little ones in the kitchen, making sweet memories along with sweet treats. Perfect for holiday cookie exchanges, a comforting snack, or simply to brighten any day, these cookies are guaranteed to become a family favorite.

The Magic of Sweetened Condensed Milk Cookies
In the vast world of baking, where countless cookie recipes vie for your attention, these sweetened condensed milk cookies carve out a special niche. Unlike traditional recipes that rely heavily on eggs or intricate steps, our recipe champions simplicity and pure, unadulterated flavor. From classic shortbreads to inventive thumbprint cookies, the options are endless, but sometimes, a unique ingredient can elevate a simple cookie into something truly extraordinary.
Sweetened condensed milk is that secret weapon. It’s not just a sweetener; it’s a game-changer for texture. Its rich, thick consistency infuses the cookies with an incredible chewiness and a depth of sweetness that granulated sugar alone cannot achieve. This distinctive quality sets these cookies apart, offering a wonderfully soft and tender crumb that makes them utterly addictive.
Beyond their delightful taste and texture, these cookies are a fantastic addition to any baking repertoire because they offer a delicious alternative to chocolate-centric desserts. While we adore chocolate, it’s always wise to have a few non-chocolate recipes on hand for parties, bake sales, or simply to cater to different preferences. Imagine a beautifully arranged cookie platter featuring these golden gems alongside classic Sugar Cookies, wholesome Oatmeal Rice Krispie Cookies, or decadent Cheesecake Cookies. The variety of flavors and textures will impress every guest!
You’ll find immense joy in sharing this remarkably easy recipe with your loved ones. And for those who can’t imagine a cookie without a hint of cocoa, rest assured! These versatile treats can easily be transformed into delightful chocolate chip wonders. We’ll cover how to incorporate chocolate chips (even extra chocolate chips!) in a dedicated section below, ensuring everyone’s sweet tooth is satisfied.
The beauty of using sweetened condensed milk truly lies in its dual power: it imparts both a profound sweetness and an irresistible, satisfying chewiness to every bite. Prepare to fall in love with these simple yet sophisticated cookies!
Why You’ll Adore This Condensed Milk Cookie Recipe
These cookies, often made with popular brands like Eagle Brand sweetened condensed milk, are more than just a recipe; they’re an experience. Here’s why we’re confident they’ll quickly become your go-to:
- Effortless Baking: Simplicity is key! This recipe is designed for minimal fuss, making it perfect for novice bakers and seasoned pros alike. You won’t spend hours in the kitchen, but you’ll reap maximum deliciousness.
- Minimal Ingredients: With just six basic ingredients that you likely already have in your pantry, you can whip up a batch of these extraordinary cookies without a special trip to the grocery store.
- Kid-Friendly Fun: Baking is a wonderful activity to share with children. The straightforward steps and simple ingredient list make these condensed milk cookies ideal for involving little hands in the measuring, mixing, and scooping process, creating cherished family memories.
- Irresistibly Sweet and Soft: The unique contribution of sweetened condensed milk results in a cookie that is perfectly sweet, incredibly tender, and boasts a delightful melt-in-your-mouth quality that’s hard to beat.
- The Perfect Non-Chocolate Option: For those who don’t eat chocolate or simply crave something different, these cookies are a stellar choice. They offer a refreshing change of pace without compromising on flavor or indulgence.
- Egg-Free Delight: This recipe is naturally egg-free, making it a fantastic option for individuals with egg allergies or dietary preferences, ensuring everyone can enjoy a delicious homemade cookie.
One of my favorite aspects of this recipe is its incredible convenience. I always make sure to keep a can or two of sweetened condensed milk in my pantry. This way, I’m always prepared to whip up a batch of these heavenly cookies at a moment’s notice, whether for an unexpected guest or a sudden craving. This readiness ensures that a warm, homemade treat is never far away.
Imagine, with just a handful of simple ingredients and a little bit of your time and effort, you can produce a generous batch of these delightful cookies. They are proof that some of the best things in life, especially in baking, are often the simplest.
Essential Ingredients for Your Condensed Milk Cookies
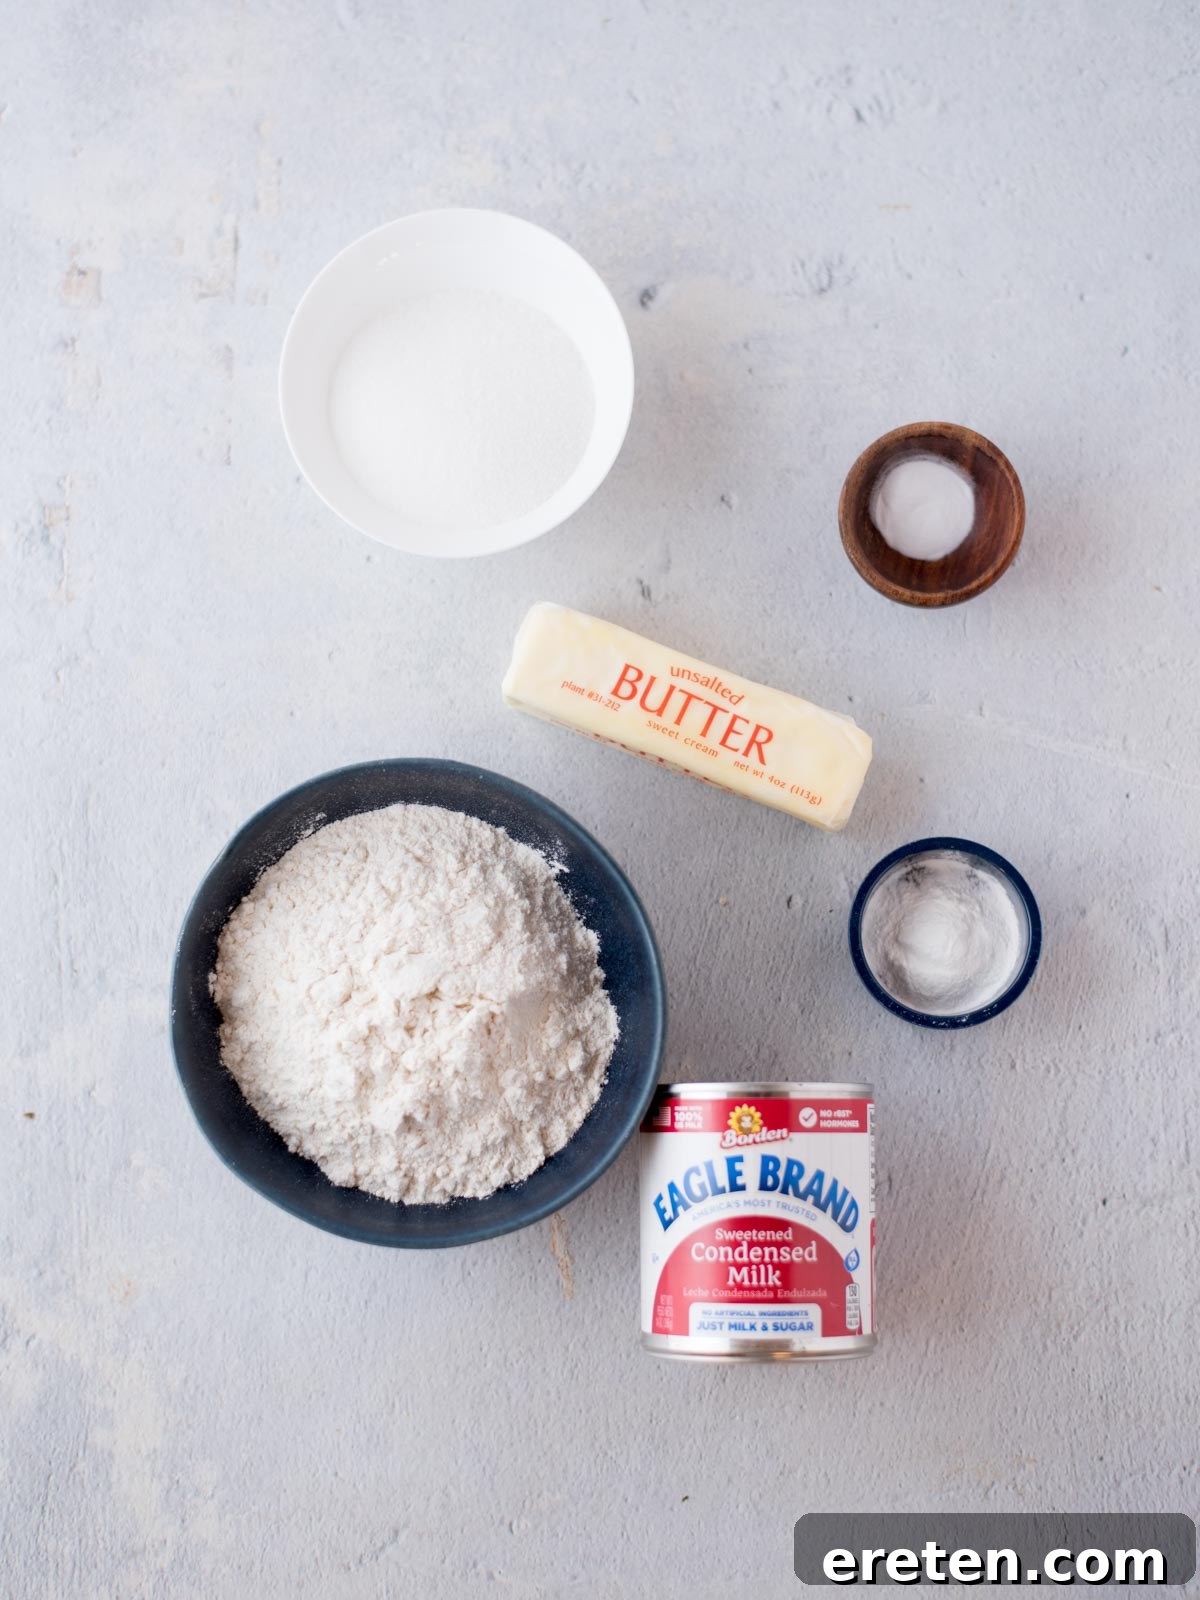
Gathering your ingredients is the first step to baking success. This recipe prides itself on its simplicity, requiring only six common items. Here’s what you’ll need to grab from your pantry or the grocery store:
- All-Purpose Flour: The foundation of our cookie. For best results, measure correctly by spooning flour into your measuring cup and leveling it off.
- Butter: You’ll need ¾ cup of butter, which is 1 ½ sticks. Whether you choose salted or unsalted butter, the most crucial factor is that it must be softened to room temperature. This ensures it creams smoothly with the sugar, creating a light and airy base for your dough.
- Baking Soda: A leavening agent that helps your cookies spread and achieve a delicate chewiness.
- Baking Powder: Another leavening agent that works in conjunction with baking soda to give your cookies a perfect lift and tenderness.
- Sweetened Condensed Milk: The star ingredient! This thick, sweet milk is what gives these cookies their unique flavor and incredibly chewy texture. Brands like Eagle Brand are widely available and work perfectly.
- Granulated Sugar: Provides additional sweetness and contributes to the golden-brown edges and crisp-chewy texture.
For those with gluten sensitivities or preferences, you can easily adapt this recipe. Simply substitute the all-purpose flour with your favorite gluten-free 1:1 baking blend, such as Bob’s Red Mill Gluten-Free 1-to-1 Baking Flour. The results will be just as delicious and satisfying!
Sweetened Condensed Milk Substitutions: What if You Don’t Have Any?
Finding yourself mid-recipe without sweetened condensed milk can be a bummer, but don’t fret! You don’t have to put your baking plans on hold. It’s surprisingly easy to create a homemade substitute right in your own kitchen with just a few basic dairy ingredients. This DIY option ensures you can still enjoy these delicious cookies, even if your pantry isn’t fully stocked.
To make your own sweetened condensed milk, you will need:
- 1 ½ cups milk (whole milk works best for richness)
- ½ cup heavy cream
- 1 cup granulated sugar
Here’s how to prepare it:
- Combine all three ingredients—milk, heavy cream, and sugar—in a medium-sized saucepan.
- Place the saucepan on your stovetop over medium heat. Stir continuously until the sugar has completely dissolved.
- Once the sugar is dissolved, reduce the heat to low and allow the mixture to simmer gently. This simmering process is crucial for reducing and thickening the milk.
- Continue to simmer, stirring occasionally to prevent scorching, until the liquid has reduced by half. This will typically take about 30 to 40 minutes, depending on your stovetop and saucepan. The mixture will become noticeably thicker and more viscous.
- Remove the saucepan from the heat and let the mixture cool completely. As it cools, and especially once refrigerated, it will continue to thicken to the familiar consistency of store-bought sweetened condensed milk.
Once cooled, this homemade substitute can be used in your condensed milk cookie recipe (and any other recipe calling for sweetened condensed milk) in a 1:1 ratio. It’s a fantastic trick to have up your sleeve for any baking emergency!
Baking Bliss: How to Make Cookies with Condensed Milk
This recipe is not only simple but also incredibly rewarding. It’s a perfect opportunity to introduce budding young bakers to the joys of the kitchen, teaching them about measurements, mixing, and the magic of transforming simple ingredients into delicious treats. Let’s get baking!
- **Prepare Your Workspace:** Begin by preheating your oven to 350°F (175°C). While the oven heats, line a large cookie sheet with parchment paper or a silicone baking mat. This step is essential for preventing sticking and ensuring easy cleanup.
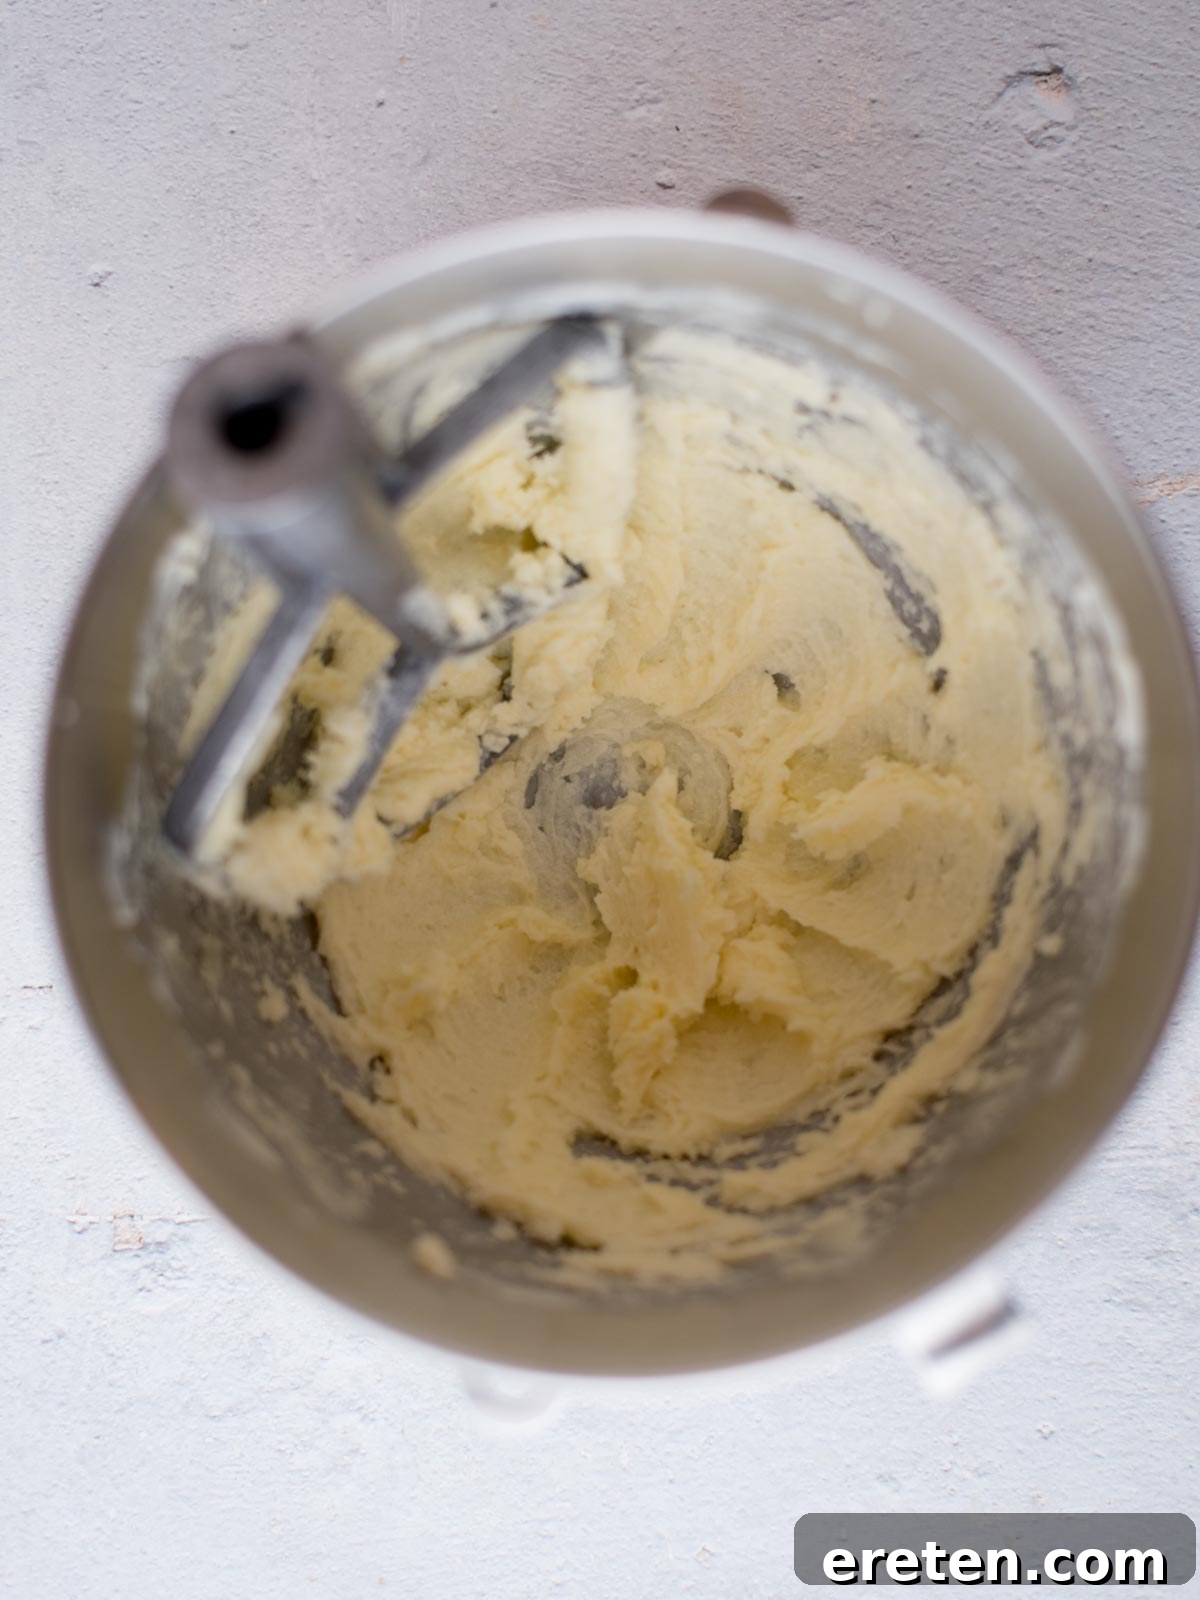
- **Cream Butter and Sugar:** In a large mixing bowl, or the bowl of a stand mixer fitted with the paddle attachment, combine the softened butter and granulated sugar. Beat on medium speed until the mixture is light, fluffy, and pale in color. This creaming process incorporates air, which is vital for the cookies’ soft texture.
- **Incorporate Condensed Milk:** Pour in the sweetened condensed milk. Continue to blend until the mixture is smooth and beautifully creamy. The condensed milk will add moisture and richness.
- **Add Dry Ingredients (Part 1):** In a separate small bowl, whisk together the all-purpose flour, baking soda, baking powder, and a tiny pinch of salt (if using unsalted butter). This ensures that the leavening agents and salt are evenly distributed throughout the dough.
- **Combine Wet and Dry:** Gradually add the dry ingredient mixture to the wet ingredients in the large mixing bowl. Mix on low speed until everything is just combined and no streaks of flour remain. Be careful not to overmix, as this can lead to tough cookies.
- **Chill the Dough (Crucial Step):** Cover the cookie dough with plastic wrap, pressing it directly onto the surface to prevent a skin from forming. Transfer the bowl to the refrigerator and chill for a minimum of 1 hour, or up to 72 hours. This step is non-negotiable for achieving the perfect texture and preventing the cookies from spreading too much during baking.
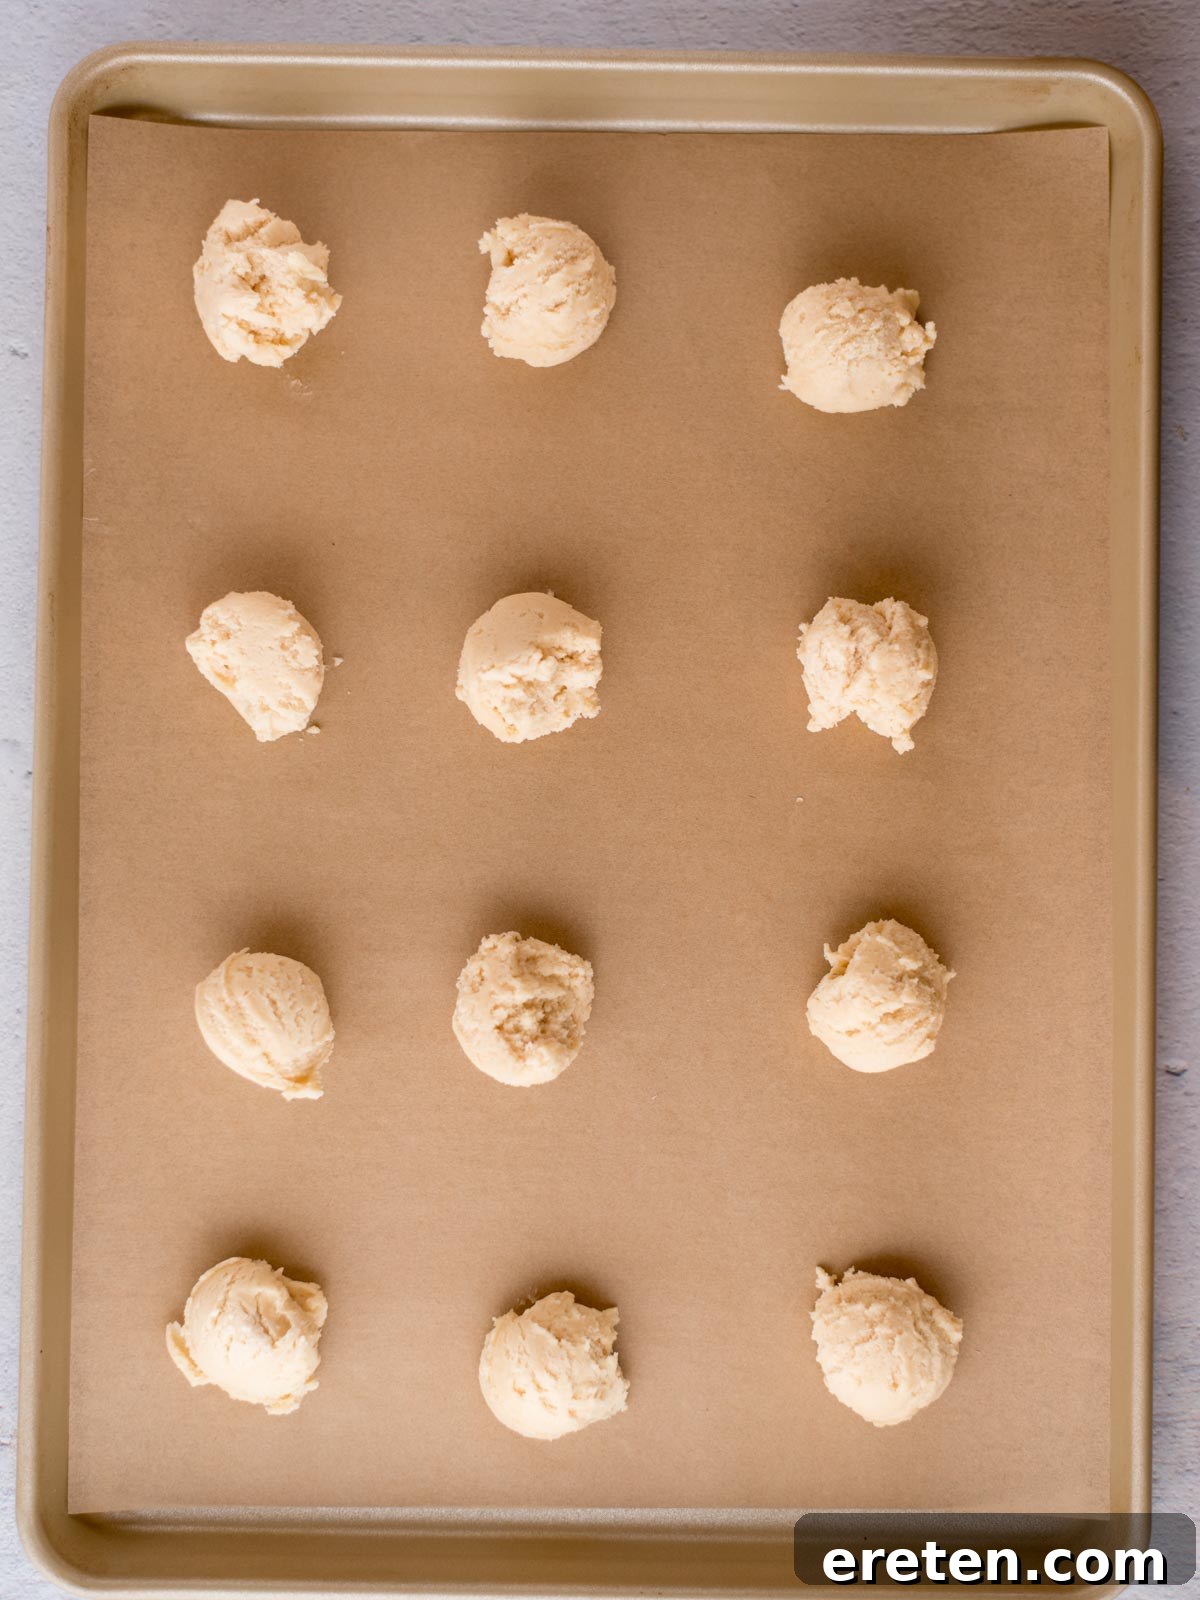
- **Scoop and Bake:** Once the dough is adequately chilled, remove it from the refrigerator. Use a 1-tablespoon cookie scoop to form uniform balls of dough. Arrange them on your prepared baking sheet, ensuring they are spaced about 2 inches apart to allow for proper spreading.
- **Bake to Golden Perfection:** Place the cookie sheet in the preheated oven and bake for 10-12 minutes. You’ll know they’re ready when the edges begin to turn a beautiful, light golden brown. The centers may still look slightly soft, but they will firm up as they cool.
- **Cooling Process:** Allow the cookies to cool on the baking sheet for about 1 minute before carefully transferring them to a wire cooling rack. This brief cooling period on the hot sheet helps them set without falling apart. Let them cool completely on the wire rack before storing or serving.
Enjoy the sweet aroma filling your kitchen and the delightful taste of these homemade condensed milk cookies!
Pro Tips & Tricks for Perfect Sweetened Condensed Milk Cookies
Achieving bakery-quality cookies at home is all about the little details. Here are some essential tips and tricks to ensure your sweetened condensed milk cookies turn out perfectly every single time:
-
Properly Soften Your Butter:
The texture of your butter plays a significant role in the final cookie texture. It needs to be genuinely softened to room temperature, not melted. Softened butter creams beautifully with sugar, creating an airy, emulsified base. If your butter is too cold, it won’t combine properly, leading to a dense dough. If it’s melted, the cookies will spread too much and be greasy.
My favorite softening trick: Avoid the microwave if possible, as it often melts butter unevenly. Instead, heat some water in a mug until it’s very hot (microwave or kettle works for this). Pour out the hot water, then invert the warm mug over your stick of butter on a plate. Let it sit for about 5-10 minutes. The residual heat from the mug will gently and evenly soften the butter to the perfect consistency without melting.
-
Don’t Skip the Chill Time:
This is arguably the most crucial step for condensed milk cookies! It might be tempting to rush, but chilling the dough for at least an hour (or longer) allows the butter to firm up, preventing the cookies from spreading excessively in the oven. More importantly, it allows the flour to fully hydrate, which leads to a more flavorful and tender cookie with that desirable chewiness. Dough that hasn’t been chilled enough will result in flat, crispy (not chewy) cookies.
-
Watch for Golden Edges:
Oven temperatures can vary, so don’t rely solely on the timer. Keep a close eye on your cookies during the last few minutes of baking. You’re looking for the edges to be lightly golden brown. The centers may still appear slightly undercooked or soft, and that’s exactly what you want! They will continue to bake and set as they cool on the hot baking sheet. Taking them out too early will result in cookies that are too flat and potentially pale; baking them too long will make them dry and hard rather than soft and chewy.
-
Measure Flour Correctly:
Too much flour is a common baking mistake that can lead to dry, dense cookies. Avoid scooping flour directly from the bag with your measuring cup, as this compacts it. Instead, use a spoon to lightly fluff and spoon the flour into your measuring cup, then level it off with a straight edge (like the back of a knife). This method ensures you’re using the correct amount of flour for a tender crumb.
-
Use Quality Ingredients:
While this recipe uses simple ingredients, their quality matters. Good butter and a reliable brand of sweetened condensed milk will yield the best flavor and texture in your final product.
By following these tips, you’ll be well on your way to baking a batch of truly exceptional sweetened condensed milk cookies that are soft, chewy, and utterly delicious!
Essential Kitchen Tools for Cookie Baking
Having the right tools can make all the difference in your baking experience, especially when whipping up a batch of these fantastic condensed milk cookies. While you don’t need a professional kitchen setup, these items will ensure efficiency and consistent results:
- KitchenAid Stand Mixer or a good quality hand mixer: Indispensable for creaming butter and sugar until fluffy, saving your arms a lot of work.
- Measuring Cups and Measuring Spoons: Accuracy is key in baking for consistent results.
- Parchment Paper or silicone baking mats: Prevents cookies from sticking and ensures even baking, plus makes cleanup a breeze.
- Baking Sheets: Essential for baking your cookies. Opt for light-colored sheets to prevent over-browning on the bottom.
- Cookie Scoop: Ensures uniform cookie size for even baking and a professional look.
- Cooling Rack: Allows air circulation around the cookies, preventing them from becoming soggy on the bottom and ensuring a perfectly cooled treat.
Customizing Texture: Achieving Chewy vs. Soft Condensed Milk Cookies
One of the beautiful aspects of these cookies is their adaptable texture. While the standard recipe yields a wonderfully soft and chewy cookie, you can subtly adjust the outcome to suit your preference. If you find yourself craving an even chewier cookie using sweetened condensed milk, a slight modification to the chilling time can make a noticeable difference.
To enhance the chewiness, you can opt to chill the dough for a slightly shorter period than the recommended minimum of one hour. A shorter chill time means the butter in the dough is a bit softer when it enters the oven, which can encourage a bit more spread and a chewier texture. However, proceed with caution and be mindful of your baking time!
When working with less-chilled dough:
- Increased Spread: Expect the cookies to spread a little more on the baking sheet. Ensure adequate spacing between dough balls.
- Reduced Baking Time: Cookies made with warmer dough may bake faster. Keep a very close eye on them in the oven. They might not need the full 10-12 minutes, as the dough won’t be as cold and will reach temperature quicker. Look for those lightly golden edges as your indicator of doneness.
- Flatter Profile: While they will be chewier, a shorter chill time can also result in cookies that are slightly flatter than those chilled for the full duration.
Conversely, for maximum softness and a thicker cookie, stick to the full chilling time (1-3 hours, or even up to 72 hours). The colder dough will hold its shape better, resulting in a puffier, softer cookie with less spread. Experiment with chill times to discover your perfect condensed milk cookie texture!
Elevating Flavor: Condensed Milk Chocolate Chip Cookies
While these original condensed milk cookies are a pure delight in their own right, sometimes the heart (and taste buds) simply craves chocolate. Good news: this versatile recipe serves as an excellent base for transforming them into irresistible chocolate chip cookies! Adding chocolate chips introduces a familiar, beloved element that beautifully complements the unique sweetness and chewiness of the condensed milk.
The process couldn’t be simpler:
- **Timing is Key:** Once you have mixed in the flour and your dough is just combined (step 5 in the instructions), it’s the perfect time to add your chocolate chips.
- **Fold Them In:** Gently fold the chocolate chips into the dough using a spatula until they are evenly distributed. Avoid overmixing, as this can develop the gluten in the flour and make your cookies tough.
- **Follow Remaining Steps:** All other steps, including the crucial chilling period and baking instructions, remain exactly the same.
A Note on Chocolate Chip Size: I highly recommend using mini chocolate chips for this particular recipe. Here’s why:
- Balanced Flavor: The delicate, distinctive flavor of the condensed milk is a key characteristic of these cookies. Large chocolate chips can be quite dominant and rich, potentially overpowering that lovely, nuanced condensed milk taste we cherish. Mini chips provide just enough chocolatey goodness without stealing the spotlight.
- Even Distribution: Mini chocolate chips distribute more evenly throughout the dough, ensuring that you get a perfect balance of cookie and chocolate in every single bite.
- Texture Harmony: Their smaller size also integrates seamlessly with the cookie’s soft and chewy texture, creating a harmonious mouthfeel.
Feel free to experiment with different types of chocolate, such as milk, semi-sweet, or dark chocolate mini chips, to find your ideal combination. You can also mix in other additions like chopped nuts, sprinkles, or a sprinkle of flaky sea salt on top before baking for an extra layer of flavor and visual appeal. The possibilities are endless when it comes to customizing these delightful condensed milk cookies!

Creative Uses for Leftover Sweetened Condensed Milk
Often, a recipe won’t call for an entire can of sweetened condensed milk, leaving you with a partial can. Don’t let that precious liquid gold go to waste! Sweetened condensed milk is an incredibly versatile ingredient that can enhance a wide array of dishes and beverages. Its rich, creamy sweetness makes it a fantastic addition to both desserts and drinks.
Here are just a few ideas for what you can create with your leftover sweetened condensed milk:
- Desserts:
- No-Bake Cheesecakes: It’s a key ingredient for many easy, no-bake cheesecake recipes, providing a creamy base without the need for eggs or extensive baking.
- Fudge: Melt it with chocolate chips for quick and easy homemade fudge.
- Caramel Sauce (Dulce de Leche): Slowly cook it in a double boiler or oven for hours to transform it into rich, luscious dulce de leche.
- Key Lime Pie: A staple for the creamy filling of a classic Key Lime Pie.
- Magic Cookie Bars: Drizzle it over layers of graham crackers, chocolate chips, nuts, and coconut for a truly magical treat.
- Beverages:
- Iced Coffee or Vietnamese Coffee: Stir a spoonful into your hot or iced coffee for a wonderfully sweet and creamy treat.
- Brazilian Limeade: A refreshing, unique drink made with limes, water, and condensed milk.
- Homemade Irish Cream: Combine it with whiskey, cream, and other flavorings for a delightful homemade liqueur.
- Smoothies: Add a touch to fruit smoothies for extra sweetness and creaminess.
- Other Delights:
- Ice Cream Base: Many no-churn ice cream recipes use sweetened condensed milk as their creamy foundation.
- Sweet Spreads: Mix it with cocoa powder or other flavorings to create a unique dessert spread.
If you don’t have immediate plans to use your leftovers, proper storage is key to extending its freshness.
Storing Sweetened Condensed Milk for Future Indulgences
Once you’ve opened a can of sweetened condensed milk, it’s essential to store it correctly to maintain its quality and prevent spoilage. Unlike unopened cans which are shelf-stable for a long time, opened condensed milk requires refrigeration due to its dairy content.
To store leftover condensed milk effectively:
- **Transfer to an Airtight Container:** Never store opened canned goods directly in the can. Transfer any unused sweetened condensed milk to an airtight container. A glass jar with a tight-fitting lid or a plastic food storage container with a secure seal works perfectly.
- **Refrigerate Promptly:** Place the sealed container in the refrigerator immediately.
- **Use Within 5-7 Days:** For optimal freshness and safety, aim to use the refrigerated condensed milk within 5 to 7 days. Beyond this period, its quality may start to degrade, and there’s a higher risk of spoilage.
Can You Freeze Sweetened Condensed Milk?
Absolutely! Freezing is an excellent method for preserving sweetened condensed milk for much longer periods, allowing you to use it in future recipes without worrying about it going bad. This is particularly useful if you only need a small amount for a recipe and don’t want to waste the rest.
Here’s how to freeze it:
- **Portion It Out:** For convenience, it’s best to freeze condensed milk in smaller, usable portions. You can pour it into ice cube trays (silicone trays are fantastic for easy removal) or specialized freezer containers like “souper cubes” that create perfect ½-cup or 1-cup portions.
- **Freeze Solid:** Place the trays or containers in the freezer until the condensed milk is completely solid.
- **Transfer to Freezer Bag:** Once frozen, pop the cubes or portions out and transfer them to a freezer-safe bag or container. Label it with the date and contents. This method saves space and makes it easy to grab just what you need.
- **Thawing and Usage:** When you’re ready to use the frozen condensed milk, simply remove the desired amount and let it thaw in the refrigerator overnight, or gently defrost it in the microwave using a low-power setting. Once thawed, stir it well before using, as some separation might occur.
Freezing ensures you always have sweetened condensed milk on hand for those spontaneous baking sessions or coffee treats!

Storing Leftover Condensed Milk Cookies for Lasting Freshness
Once you’ve baked a batch of these delectable condensed milk cookies, proper storage is key to maintaining their delightful soft and chewy texture. You want them to taste as fresh on day two (or three!) as they did right out of the oven.
To keep these soft and chewy cookies at their best:
- **Ensure Complete Cooling:** Always allow your cookies to cool completely on a wire rack before storing them. Storing warm cookies will create condensation inside the container, leading to soggy cookies and potentially mold.
- **Use an Airtight Container:** The most important rule for storing cookies is to use an airtight container. This prevents air from getting in and drying out your cookies, preserving their soft texture. A cookie jar with a tight seal, a glass food storage container, or a sturdy plastic container with a secure lid are all excellent choices.
- **Store at Room Temperature:** These cookies are best stored at room temperature. Refrigerating them can actually cause them to dry out faster and become crumbly.
- **Avoid Cling Wrap Alone:** While it might seem convenient, simply wrapping cookies in cling wrap usually isn’t enough to create a truly airtight seal. Air can still sneak in, causing them to stale much quicker than if stored in a proper container.
- **Add a Slice of Bread (Optional but Recommended):** For an extra layer of freshness, especially if you plan to store them for a few days, you can place a slice of plain white bread (or a quarter of a plain tortilla) inside the airtight container with the cookies. The cookies will absorb moisture from the bread, keeping them wonderfully soft. Just remember to replace the bread every day or two as it hardens.
Stored correctly, your homemade condensed milk cookies will remain perfectly soft and delicious for up to 3-5 days. Enjoy them with a cup of coffee, a glass of milk, or as a sweet treat anytime!
Frequently Asked Questions About Condensed Milk Cookies
Here are some common questions and answers about making and storing condensed milk cookies and their star ingredient:
- Can you freeze sweetened condensed milk?
- Yes, absolutely! Freezing sweetened condensed milk is a great way to store leftovers. Pour it into ice cube trays or small freezer-safe containers. Once frozen, transfer the portions to a freezer bag. When ready to use, simply let it thaw in the refrigerator or gently defrost it in the microwave.
- How long does condensed milk last in the fridge?
- Once opened, sweetened condensed milk should be transferred to an airtight container and stored in the refrigerator. It will typically last for up to 5-7 days when stored properly.
- Is sweetened condensed milk gluten-free?
- Yes, in its pure form, sweetened condensed milk is naturally gluten-free. It’s primarily made from milk and sugar. However, always check the label for specific brands to confirm, especially if you have severe gluten sensitivities, as manufacturing processes can vary.
- What can I substitute for condensed milk in recipes?
- If you don’t have sweetened condensed milk on hand, you can make a homemade substitute. Combine 1 ½ cups milk (whole milk is best), ½ cup heavy cream, and 1 cup sugar in a saucepan. Simmer on low heat, stirring occasionally, until the mixture reduces by half and thickens (about 30-40 minutes). Let it cool completely before using.
- Can I make these cookies without chilling the dough?
- While it’s tempting to skip, chilling the dough is highly recommended. It prevents the cookies from spreading too much, helps them hold their shape, and contributes to a softer, chewier texture. Skipping this step can result in flatter, crispier cookies.
- Why are my condensed milk cookies flat?
- Flat cookies are often caused by warm butter, insufficient chilling time for the dough, or an oven that isn’t hot enough. Ensure your butter is softened, not melted, chill the dough for at least an hour, and confirm your oven temperature with an oven thermometer if you suspect it’s inaccurate.
Discover More Delicious Cookie Recipes
If you’ve enjoyed baking these simple and delightful condensed milk cookies, you’re in for a treat! Our collection features a wide variety of cookie recipes, perfect for every craving and occasion. Expand your baking horizons with these other fantastic options:
- Chewy Chocolate Chip Cookies (The best chocolate chip cookie recipe for classic lovers!)
- Cookies & Cream Cookies (A fan favorite combining two beloved treats!)
- Apple Cinnamon Oatmeal Cookies (Warm, comforting, and packed with flavor)
- Oatmeal Raisin Cookies (A timeless classic, perfectly spiced and chewy)
- Triple Chocolate Cookies (For the ultimate chocolate indulgence)
- Banana Oatmeal Cookies (A healthier, yet equally delicious, option)
If you make this recipe and love it, we would love a 5 ⭐⭐⭐⭐⭐ rating! Your feedback helps us continue to provide free, delicious recipes for everyone to enjoy.
Condensed Milk Cookies Recipe
By: sweetlysplendid.com

These easy Condensed Milk Cookies are incredibly simple to make and perfect for any occasion, especially cookie exchanges! Requiring just six basic, egg-free ingredients, they are a fun activity for families and an excellent choice for anyone seeking a delicious non-chocolate treat.
Ingredients
- 2 cups all-purpose flour
- ¾ cup butter, softened (1 ½ sticks)
- ½ teaspoon baking soda
- 1 teaspoon baking powder
- ¾ cup sweetened condensed milk
- ½ cup granulated sugar
Instructions
- Preheat the oven to 350°F (175°C).
- Line a cookie sheet with parchment paper or a silicone baking mat.
- In a large mixing bowl or stand mixer, add the softened butter and granulated sugar.
- Mix until light, fluffy, and well combined.
- Add the sweetened condensed milk and blend until the mixture is smooth and creamy.
- In a separate bowl, whisk together the flour, baking soda, baking powder, and a pinch of salt. Gradually add this dry mixture to the wet ingredients, blending until just combined. Do not overmix.
- Cover the dough with plastic wrap and chill in the refrigerator for at least 1 hour, or up to 72 hours. This step is essential for cookie texture.
- Remove the chilled dough from the refrigerator.
- Use a 1-tablespoon cookie scoop to form balls of dough, dropping them approximately 2 inches apart on the prepared cookie sheet.
- Bake for 10-12 minutes, or until the edges are lightly golden brown. The centers may still appear soft.
- Allow the cookies to cool for about 1 minute on the baking sheet before carefully transferring them to a wire cooling rack to cool completely.
Nutrition
Serving: 1 cookie, Calories: 136kcal, Carbohydrates: 17g, Protein: 2g, Fat: 7g, Saturated Fat: 4g, Polyunsaturated Fat: 0.3g, Monounsaturated Fat: 2g, Trans Fat: 0.2g, Cholesterol: 19mg, Sodium: 54mg, Potassium: 48mg, Fiber: 0.3g, Sugar: 9g, Vitamin A: 203IU, Vitamin C: 0.2mg, Calcium: 40mg, Iron: 1mg
Nutrition information is automatically calculated, so should only be used as an approximation.
Additional Info
Have questions or comments? Leave them below!