
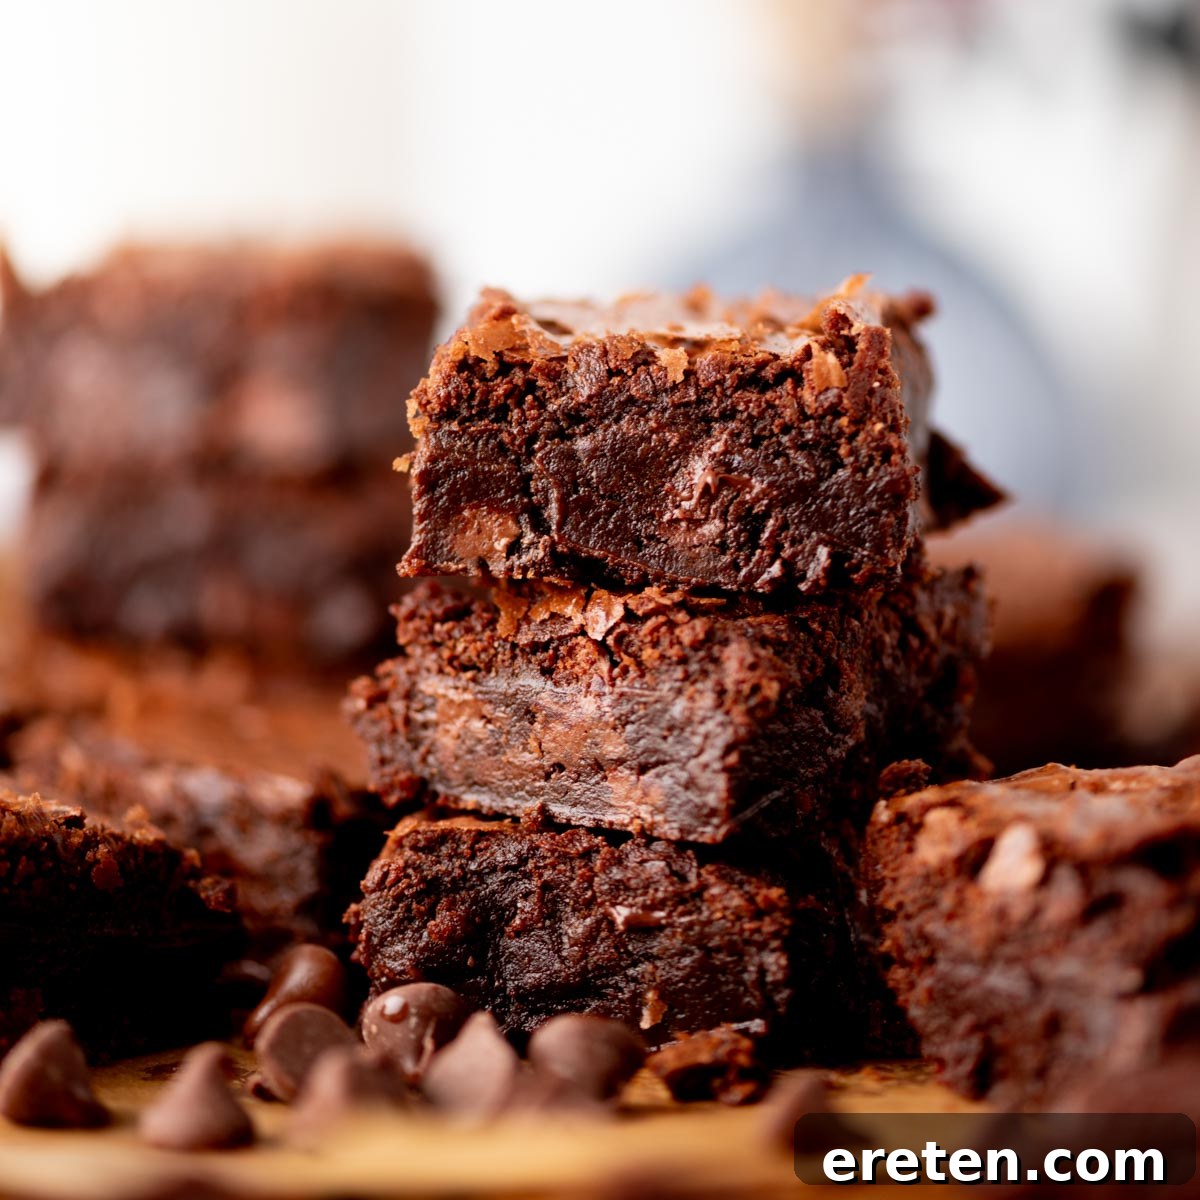
Unlock the secret to bakery-quality brownies with this ultimate recipe, engineered to deliver that elusive crackly top, irresistibly fudgy center, and perfectly chewy edges. Forget dry, cakey disappointments; this guide promises a deeply chocolatey experience that remains just as delightful, if not more so, on day two. Master these seemingly small but crucial steps, and you’ll quickly become the go-to person for the most phenomenal homemade brownies. Once you bring these to a gathering, showing up empty-handed will simply no longer be an option.
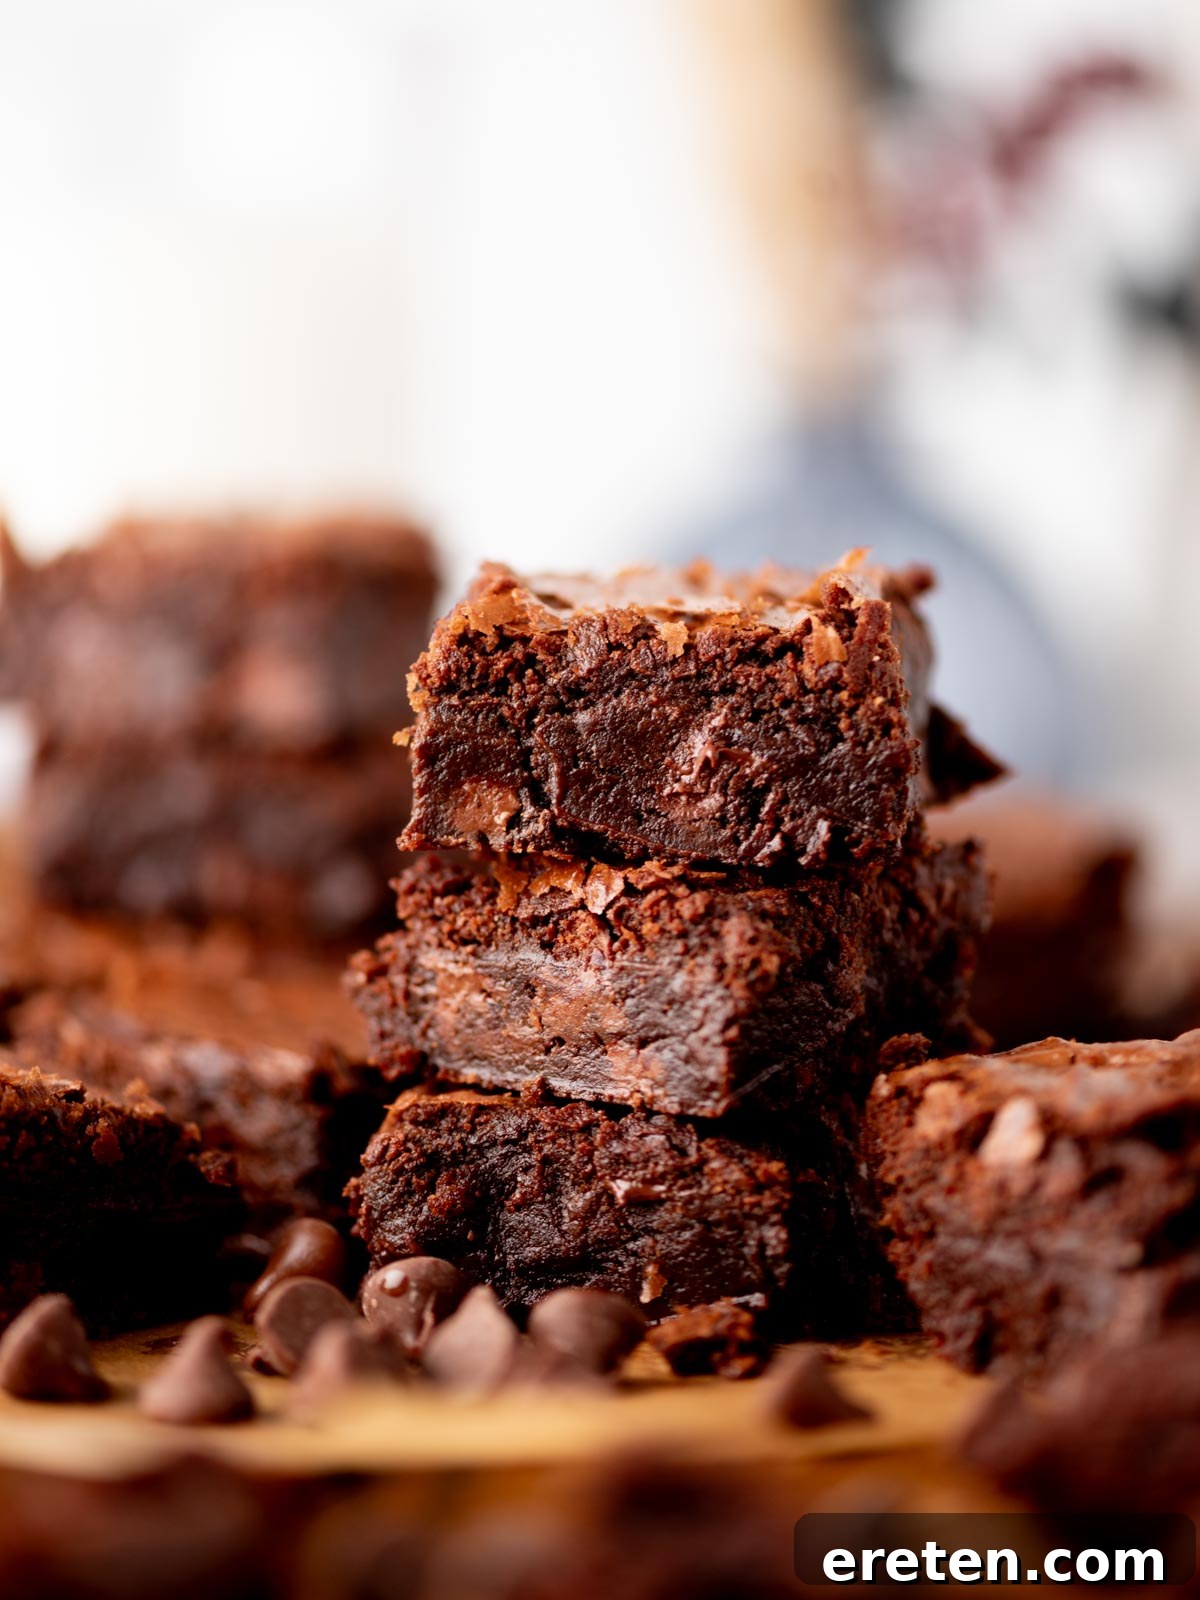
Brownies, at first glance, appear deceptively simple. Yet, they are one of those quintessential baking challenges where the slightest detail can dramatically alter the outcome – distinguishing between a merely good treat and an absolutely divine dessert. Achieving that perfect balance of fudgy versus cakey, a glossy crackly top versus a flat surface, or simply good versus truly exceptional, is an art. After countless hours of meticulous testing, precise tweaking, and dedicated experimentation, this meticulously crafted recipe consistently delivers perfection in every single bite.
What sets this recipe apart is its unwavering commitment to producing brownies with ideal chewy edges, an intensely soft and meltingly fudgy center, and that coveted, signature crackly top. Every single component, from the exact combination of chocolates and the precise ratios of ingredients, to the specific whisking technique, optimal bake time, and even the type of pan used, has been rigorously tested and intentionally selected to ensure a flawless result. We dive deep into the science and art of brownie making, so you can achieve consistent, show-stopping results every time.
And yes, the choice of your baking pan holds far more significance than you might imagine! Through extensive trials, I’ve evaluated metal, glass, and ceramic pans under varying temperatures and bake times. This comprehensive testing means that no matter which type of pan you have in your kitchen, you’ll receive tailored guidance to master these brownies perfectly, ensuring success with every batch.
Why These Are The Best Fudgy Brownies You’ll Ever Make
Are you tired of brownies that fall flat, turn out dry, or lack that deep chocolate punch? This recipe is specifically designed to eliminate those common frustrations, elevating your homemade brownies to an unparalleled level of deliciousness. Here’s why this will become your ultimate go-to brownie recipe:
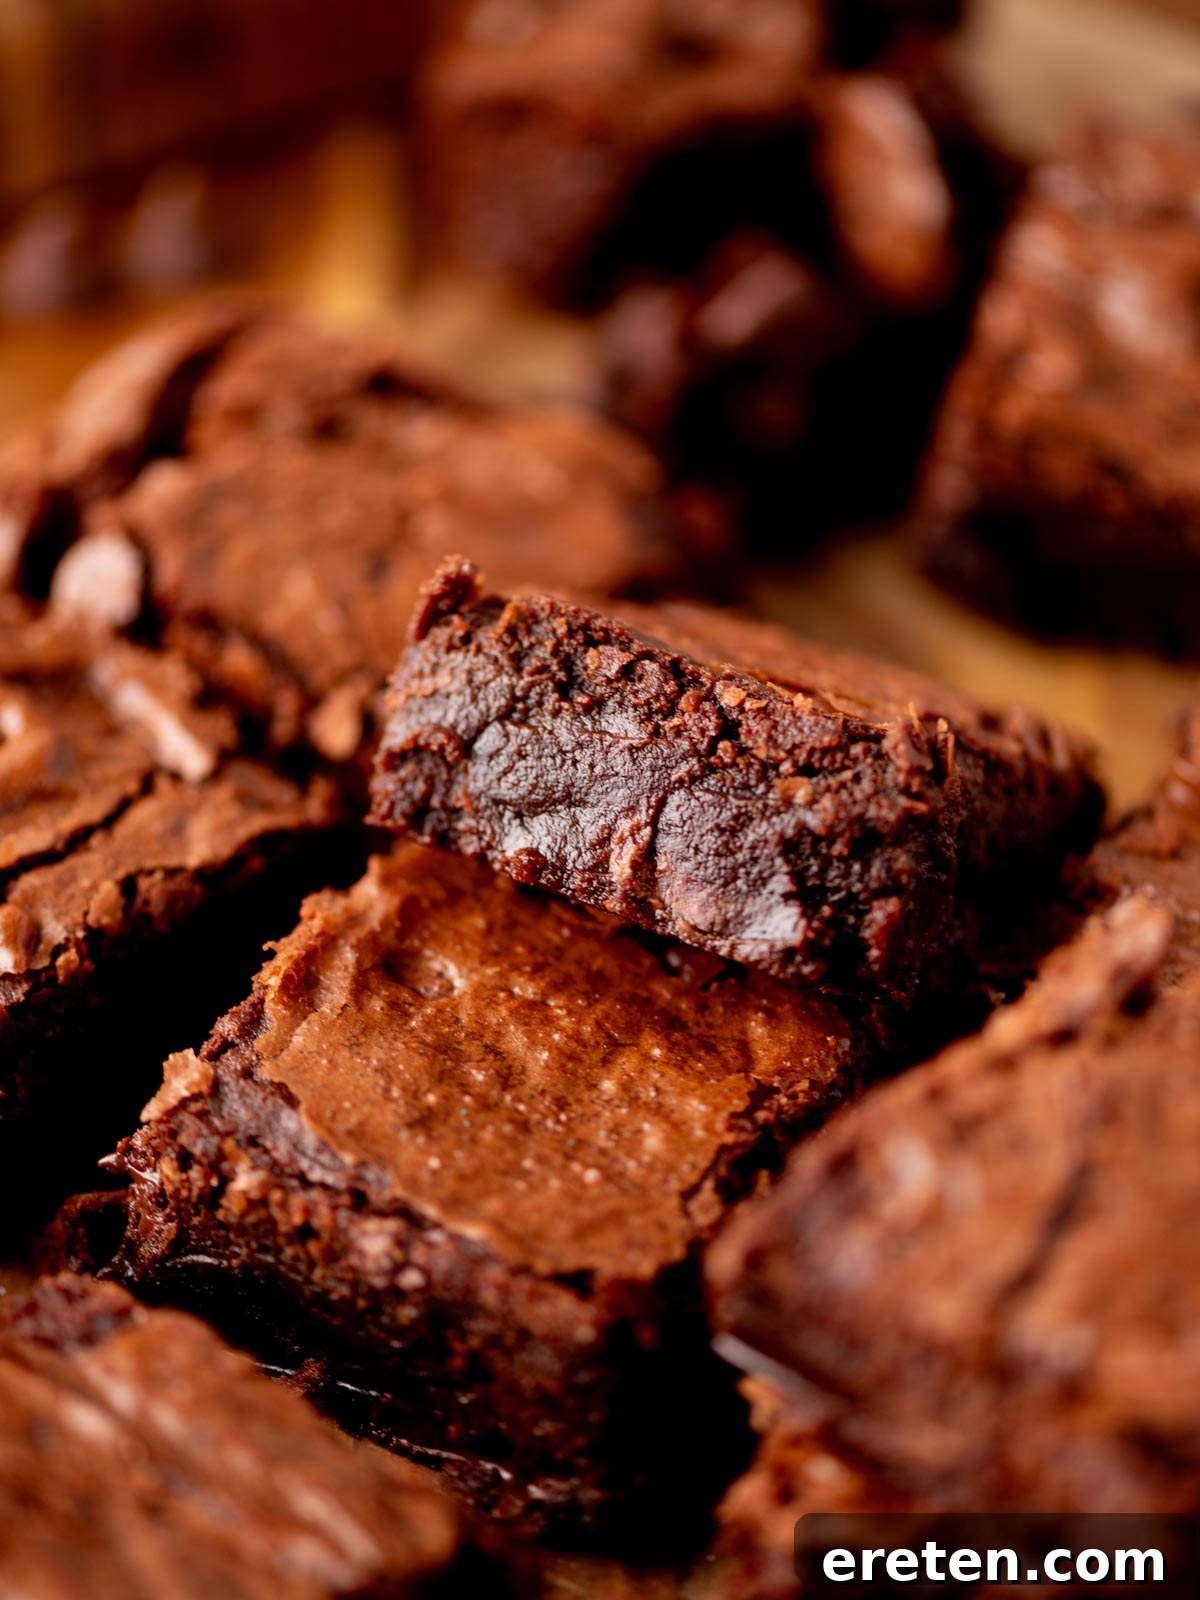
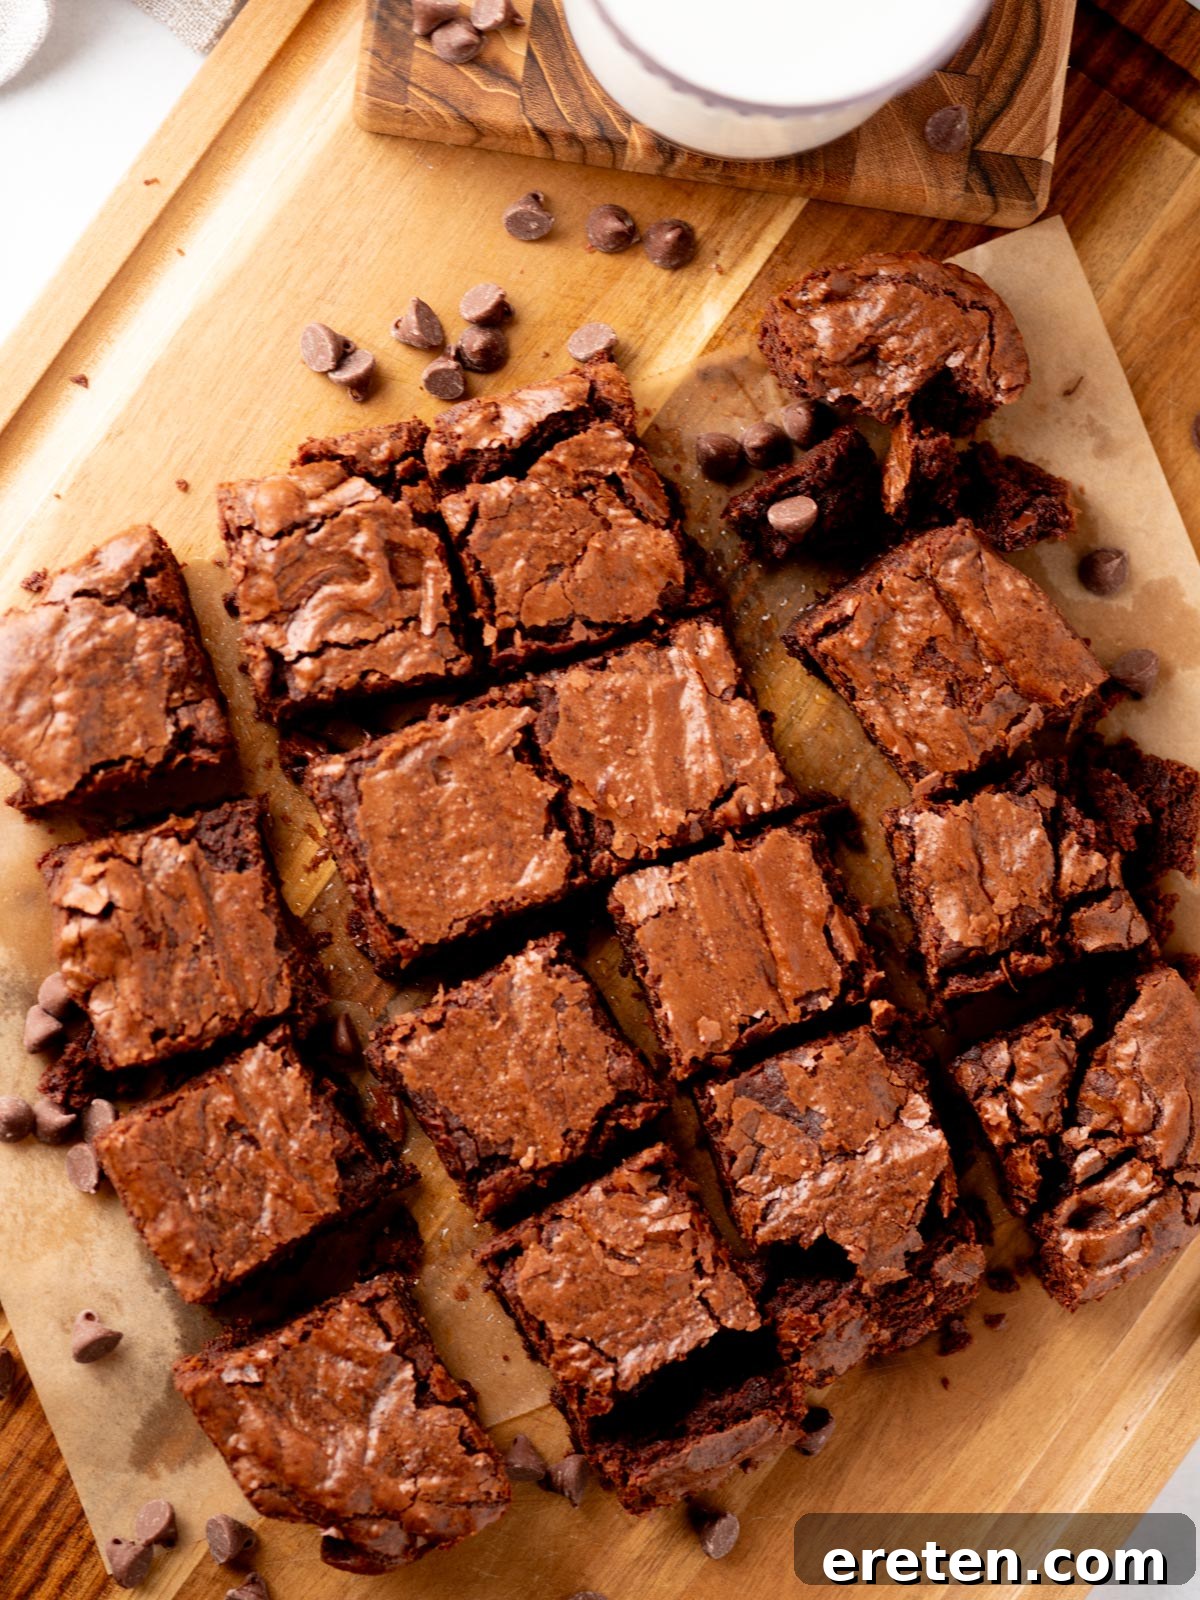
- The Signature Crackly, Glossy Top: This isn’t a happy accident; it’s a carefully cultivated outcome. That delicate, shiny layer on top, reminiscent of professional bakery brownies, is achieved through a specific method of properly beating the eggs and sugar. This crucial step not only provides visual appeal but also contributes to the overall texture, making your brownies look as incredible as they taste. It’s the hallmark of a truly exceptional brownie.
- Perfect Harmony of Chewy Edges with a Decadent Fudgy Center: We believe in having the best of both worlds. This recipe masterfully balances two highly sought-after textures. The edges develop a delightful chewiness that yields satisfying resistance with every bite, while the interior remains luxuriously soft, dense, and rich – never underbaked or disappointingly messy. Each piece offers a contrast that makes it uniquely addictive.
- Unforgettably Deep Chocolate Flavor: Prepare for an intensely satisfying chocolate experience. Our recipe leverages a powerful combination of both high-quality unsweetened cocoa powder and rich melted chocolate. This dual-chocolate approach creates a profound, multi-layered flavor profile that’s far more complex and satisfying than using just one. Furthermore, a subtle hint of espresso powder is included, not to impart a coffee flavor, but to brilliantly enhance and deepen the natural richness of the chocolate, making it sing.
- Effortless Preparation with Simple, Accessible Ingredients: You won’t need any specialized equipment or exotic items for this recipe. We’ve ensured that the process is straightforward and fuss-free, requiring no stand mixers – just two mixing bowls and a whisk. All the ingredients are common pantry staples, meaning you likely already have everything on hand to whip up a batch on a whim. This simplicity makes perfection attainable for every home baker.
- Remarkable Freshness and Fudginess for Days: One of the greatest challenges with homemade brownies is maintaining their moist, fudgy texture beyond the first day. Thanks to a carefully balanced ratio of butter, neutral oil, and various sugars, these brownies boast exceptional moisture retention. They resist drying out, remaining wonderfully soft and fudgy for several days after baking. In fact, many find them to be even better on subsequent days, as the flavors deepen and meld.
The Art and Science Behind The Perfect Brownie Texture
Achieving the perfect brownie is more than just following steps; it’s understanding the ‘why’ behind each ingredient and technique. Here’s a quick dive into the science that makes these brownies superior:
- The Sugar & Egg Whisking: This isn’t just mixing; it’s aeration. Whipping the granulated sugar, brown sugar, and eggs vigorously creates a stable emulsion. The sugar crystals dissolve slightly, and air is incorporated, forming a meringue-like structure that, when baked, sets into that famous crackly, glossy top. It also contributes to the rise and structure, preventing a dense, brick-like brownie.
- Butter & Oil Combination: Butter brings unparalleled flavor, while oil adds essential moisture and tenderness. Butter’s milk solids and water content can lead to a drier crumb over time. By incorporating a neutral oil, we ensure the brownies stay incredibly moist and fudgy for longer, as oil is 100% fat and doesn’t evaporate during baking.
- Cocoa Powder & Melted Chocolate Synergy: Cocoa powder provides a deep, intense chocolate base, primarily affecting color and contributing to the dense texture. Melted chocolate, with its cocoa butter content, adds richness, gloss, and a silkier, more complex flavor profile. Together, they create a chocolate intensity that is truly unmatched.
- Minimal Flour: The key to fudgy, not cakey, brownies is a restrained hand with flour. Flour provides structure, but too much leads to gluten development, resulting in a tougher, lighter, and more cake-like crumb. We use just enough to bind the ingredients without sacrificing fudginess.
- The Role of Salt & Espresso Powder: Salt is a flavor enhancer, balancing sweetness and amplifying chocolate notes. Espresso powder, a secret weapon for chocolate desserts, doesn’t add coffee flavor but dramatically intensifies the chocolate, making it taste richer and more profound.
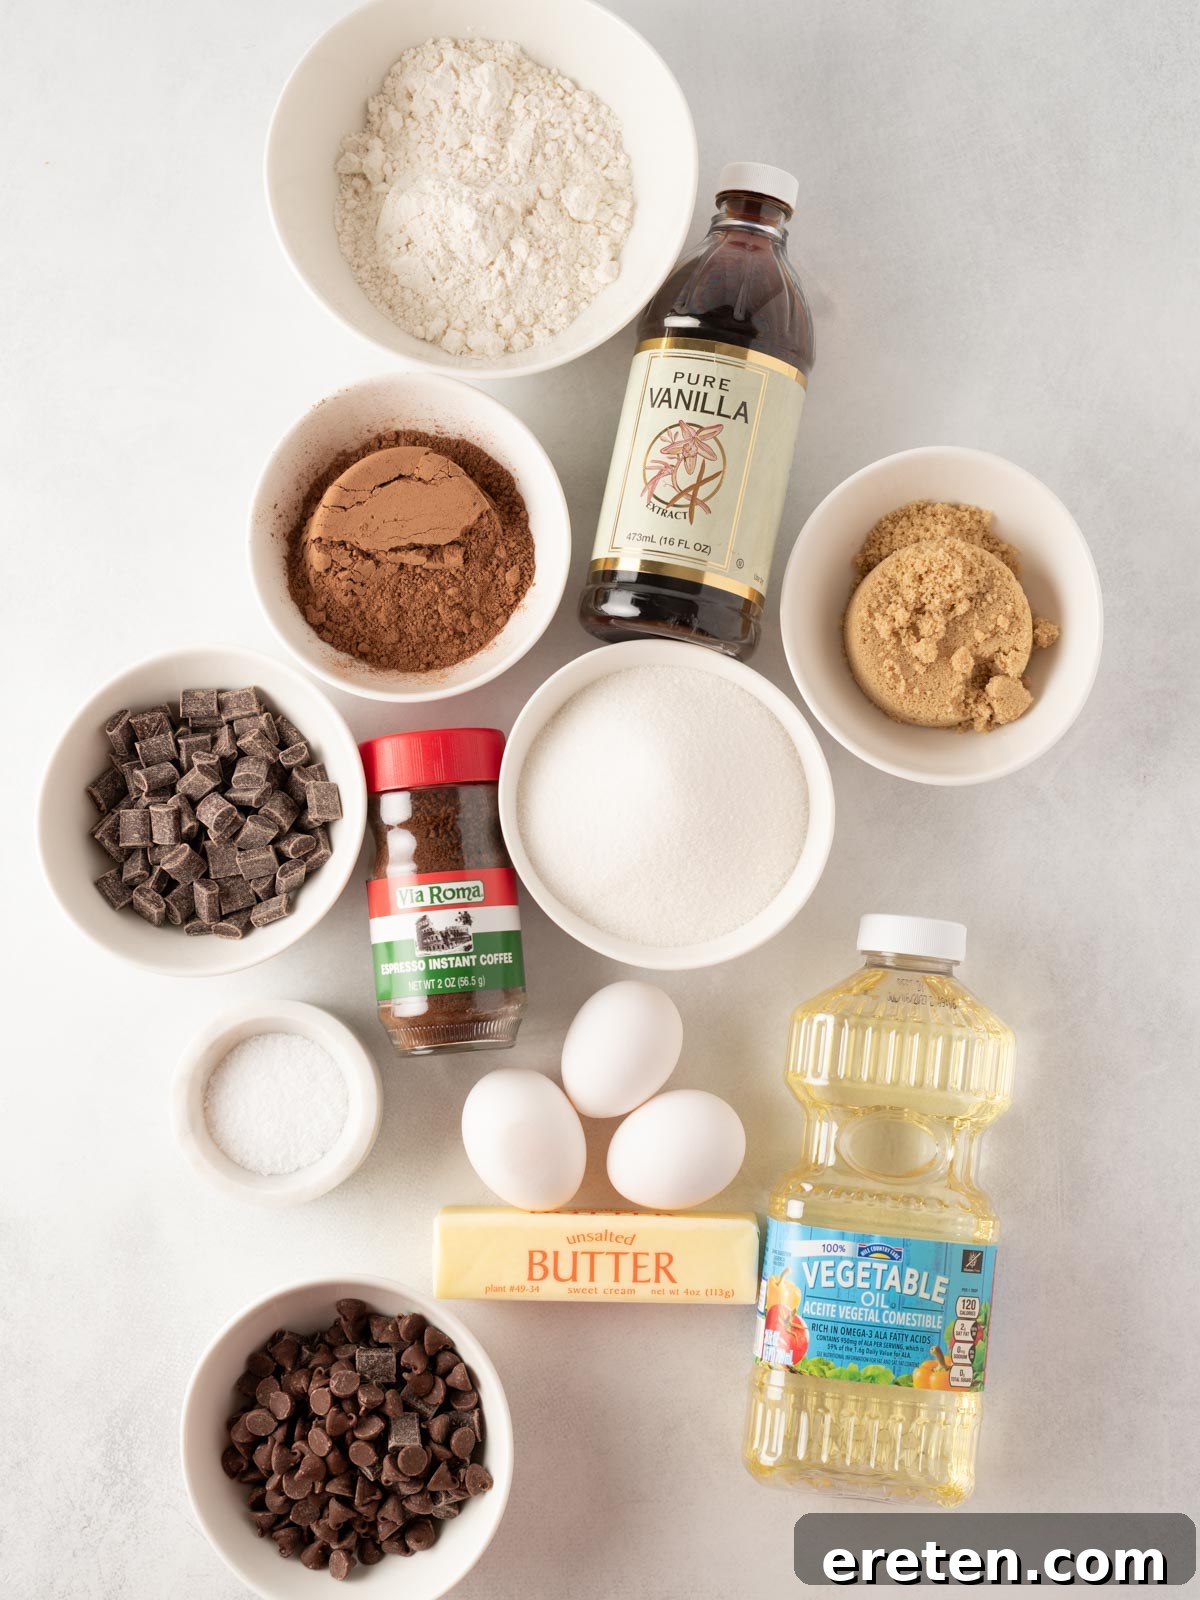
Essential Ingredients for Your Fudgy Brownies
Gathering the right ingredients is the first step toward brownie bliss. Here’s a detailed look at what you’ll need and why each component is vital:
- Unsalted Butter: This forms the foundational richness and classic flavor of our brownies. Using unsalted butter allows you complete control over the total salt content, ensuring that the exquisite chocolate flavor remains front and center, unmasked by excessive saltiness. Melted butter also helps create a denser, chewier texture.
- Neutral Oil (Vegetable or Canola): A small but mighty addition. Just a couple of tablespoons of a neutral-flavored oil are critical for achieving that lasting soft and moist texture, even days after baking. Unlike butter, which contains water and milk solids that can evaporate and dry out baked goods, oil remains stable, acting as a crucial element for sustained fudginess.
- Granulated Sugar: Beyond sweetness, granulated sugar plays a pivotal structural role. It’s the primary ingredient responsible for collaborating with the eggs to create that iconic, glossy, and crackly top that sets truly great brownies apart. Its crystalline structure helps aerate the batter when whisked with eggs.
- Light Brown Sugar: Adding light brown sugar introduces a subtle caramel-like depth of flavor and contributes significantly to the chewy texture, especially around the edges of the brownies. Its molasses content also helps retain moisture, enhancing the overall fudginess.
- Eggs + Extra Egg Yolk: Eggs are fundamental for structure and binding the ingredients. The inclusion of an additional egg yolk, however, is a game-changer. It dramatically boosts richness, moisture, and ensures the center remains wonderfully soft and exquisitely fudgy. This technique is also employed in my renowned chewy chocolate chip cookies for similar textural benefits.
- Vanilla Extract: A touch of pure vanilla extract is essential for rounding out the complex chocolate flavors. It adds a layer of warmth and depth, elevating the overall taste without ever overpowering the star of the show – the chocolate.
- Espresso Powder: This is our secret weapon! While it might sound unusual, espresso powder does not make your brownies taste like coffee. Instead, it acts as a profound flavor enhancer, making the chocolate taste significantly richer, deeper, and more intensely chocolatey. It’s a subtle but impactful addition.
- Unsweetened Cocoa Powder: The backbone of our chocolate flavor. Unsweetened cocoa powder provides a deep, robust chocolate base and is crucial for achieving that dense, intensely fudgy texture characteristic of a perfect brownie.
- Semisweet or Bittersweet Chocolate: Melted and incorporated directly into the batter, this chocolate adds an extra layer of luxurious richness and a more nuanced, sophisticated chocolate flavor that complements the cocoa powder beautifully. Choose a good quality baking bar for best results.
- All-Purpose Flour: Used sparingly, just enough to provide necessary structure without making the brownies heavy or cakey. The goal is to bind the ingredients into a cohesive batter that bakes into a dense, fudgy square, not a fluffy cake.
- Salt: A non-negotiable ingredient. Salt is crucial for balancing the sweetness of the sugars and, most importantly, for highlighting and intensifying the deep chocolate flavors. I highly recommend using coarse kosher salt for optimal distribution and flavor enhancement.
- Chocolate Chunks or Chips: These are folded into the batter to create delightful pockets of gooey, melted chocolate throughout each brownie. Every bite will offer an additional burst of warm, melted chocolate, adding to the indulgence.
- Flaky Sea Salt (Optional): A light sprinkle of flaky sea salt on top after baking provides a sophisticated sweet-salty contrast. This simple garnish not only adds a beautiful visual appeal but also brilliantly makes the chocolate flavor pop. It’s entirely optional, but highly recommended for those who appreciate that nuanced combination.
How to Make The Most Delicious Fudgy Brownies: A Step-by-Step Guide
Follow these precise steps to ensure your brownies come out perfectly fudgy with that amazing crackly top every single time.
- Prepare Your Pan and Preheat Oven: Begin by preheating your oven. If you are using a metal baking pan (which is recommended for the best results), set your oven to 350°F (175°C). If you opt for a glass pan, reduce the oven temperature slightly to 325°F (160°C). Line an 8×8 inch (20×20 cm) baking pan with parchment paper, allowing some overhang on the sides. This “sling” will make it incredibly easy to lift the baked brownies out of the pan for clean slicing later.
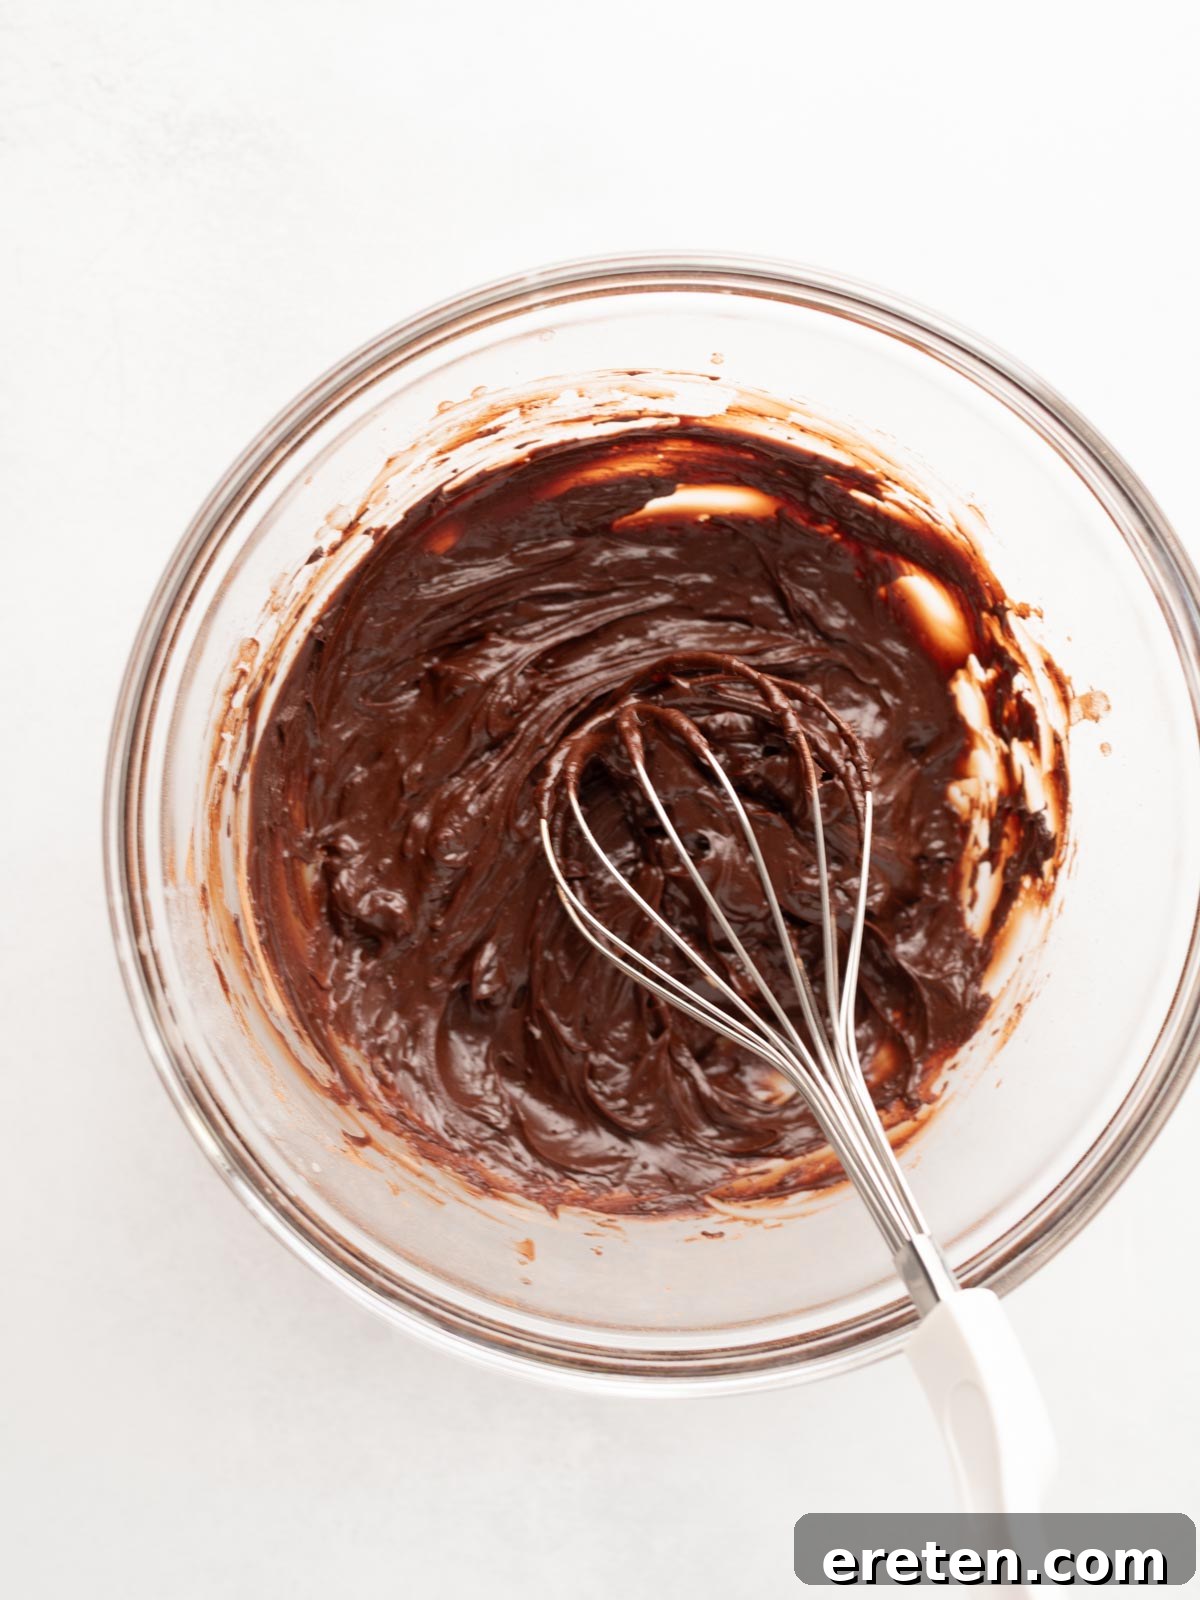
- Combine Fats and Cocoa for Deep Chocolate Flavor: In a large mixing bowl, combine the melted unsalted butter, neutral oil, and unsweetened cocoa powder. While the butter is still warm, whisk these ingredients together vigorously until the mixture is completely smooth and homogeneous. This crucial step, performed while the mixture is warm, helps “bloom” the cocoa powder, significantly intensifying and bringing out a deeper, richer chocolate flavor in the final product.
- Create the Crackly Top Base: In a separate, clean bowl, combine the granulated sugar, light brown sugar, two large eggs, and the extra egg yolk. Whisk this mixture with enthusiasm for a full 2 to 3 minutes. You’ll notice the mixture gradually transform – it will become noticeably lighter in color, thicker in consistency, and beautifully glossy. This extended whisking is the absolute key to developing that sought-after thin, shiny, and crackly top on your brownies. Do not rush this step!
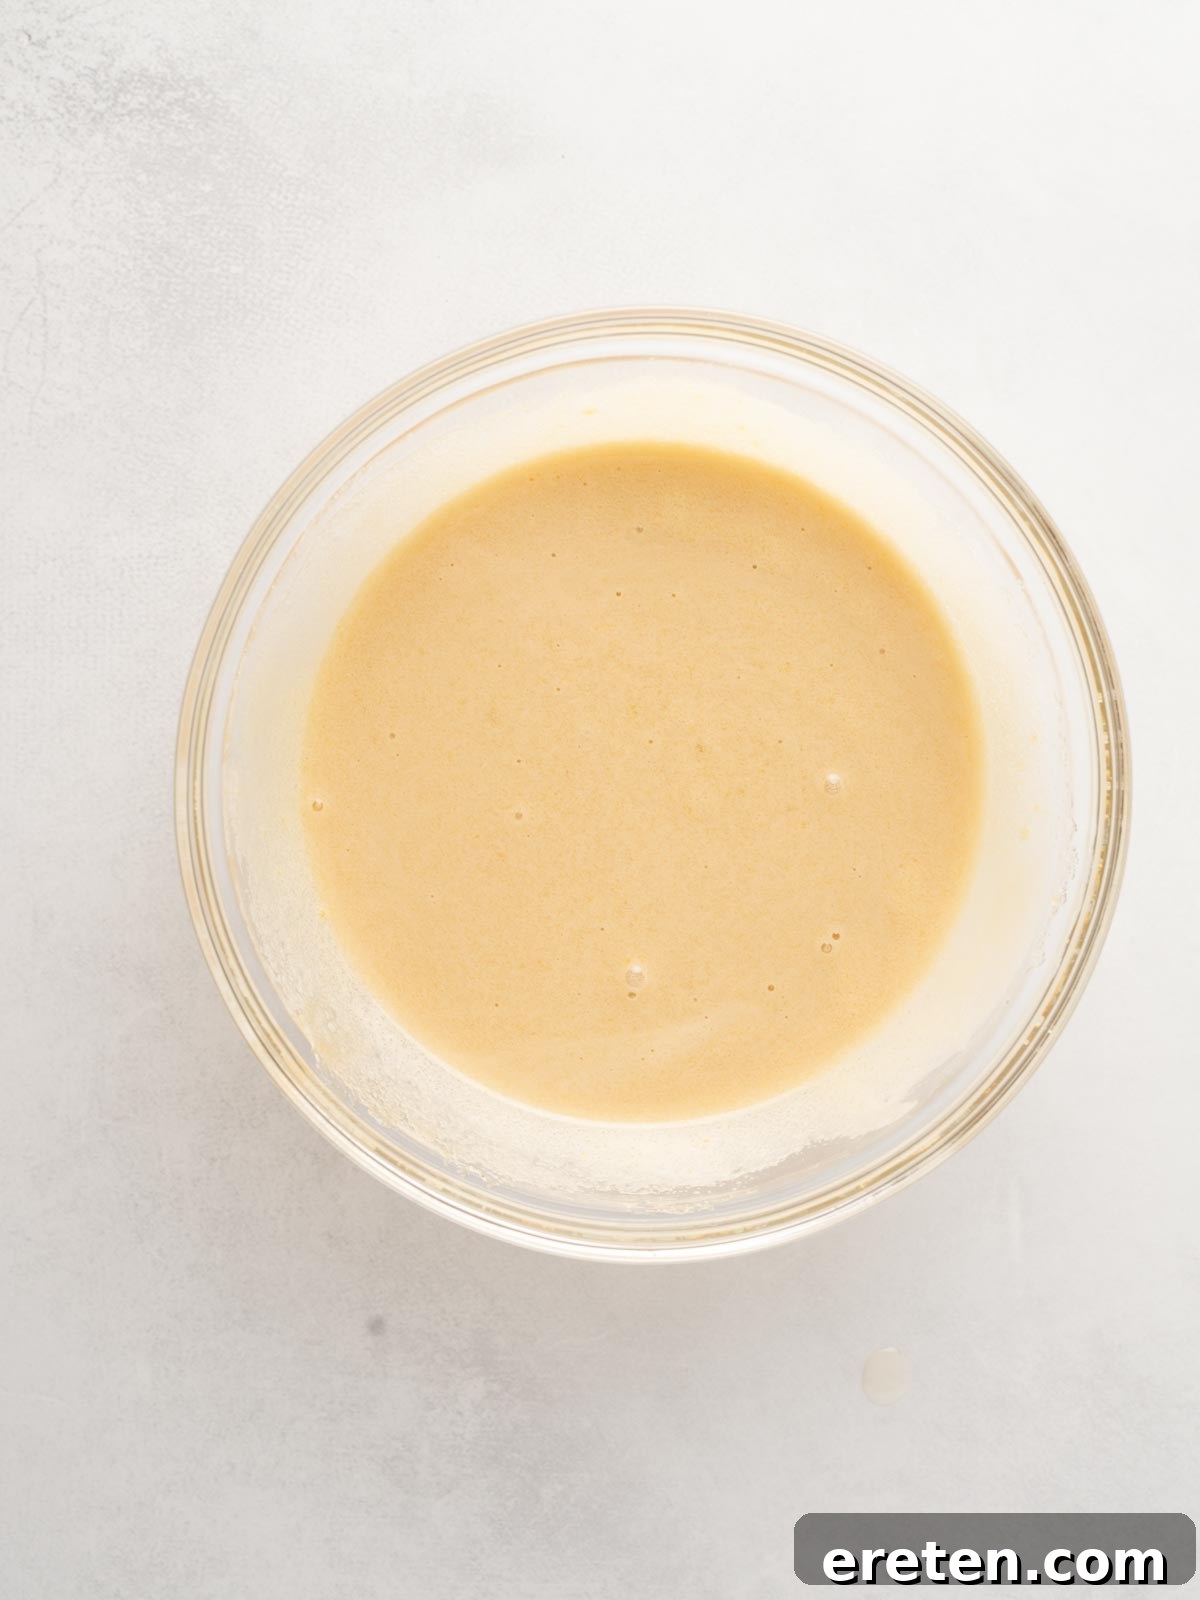
- Combine Wet Ingredients: Carefully pour the aerated egg and sugar mixture into the bowl with the bloomed cocoa and fat mixture. Next, add the melted semisweet or bittersweet chocolate, the vanilla extract, and the espresso powder. Whisk everything together thoroughly until all ingredients are fully combined and the batter is luxuriously smooth and even in color. Ensure there are no streaks of unmixed ingredients.
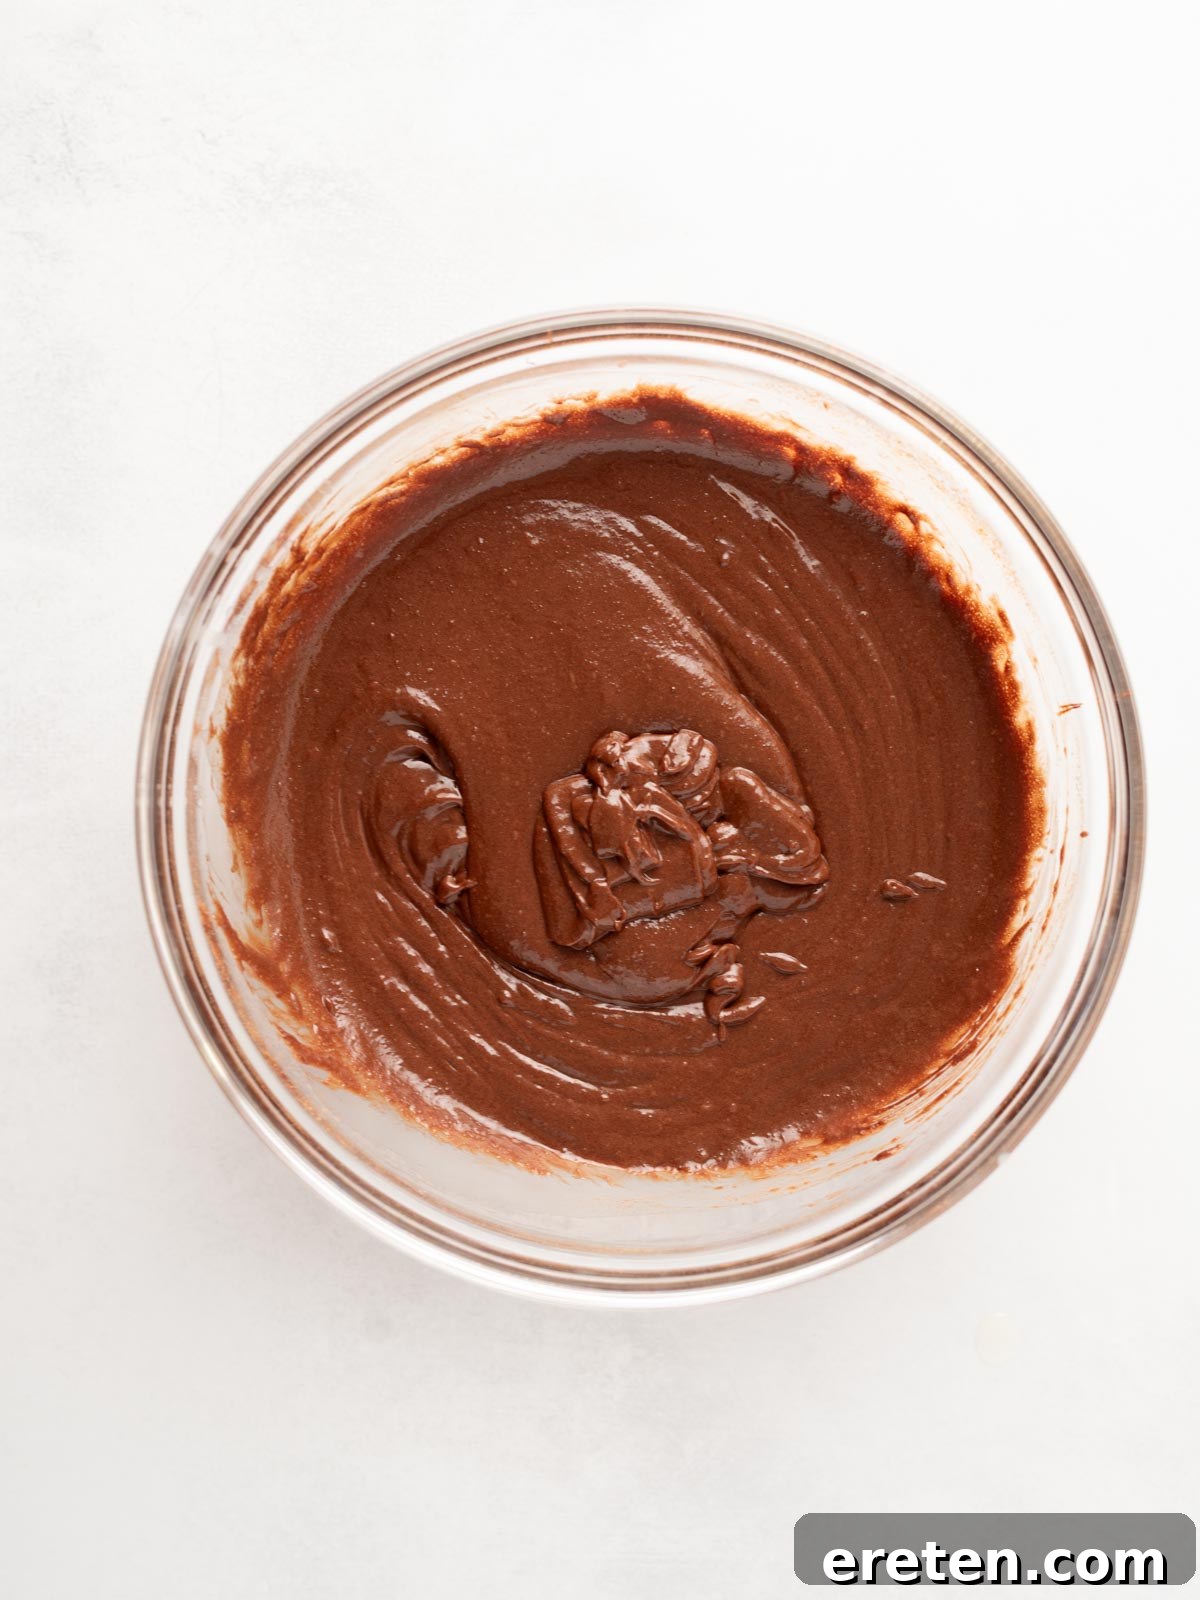
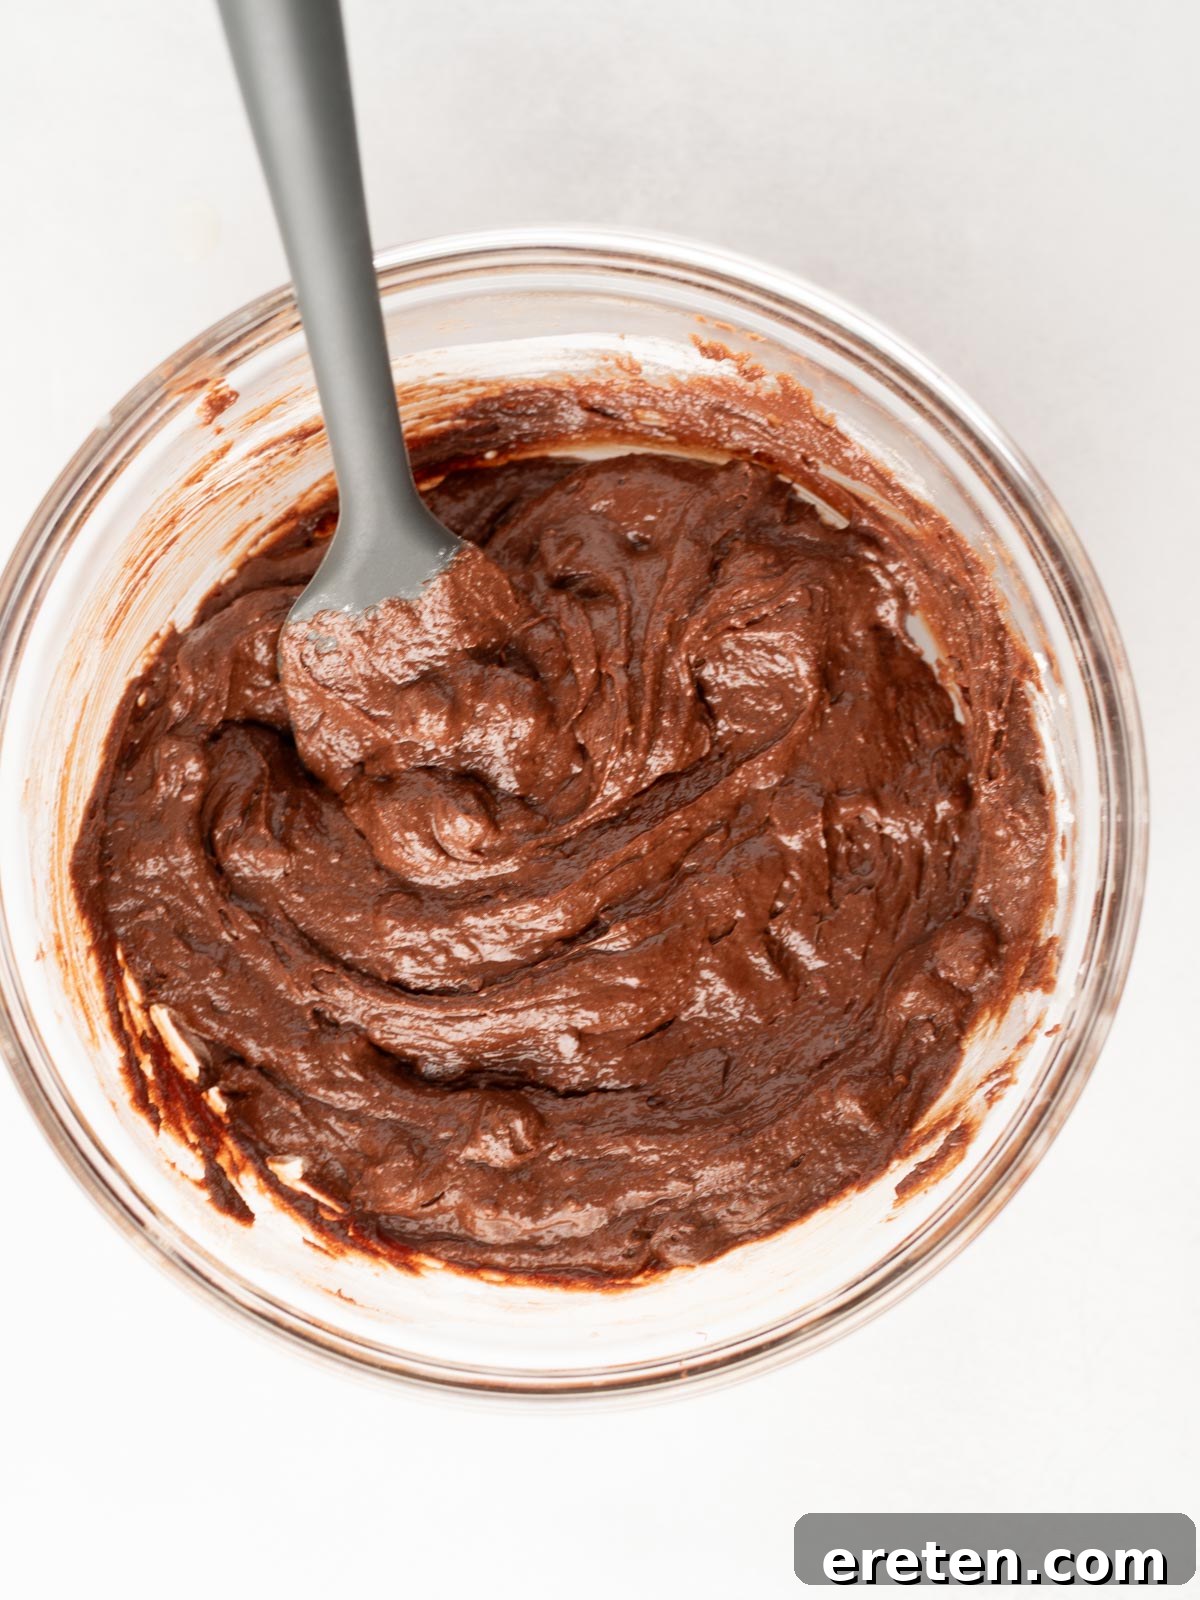
- Incorporate Dry Ingredients (Gently!): Add the all-purpose flour and salt to the wet mixture. Using a rubber spatula, gently fold everything together. The goal here is to mix just until no dry streaks of flour are visible. It’s absolutely critical to avoid overmixing at this stage. Overmixing can lead to excessive gluten development, resulting in tough, cakey brownies rather than the desired soft, fudgy texture.
- Fold in Chocolate Chunks: Once the flour is just incorporated, add your chocolate chunks or chips. Gently fold them into the batter until they are evenly distributed. These pockets of melting chocolate will add an extra layer of indulgence.
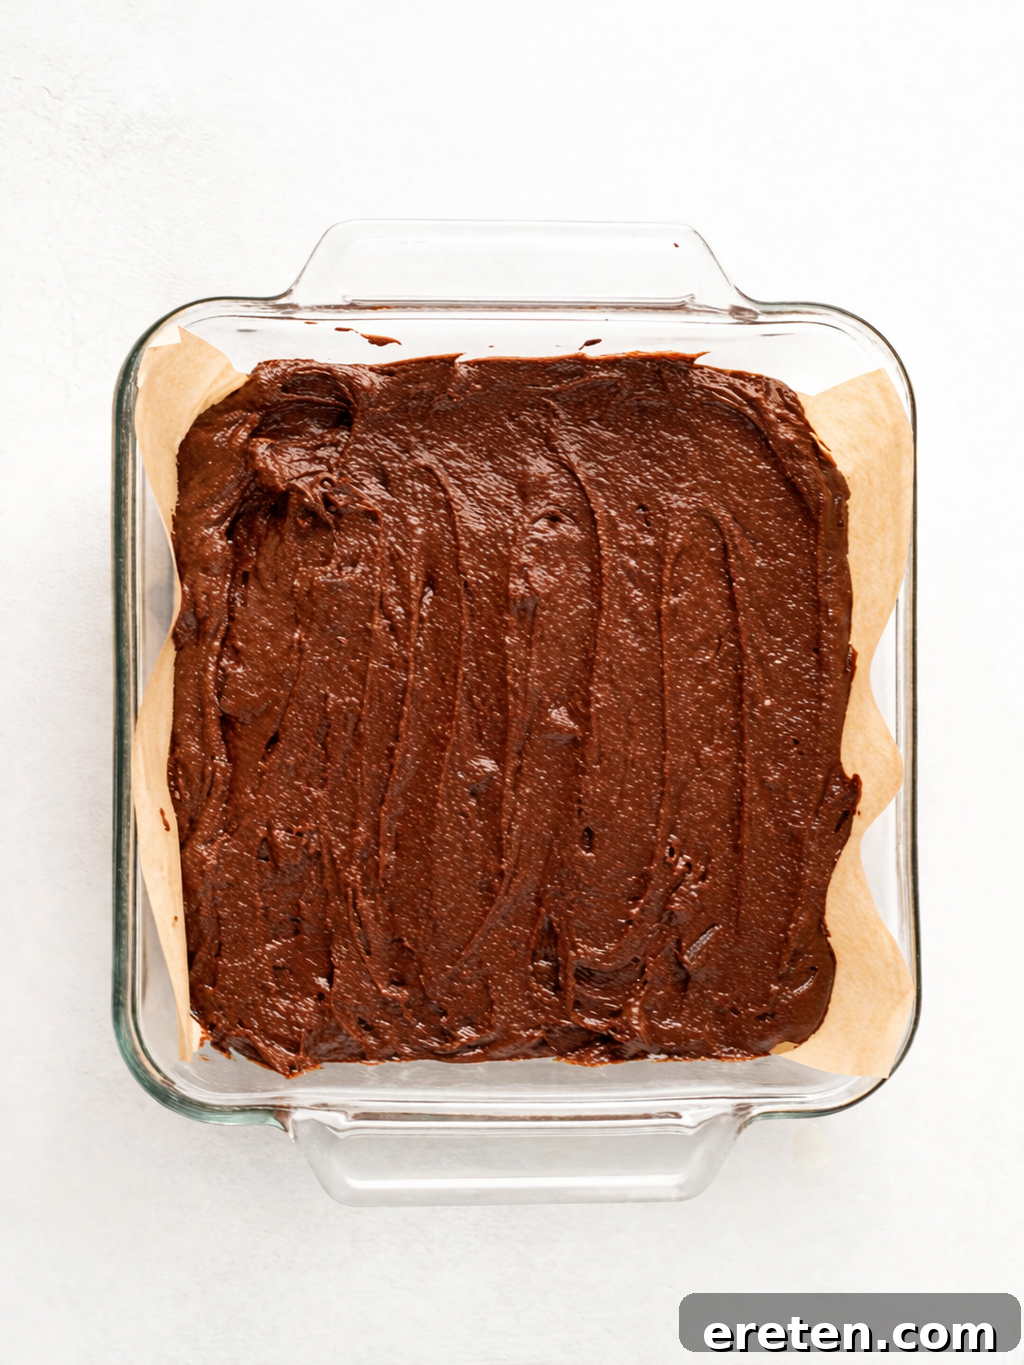
- Transfer to Pan: Pour the luscious brownie batter into your prepared pan. Use your spatula to spread it evenly into a flat, consistent layer, ensuring uniform thickness for even baking.
- Bake to Perfection: Place the pan in your preheated oven. Bake for 28–33 minutes if using a metal pan, or 32–38 minutes if using a glass pan (remembering the lower temperature for glass). The brownies are done when the edges appear set and slightly firm. To test for doneness, insert a toothpick about 2 inches from the edge of the pan. It should come out with moist crumbs clinging to it, but no wet batter. The very center will still feel slightly soft and appear a little underbaked – this is exactly what you want for that ultra-fudgy interior.
- Cool Completely Before Slicing: This step requires patience, but it’s absolutely essential for perfect results. Allow the brownies to cool undisturbed in the pan for at least 45 minutes. For the cleanest, most perfect cuts and the ultimate fudgy texture, I actually recommend waiting approximately 2 hours before attempting to slice them. During this cooling period, the brownies will continue to set and firm up, transforming into that ideal dense, fudgy consistency. Once cooled, you can lift them out using the parchment paper overhang and slice as desired.
The Critical Role of Your Baking Pan: Metal vs. Glass vs. Ceramic
While often overlooked, the type of baking pan you choose has a profound impact on how your brownies bake and, ultimately, their final texture. Understanding the thermal properties of different materials is key to achieving that perfect fudgy center without overbaking the edges.
Metal Pans (The Recommended Choice)
Metal pans are generally considered the superior choice for brownies, and here’s why: they heat up quickly and conduct heat efficiently and evenly. This consistent heat distribution means that the brownies bake through at a more uniform rate from the edges to the very center, minimizing the risk of uneven cooking.
Using a metal pan helps you achieve:
- Ideal Chewy Edges: The quick, even heating helps caramelize the sugars around the perimeter, contributing to that satisfying chew.
- A Consistently Soft, Fudgy Center: Because the heat penetrates evenly, the center cooks just enough without drying out, maintaining its rich, gooey texture.
- Uniform Texture: You’ll experience a consistent bake throughout the entire pan, from corner to center.
If you own an 8×8 inch metal baking pan, it is undeniably your best option for the most reliable and consistently perfect results with this recipe.
Glass Pans
Glass pans behave quite differently from metal. They heat up more slowly and retain heat for a significantly longer period. This means that while they might take longer to reach the optimal baking temperature, they also continue to cook your brownies even after you’ve pulled them out of the oven.
If you’re using a glass pan, you must make a few critical adjustments to avoid overbaked edges and a dry center:
- Reduce Oven Temperature: Lower your oven temperature to 325°F (160°C) to compensate for glass’s heat retention.
- Expect a Longer Bake Time: Due to the slower heat transfer, your brownies will likely need a slightly longer baking duration than if baked in a metal pan.
- Test for Doneness Strategically: When checking for doneness, focus your toothpick test closer to the edges (about 2 inches in), rather than directly in the center, as the center will take longer to set.
These adjustments are essential to prevent the edges from becoming overly crisp or dry while ensuring the center has enough time to finish setting to a fudgy consistency.
Ceramic or Stoneware Pans
Ceramic and stoneware pans share similar characteristics with glass, heating slowly and retaining heat for extended periods. However, they can sometimes bake even more unevenly than glass, making them a less predictable choice for brownies. I would generally recommend using these as a last resort.
With ceramic or stoneware, you might find they:
- Retain Heat Longer: Similar to glass, they hold heat, potentially continuing to cook the brownies after removal from the oven.
- Bake Slower in the Center: The slower heat transfer can mean the center takes a considerable time to cook through.
- Overcook the Edges: Without careful monitoring and temperature adjustments, the edges are prone to becoming tough and dry.
If a ceramic or stoneware pan is your only option, apply the same temperature reduction and extended bake time adjustments as you would for a glass pan. Crucially, keep a very close eye on your brownies throughout the baking process to prevent overbaking.
Top Tip for Fudgy Brownies
The single most important principle when baking brownies, especially when aiming for that luscious fudgy texture, is to avoid overbaking them at all costs.
Remember, brownies should still be slightly soft, even a little bit “underdone,” in the very center when you initially take them out of the oven. This is by design! They will continue to cook gently and firm up (known as carryover cooking) as they cool down in the warm pan, ultimately achieving that perfect dense and fudgy consistency.
Mastering Doneness: How to Tell When Your Fudgy Brownies Are Truly Ready
Knowing precisely when to pull your brownies out of the oven is arguably the most critical skill in brownie baking. This knowledge is the difference between a yielding, moist, fudgy center and a disappointing tray of dry, crumbly squares.
Don’t Test the Center Directly
It’s a natural instinct to insert a toothpick right into the middle, but for fudgy brownies, this method can be misleading. The very center will almost always appear somewhat wet or “underdone,” even when the brownies are perfectly ready to be removed from the oven.
Instead, for an accurate reading, insert a clean toothpick about 2 inches in from the edge of the pan.
Here’s what you’re looking for:
- Moist, Fudgy Crumbs: If the toothpick comes out with moist, sticky crumbs clinging to it, congratulations! Your brownies are perfectly baked.
- Wet, Liquid Batter: If the toothpick emerges coated in wet, uncooked batter, they definitely need a few more minutes in the oven.
- Clean Toothpick: If the toothpick comes out completely clean, it’s a sign that your brownies are likely overbaked, resulting in a drier texture.
Observe the Edges and Top for Visual Cues
Your brownies will often communicate their readiness through visual changes even before the toothpick test. Learn to recognize these tell-tale signs:
- Set Edges: The edges of the brownies should appear visibly set and slightly firm. You might even notice them beginning to pull away ever so slightly from the sides of the pan.
- Crackly, Set Top: The entire surface of the brownies should look set, with that desirable thin, glossy, and crackly layer firmly formed across the top.
- Slightly Soft Center: While the edges are set, the center should still retain a subtle softness. It should not look wet or liquid, but rather dense and just barely firm.
The Gentle Jiggle Test
Another excellent indicator of doneness is the “jiggle test.” Gently give the baking pan a slight shake. Observe the center of the brownies:
- A Slight Jiggle: A subtle, almost imperceptible jiggle in the very center is precisely what you want. It indicates that the brownies are cooked enough to hold their shape but still retain that crucial fudginess.
- Sloshing Motion: If the center still visibly sloshes or moves like liquid, it’s a clear sign that the brownies require more baking time.
- No Movement at All: If the brownies are completely firm and show no jiggle whatsoever, there’s a good chance they are already overbaked.
The Importance of Cooling: They Finish Setting in the Pan
It cannot be stressed enough: brownies continue to cook and set in the pan after they’ve been removed from the oven. This “carryover cooking” is particularly pronounced if you are using a heat-retentive glass or ceramic dish. This is precisely why it is always better to err on the side of pulling them out a few minutes early rather than leaving them in too long.
Allowing them to cool for at least 45 minutes (and preferably 1 to 2 hours) in the pan is absolutely critical. This extended cooling period allows the internal structure to fully set and solidify, ensuring that you achieve that perfect, dense, and truly fudgy texture without any crumbling or sogginess when sliced.
Expert Tips for the Best Fudgy Brownies Every Single Time
Achieving brownie perfection consistently comes down to a few key techniques. Incorporate these pro tips into your baking routine, and you’ll be guaranteed phenomenal results batch after batch.
- Whisk Eggs and Sugar Until Truly Glossy and Light: This is arguably the most crucial step for that coveted crackly top. Do not underestimate or rush this process. Vigorously whisking the granulated sugar, brown sugar, eggs, and extra egg yolk for a full 2-3 minutes creates a stable emulsion that traps air. This aeration is what provides both the signature thin, shiny top and the necessary structure for fudgy brownies, preventing them from becoming heavy or overly dense. The mixture should be noticeably lighter in color and thicker.
- Mix Gently Once Flour is Added: Once you introduce the flour to the wet ingredients, switch from whisking to gentle folding with a rubber spatula. Overmixing flour activates gluten development, which can quickly transform your desired soft and fudgy brownies into tough, chewy (in a bad way), and cakey ones. Fold just until no dry streaks of flour remain – a few tiny lumps are perfectly fine.
- Always Use Good Quality Chocolate: Since chocolate is the undisputed star of this recipe, its quality directly impacts the final flavor. Opt for a good quality semisweet or bittersweet chocolate (baking bars or high-quality chips) for both the melted chocolate and the chunks. Better chocolate means a richer, more nuanced, and deeply satisfying chocolate flavor.
- Never, Ever Overbake Your Brownies: This is the golden rule for fudgy brownies. Always err on the side of underbaking. Remember that brownies continue to cook and set as they cool in the hot pan after being removed from the oven. Pull them out when the center still looks slightly soft and jiggly. This guarantees a moist, fudgy interior rather than a dry, crumbly one.
- Check Doneness in the Right Spot: Resist the urge to poke your toothpick into the very center of the pan. For fudgy brownies, the center will always appear underdone even when ready. Instead, insert your toothpick about 2 inches from the edge of the pan. You’re looking for moist crumbs, not liquid batter, and definitely not a clean toothpick.
- Exercise Patience: Let Them Cool Completely Before Slicing: This is a test of willpower, but it’s essential for neat, perfectly shaped brownies. Cutting into warm brownies will result in a messy, crumbly experience, and they might even seem underbaked. Allow them to cool in the pan for at least 45 minutes, ideally 1.5 to 2 hours, or even longer until they are completely cool to the touch. This cooling period allows them to fully set and firm up for pristine slices.
- Line Your Pan with Parchment Paper: A simple step that saves a lot of headaches. Lining your baking pan with parchment paper, leaving a slight overhang on the sides, creates a convenient “sling.” This allows you to effortlessly lift the entire slab of cooled brownies out of the pan, making slicing incredibly easy and mess-free, and preventing any sticking.
- Ingredient Temperature Matters: Ensure your eggs are at room temperature. Room temperature eggs emulsify better with sugar and fats, creating a smoother batter and contributing more effectively to that crackly top.
Brownie Variations & Creative Substitutions to Try
Once you’ve mastered the classic fudgy brownie, don’t hesitate to experiment! Here are some delightful variations and simple substitutions to customize your next batch:
For Extra Gooey Brownies: If you crave an even more intensely gooey center, bake your brownies at the lower end of the recommended time range. This slight underbaking will ensure a molten interior. Additionally, feel free to add an extra handful (or even half a cup) of chocolate chunks to the batter for even more irresistible, melty pockets throughout each square. Ensure they cool completely before slicing to maintain their structure despite the gooiness.
For a More Set, Structured Brownie: If you prefer a brownie that holds its shape more firmly and is easier to slice cleanly, simply bake them for an additional few minutes. Continue baking until the center exhibits less softness when gently jiggled. This will result in a slightly denser, more cake-like but still delicious texture.
Experiment with Different Types of Chocolate: While semisweet and bittersweet chocolates provide a deeply rich and balanced flavor, don’t limit yourself! If you have a sweeter tooth, consider using milk chocolate for the chocolate chunks, or even substituting a portion of the melted chocolate with milk chocolate. For an adventurous twist, try white chocolate chips or dark chocolate chunks with a high cocoa percentage for intense bitterness.
Dutch-Process vs. Natural Cocoa Powder: Both types of unsweetened cocoa powder will work beautifully in this recipe, offering slightly different flavor profiles. Dutch-process cocoa powder (alkalized) will yield a brownie with a smoother, milder, and often darker chocolate flavor. Natural cocoa powder, on the other hand, is more acidic and will give your brownies a slightly sharper, more classic “brownie” taste. Choose based on your personal preference.
Skip the Espresso Powder If Needed: While espresso powder is a fantastic flavor enhancer for chocolate, if you don’t have it on hand or prefer to omit it, your brownies will still be wonderfully rich and chocolatey. Rest assured, it will not make your brownies taste like coffee, so don’t be afraid to try it for an enhanced chocolate experience!
Add a Flaky Salt Finish: For an elegant touch and a burst of contrasting flavor, lightly sprinkle flaky sea salt over the brownies immediately after they come out of the oven, or just before serving. The sweet-salty combination remarkably enhances and brightens the deep chocolate flavor. It’s a completely optional step but highly recommended for those who appreciate that gourmet flair.
Introduce Nuts: For a delightful crunch, fold in 1/2 to 1 cup of chopped walnuts or pecans along with the chocolate chunks. Toasting the nuts lightly before adding them will deepen their flavor.
Swirl in Flavor: After pouring the batter into the pan, swirl in a tablespoon or two of peanut butter, Nutella, or even a cream cheese mixture for an added layer of flavor and visual appeal.
How to Store Brownies to Maintain Peak Freshness
Proper storage ensures your delicious brownies remain fresh, moist, and utterly irresistible for as long as possible.
At Room Temperature: For maximum softness and fudginess, store your brownies in an airtight container at room temperature. This method will keep them perfectly fresh and delicious for up to 4 days. Thanks to the balanced butter, oil, and sugar content in this specific recipe, you won’t have to worry about them hardening or drying out prematurely.
In the Refrigerator: If you prefer a firmer, denser, and slightly chewier brownie texture, you can store them in an airtight container in the refrigerator for up to 1 week. While chilling will make them more solid, they will still retain their fantastic flavor. For a softer bite, simply let them come to room temperature before enjoying.
To Freeze for Long-Term Enjoyment: Brownies freeze exceptionally well! Allow the brownies to cool completely after baking, then cut them into individual squares. Wrap each piece tightly in plastic wrap, ensuring no air exposure, then place the wrapped brownies in a freezer-safe container or heavy-duty freezer bag. They will maintain their best flavor and texture for up to 2 months. This is perfect for meal prepping desserts or having a quick treat on hand.
To Thaw Frozen Brownies: Simply remove the desired number of brownies from the freezer. Let them sit at room temperature for approximately 1 to 2 hours until fully thawed. For that wonderful, fresh-from-the-oven warmth and texture, you can also gently warm them in the microwave for 15-30 seconds, or in a preheated oven at 300°F (150°C) for 5-7 minutes.
Frequently Asked Questions About Fudgy Brownies
Why are my brownies too gooey?
If your brownies consistently come out excessively gooey, it’s a strong indicator that they needed a few more minutes in the oven. Remember, when performing the toothpick test about 2 inches from the edge, you’re looking for moist, sticky crumbs, not wet, liquid batter. While the very center should remain soft and slightly jiggly, it should never be liquid or uncooked. Increase your bake time in small increments (2-3 minutes) until you achieve the desired moist crumb result.
Why are my brownies dry?
Dry brownies are almost exclusively the result of overbaking. Even a few minutes too long in the oven can transition your brownies from wonderfully fudgy to disappointingly dry and cakey. The key is to remove them from the oven when the center still appears slightly soft; they will continue to firm up and set as they cool in the pan. Trust the jiggle test and the toothpick test (2 inches from the edge) to avoid this common pitfall.
Why didn’t my brownies get a crackly top?
That beautiful, shiny, crackly top is a direct consequence of properly and thoroughly whisking the eggs and sugar mixture. If this crucial step is skipped entirely or not performed for the recommended 2-3 minutes until the mixture is light, thick, and glossy, the chemical reaction necessary for the crackle simply won’t occur in the same way. This aeration is vital for creating that signature texture.
Can I use a glass pan for brownies?
Yes, absolutely! However, you must make a critical adjustment to your baking process. You will need to reduce your oven temperature to 325ºF (160°C) and anticipate a slightly longer bake time (typically an extra 5-10 minutes). Glass pans retain heat more effectively, so checking for doneness closer to the edges (about 2 inches in) is paramount to prevent overbaking the perimeter while the center finishes cooking. Refer to the “The Type of Pan Matters” section above for comprehensive details.
Do brownies continue to cook after baking?
Yes, they do! This phenomenon, known as carryover cooking, is particularly noticeable when using heat-retentive pans like glass or ceramic. As brownies cool in the hot pan, their internal temperature remains elevated, causing them to continue setting and firming up. This is precisely why it’s essential to remove them from the oven when the center still appears slightly soft and jiggly – they will reach perfect fudginess during the cooling period.
Can I leave out the espresso powder?
You certainly can. While espresso powder is a fantastic secret ingredient that subtly enhances and deepens the chocolate flavor without imparting any coffee taste whatsoever, omitting it will not ruin your brownies. They will still turn out incredibly rich and chocolatey. Feel free to skip it if it’s not readily available or if you simply prefer not to use it.
What’s the best chocolate to use for brownies?
For a truly rich, deep, and well-balanced chocolate flavor, semisweet or bittersweet chocolate is highly recommended for both the melted chocolate component and the chunks/chips. These types of chocolate offer a complex flavor profile that isn’t overly sweet. If you prefer a sweeter brownie, you can opt for milk chocolate for the chunks or even substitute a portion of the melted chocolate with it, but be aware the overall chocolate intensity will be milder.
How do I get clean slices?
Achieving perfectly clean, pristine slices on your brownies involves two incredibly effective tricks. First, and most importantly, allow your brownies to cool completely to room temperature before attempting to cut them. Warm brownies will inevitably crumble and smear. Second, use a plastic knife! Yes, a simple disposable plastic knife works wonders, gliding through the fudgy texture without sticking and creating beautifully smooth cuts every single time.
More Easy Dessert Recipes You Might Love
If you enjoyed making these fudgy brownies, you might also like to try these other delightful and straightforward dessert recipes:
- Classic Creamy Banana Pudding
- Indulgent Texas Sheet Cake
- Effortless Cake Mix Peach Cobbler
- Fresh Strawberry Pie with Graham Cracker Crust
Loved this recipe? Pin it now to save for later!
Pin It
Ultimate Fudgy Brownies from Scratch
Ingredients
- ½ cup unsalted butter melted
- 2 tablespoons neutral oil (vegetable or canola)
- 1 cup granulated sugar
- ½ cup light brown sugar packed
- 2 large eggs
- 1 egg yolk
- 2 teaspoons vanilla extract
- ¾ teaspoon espresso powder
- ½ cup unsweetened cocoa powder
- 4 ounces semisweet or bittersweet chocolate melted
- ¾ cup all-purpose flour
- ½ teaspoon salt
- ¾ cup chocolate chunks or chips
- Flaky sea salt (optional, for garnish)
Instructions
-
Preheat oven to 350°F (175°C) for a metal pan, or 325°F (160°C) for a glass pan. Line an 8×8 inch baking pan with parchment paper, leaving an overhang.
-
In a large bowl, whisk together melted butter, neutral oil, and cocoa powder until smooth. The warmth helps bloom the cocoa for deeper flavor.
-
In a separate bowl, whisk granulated sugar, brown sugar, eggs, and egg yolk for 2–3 minutes until the mixture is lighter in color, thicker, and glossy. This creates the crackly top.
-
Pour the egg mixture into the cocoa mixture. Add the melted chocolate, vanilla extract, and espresso powder. Whisk until fully combined and smooth.
-
Add the all-purpose flour and salt. Using a rubber spatula, gently fold everything together just until no dry flour streaks remain. Avoid overmixing to keep brownies soft.
-
Gently fold in the chocolate chunks or chips until evenly distributed.
-
Pour the batter into your prepared pan and spread it into an even layer with your spatula.
-
Bake for 28–33 minutes for a metal pan, or 32–38 minutes for a glass pan (at 325°F/160°C). The edges should be set, and a toothpick inserted about 2 inches from the edge should come out with moist crumbs, not wet batter. The center will still be slightly soft and jiggly – this is what ensures fudginess.
-
Let the brownies cool completely in the pan for at least 45 minutes, ideally 1.5 to 2 hours, before slicing for clean cuts and optimal fudgy texture. Sprinkle with flaky sea salt just before serving, if desired.
Notes
- Do not overbake: The key to fudgy brownies is to remove them from the oven when the center is still slightly soft. They will continue to set and firm up as they cool completely in the pan, leading to a perfect fudgy consistency.
- Glass or ceramic pans: If using a glass or ceramic pan, remember to reduce your oven temperature to 325°F (160°C) and expect a slightly longer bake time, typically 32–38 minutes, as these materials retain heat differently.
- For extra fudgy brownies: To achieve an even gooier, more intensely fudgy interior, bake your brownies closer to the lower end of the recommended time range.
- For clean slices: For pristine, smooth slices, ensure your brownies are completely cool before cutting. Using a plastic knife is a surprising but incredibly effective trick for super clean cuts.
Nutrition
Nutrition information is automatically calculated, so should only be used as an approximation.